Website Visits allow you to identify companies visiting your website and understand which pages they're interested in.
Each identified visit appears as a signal on your Dashboard, helping you spot potential opportunities and reach out to companies showing interest in your business.
Before setting up Website Visits, please note that:
Website Visits are included in the Ultra plan. If you're on another plan, contact our team to learn more about availability.
Only Subscription Managers can configure website tracking.
To start tracking visitors on your website:
Go to Settings → Website tracking.
Under Domains, add the website you want to track (e.g. crono.one). Subdomains are automatically included, so there's no need to add them separately.
Once you've added your first domain, Crono will generate your tracking script.
Under Tracking script, click Copy code and paste the snippet into the <head> section of your website, just before the closing </head> tag.
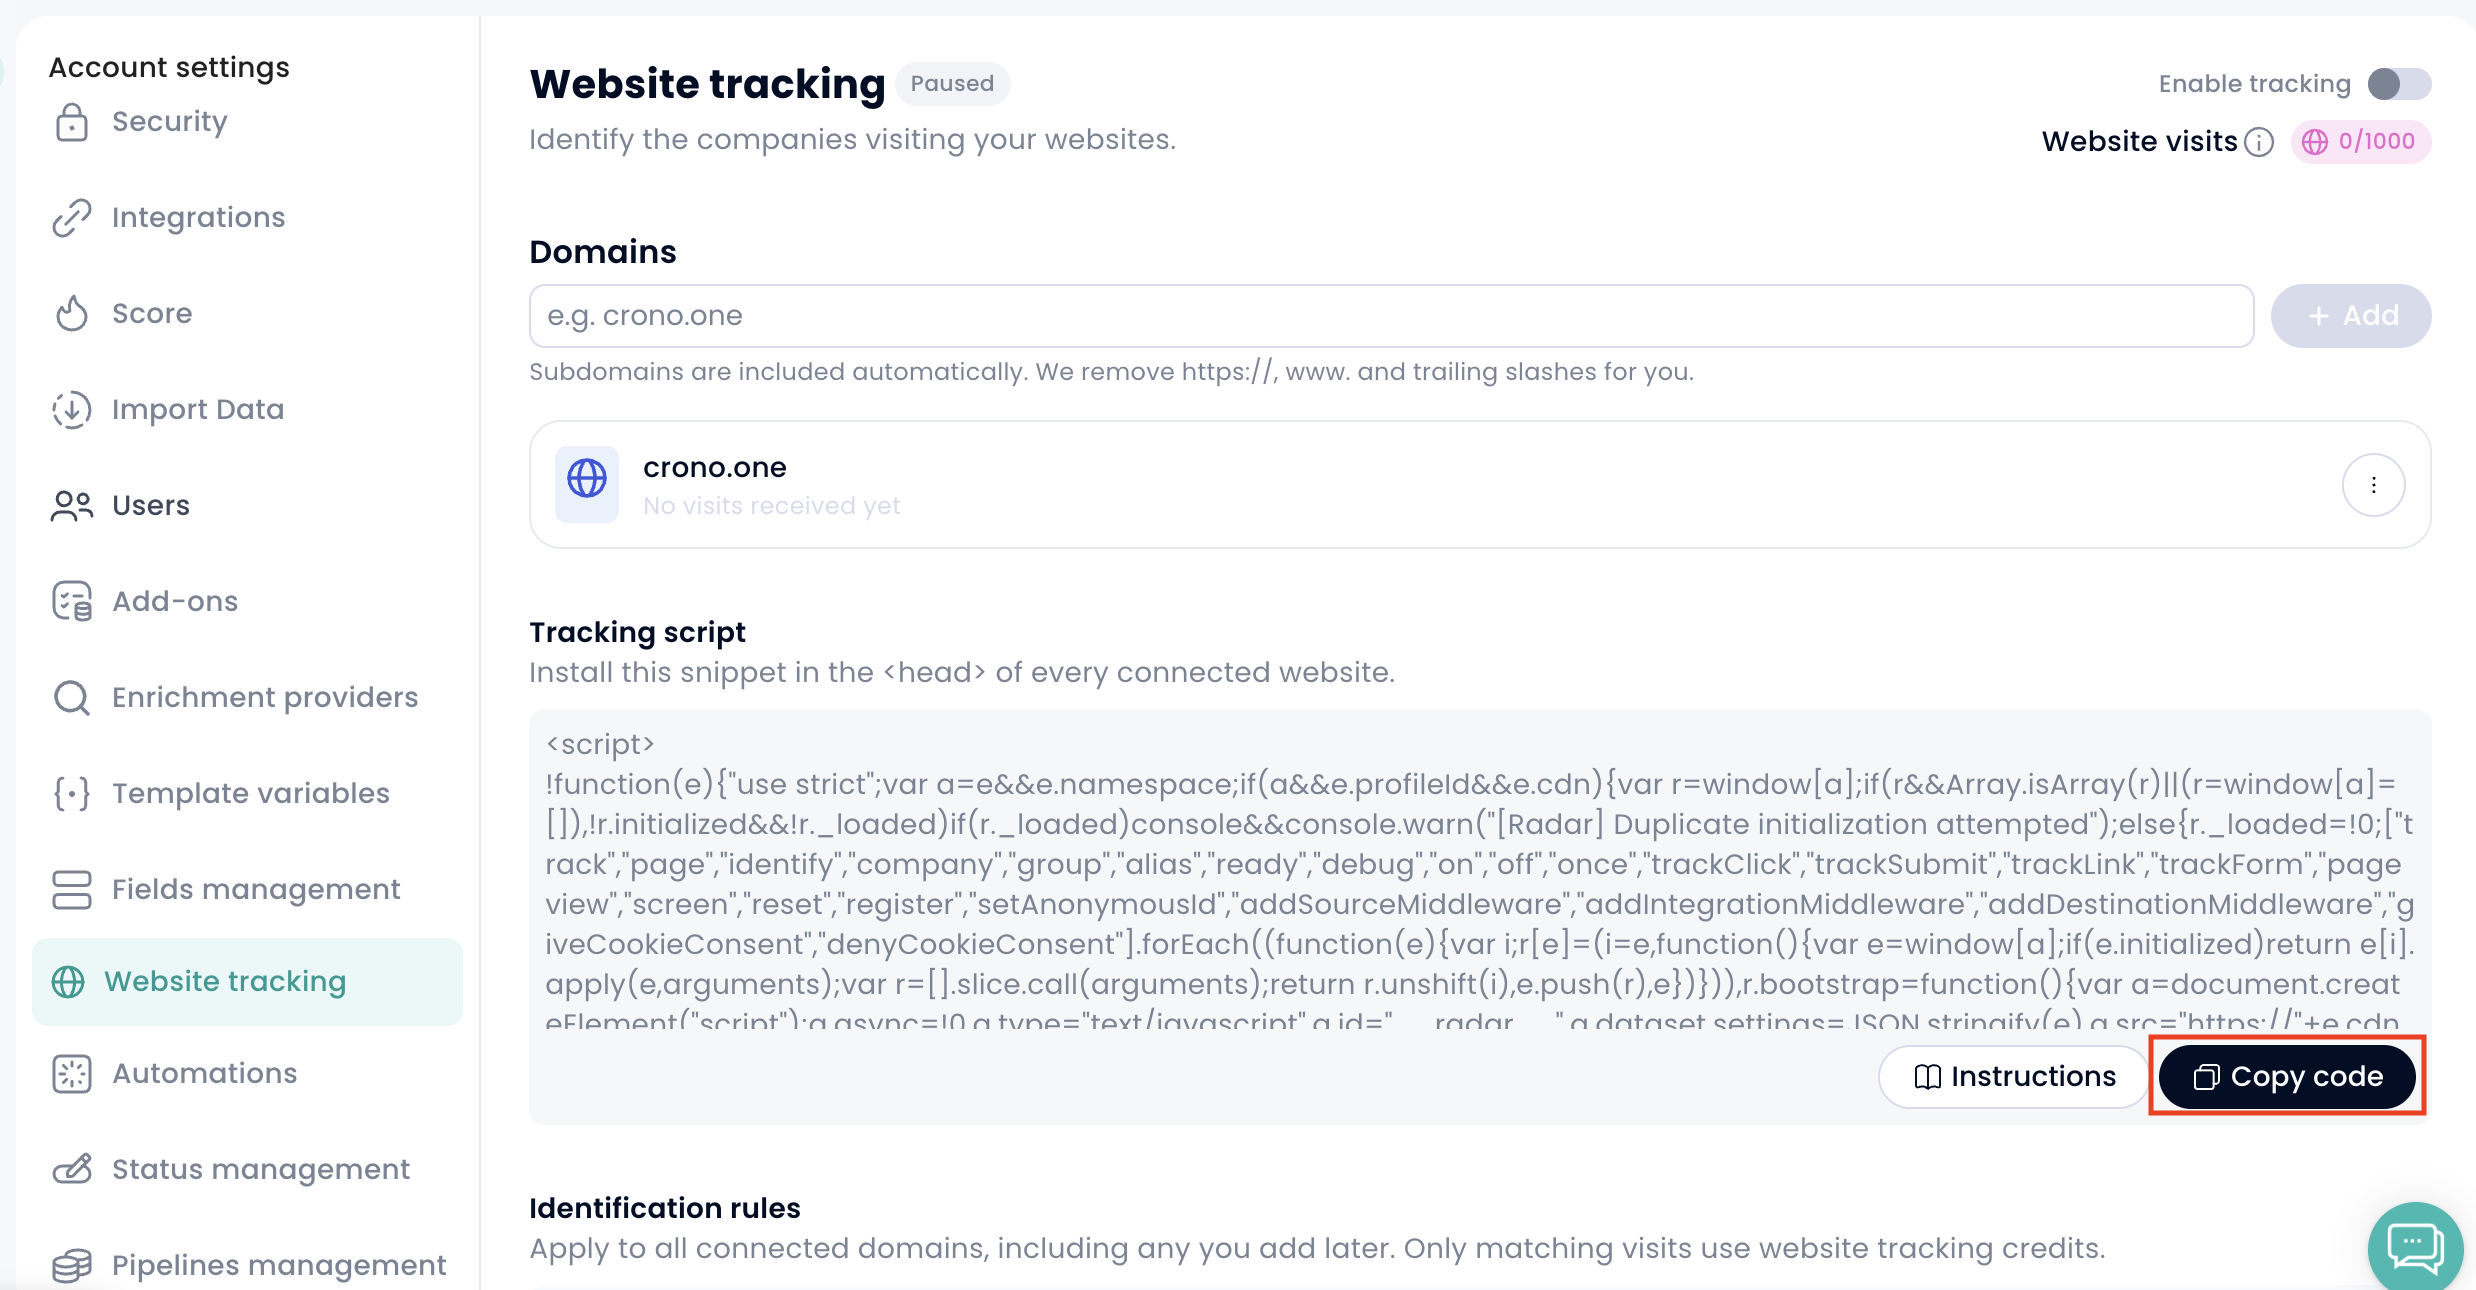
Publish your website to activate tracking.
If you use Google Tag Manager, you can also install the script as a Custom HTML tag with the All Pages trigger.
For more detailed guidance, click Instructions in the Tracking script section.
Once everything is set up, open your website in a browser to generate a visit. When Crono receives it, you'll see Last visit received... next to your domain, confirming that tracking is working.
From Settings → Website tracking, you can configure Identification rules to decide which website visits Crono should track.
You can customize these rules based on:
Country — Track visitors from all countries, include only specific countries, or exclude certain ones. This refers to the country visitors are browsing from.
Website pages — Track visits to all pages or include/exclude specific pages, such as /careers or /blog.
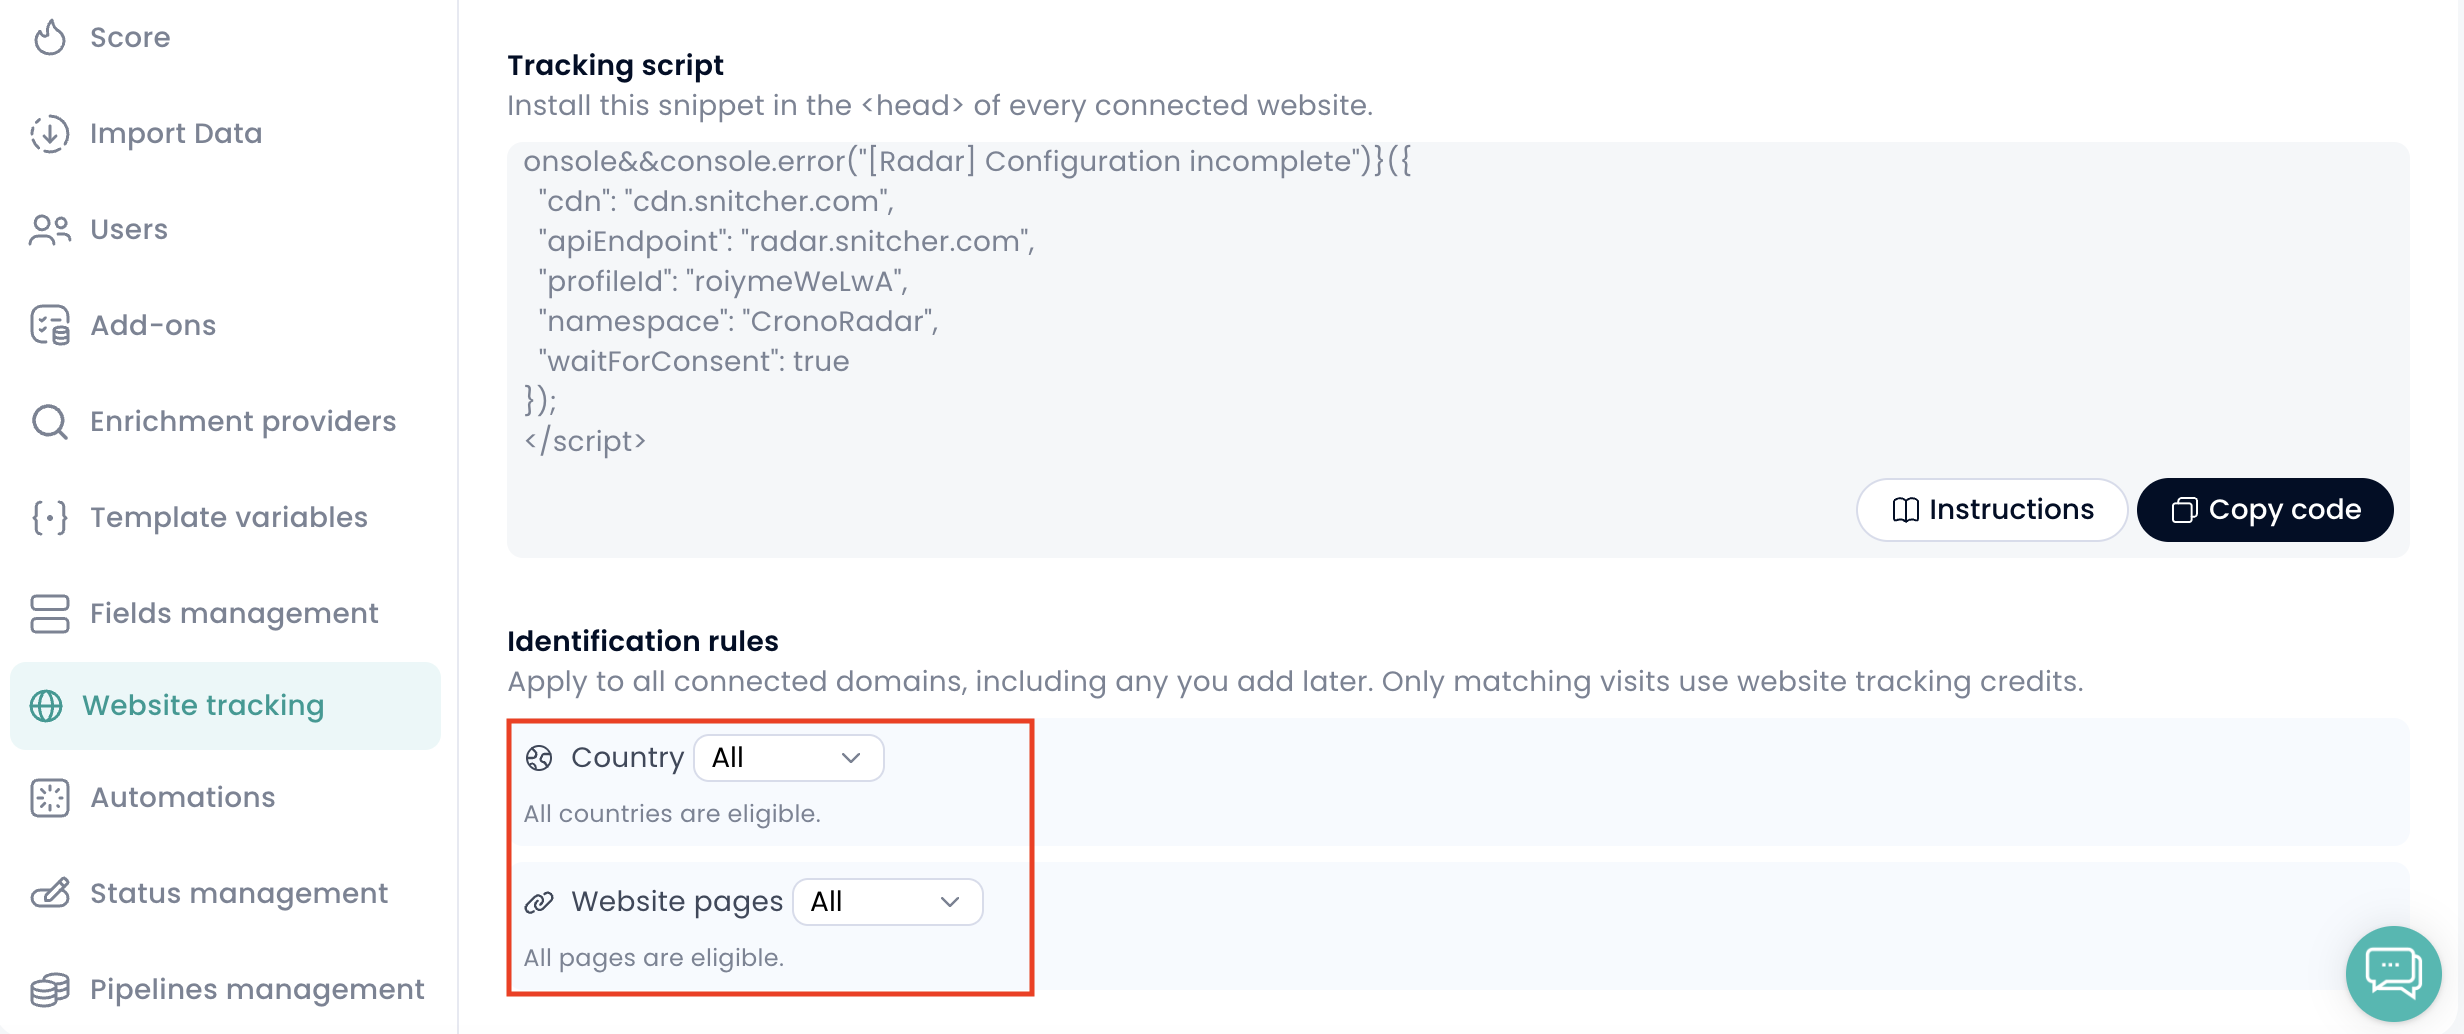
For website pages, Crono checks whether the page URL contains the value you entered. For example, a rule for /blog will also match /blogroll.
These rules apply to all the domains you've added.
Important: Only visits matching your Identification rules count towards your Website Visits balance. Excluding pages or locations that aren't relevant to your business can help you make better use of your available visits.
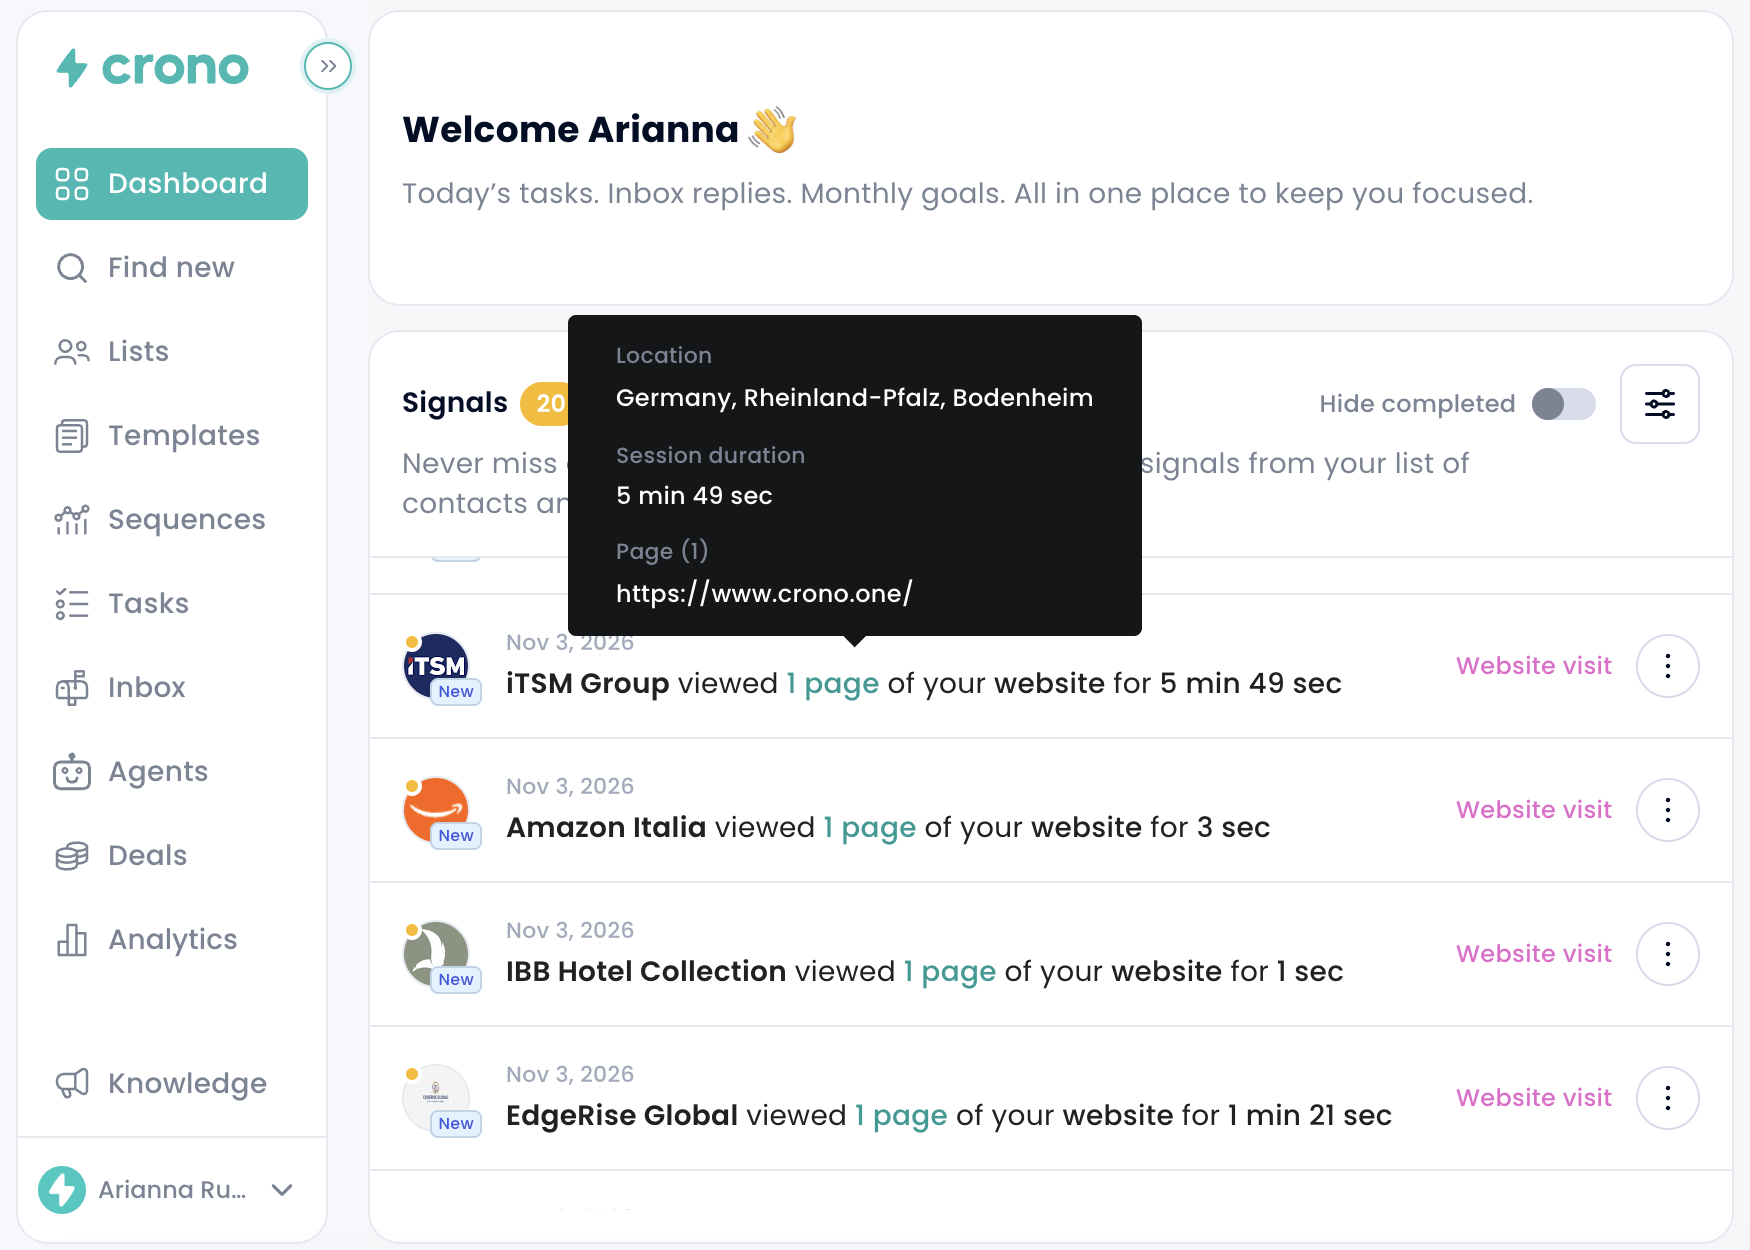
Once tracking is active, identified visits appear in Dashboard → Signals as Website visit signals.
For example, you might see:
Acme viewed 3 pages of your website for 2 min 5 sec.
By hovering over the number of pages viewed, you can see more information about the visit, including:
Visitor location
Session duration
Pages visited
What you can do with a signal depends on whether the company already exists in Crono.
The signal is shown to the company owner and the owners of its contacts.
You can click View contacts to see the people associated with that company and decide who to reach out to.
The signal is visible to everyone on your team.
You can:
Click Find contacts to look for relevant people at that company.
Click Add company to add it to your Crono workspace.
Crono doesn't automatically create new company records when a website visit is detected.
Each visit is recorded as a separate signal. This means that if the same company visits your website three times in one day, you'll see three different signals on your Dashboard.
Visits from members of your own team can also be identified.
Once you've reviewed or handled a signal, click Mark as completed.
You can also customize which Website Visit signals appear on your Dashboard.
To do this, go to Dashboard → Signals → Preferences → Website visits.
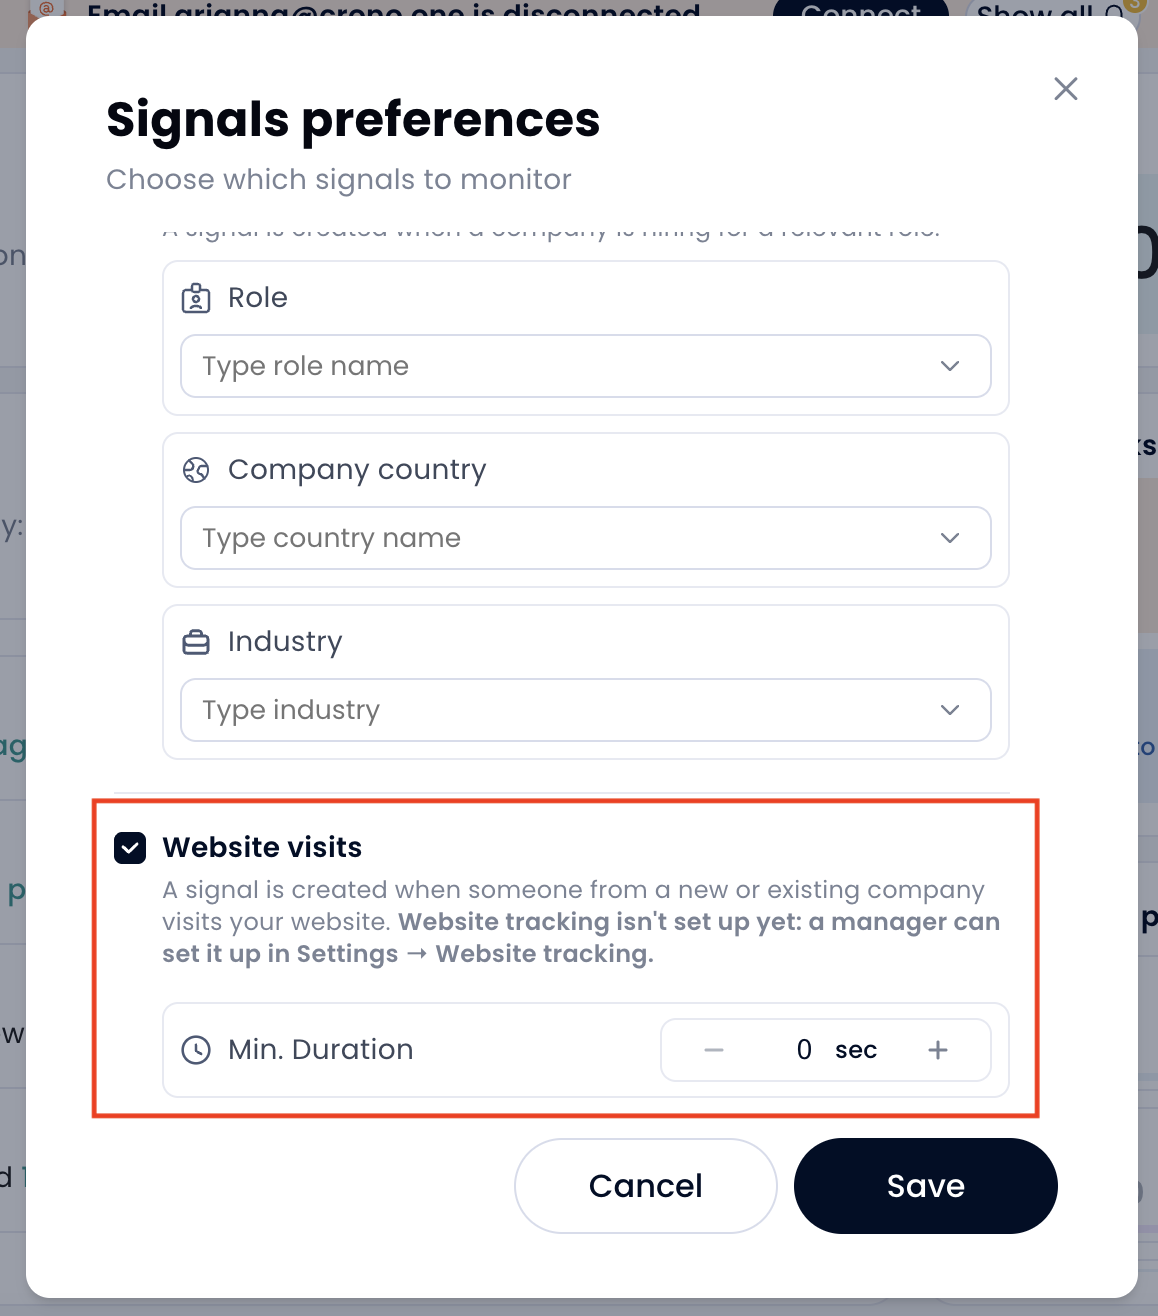
From here, you can filter visits based on:
Minimum duration — Set the minimum session duration, in seconds, for a visit to appear.
Company size — Include or exclude companies based on their size.
Company country — Include or exclude companies from specific countries.
Company industry — Include or exclude companies based on their industry.
These preferences are user-specific, meaning each team member can customize which signals they want to see without affecting anyone else's Dashboard.
Unlike Identification rules, these filters only control which signals are displayed. They do not affect your Website Visits balance.
Your Website Visits balance determines how many visitors Crono can identify each month.
Here's how it works:
One Website Visit is consumed for each unique visitor identified during the month.
If the same visitor returns multiple times during that month, those additional visits don't consume extra credits.
Visits that Crono cannot identify don't consume credits.
The balance is shared across your entire workspace and renews every month.
You can check your available balance from Settings → Website tracking or Settings → Add-ons.
If you need more visits than those included in your plan, you can purchase additional Website Visits from Settings → Add-ons.
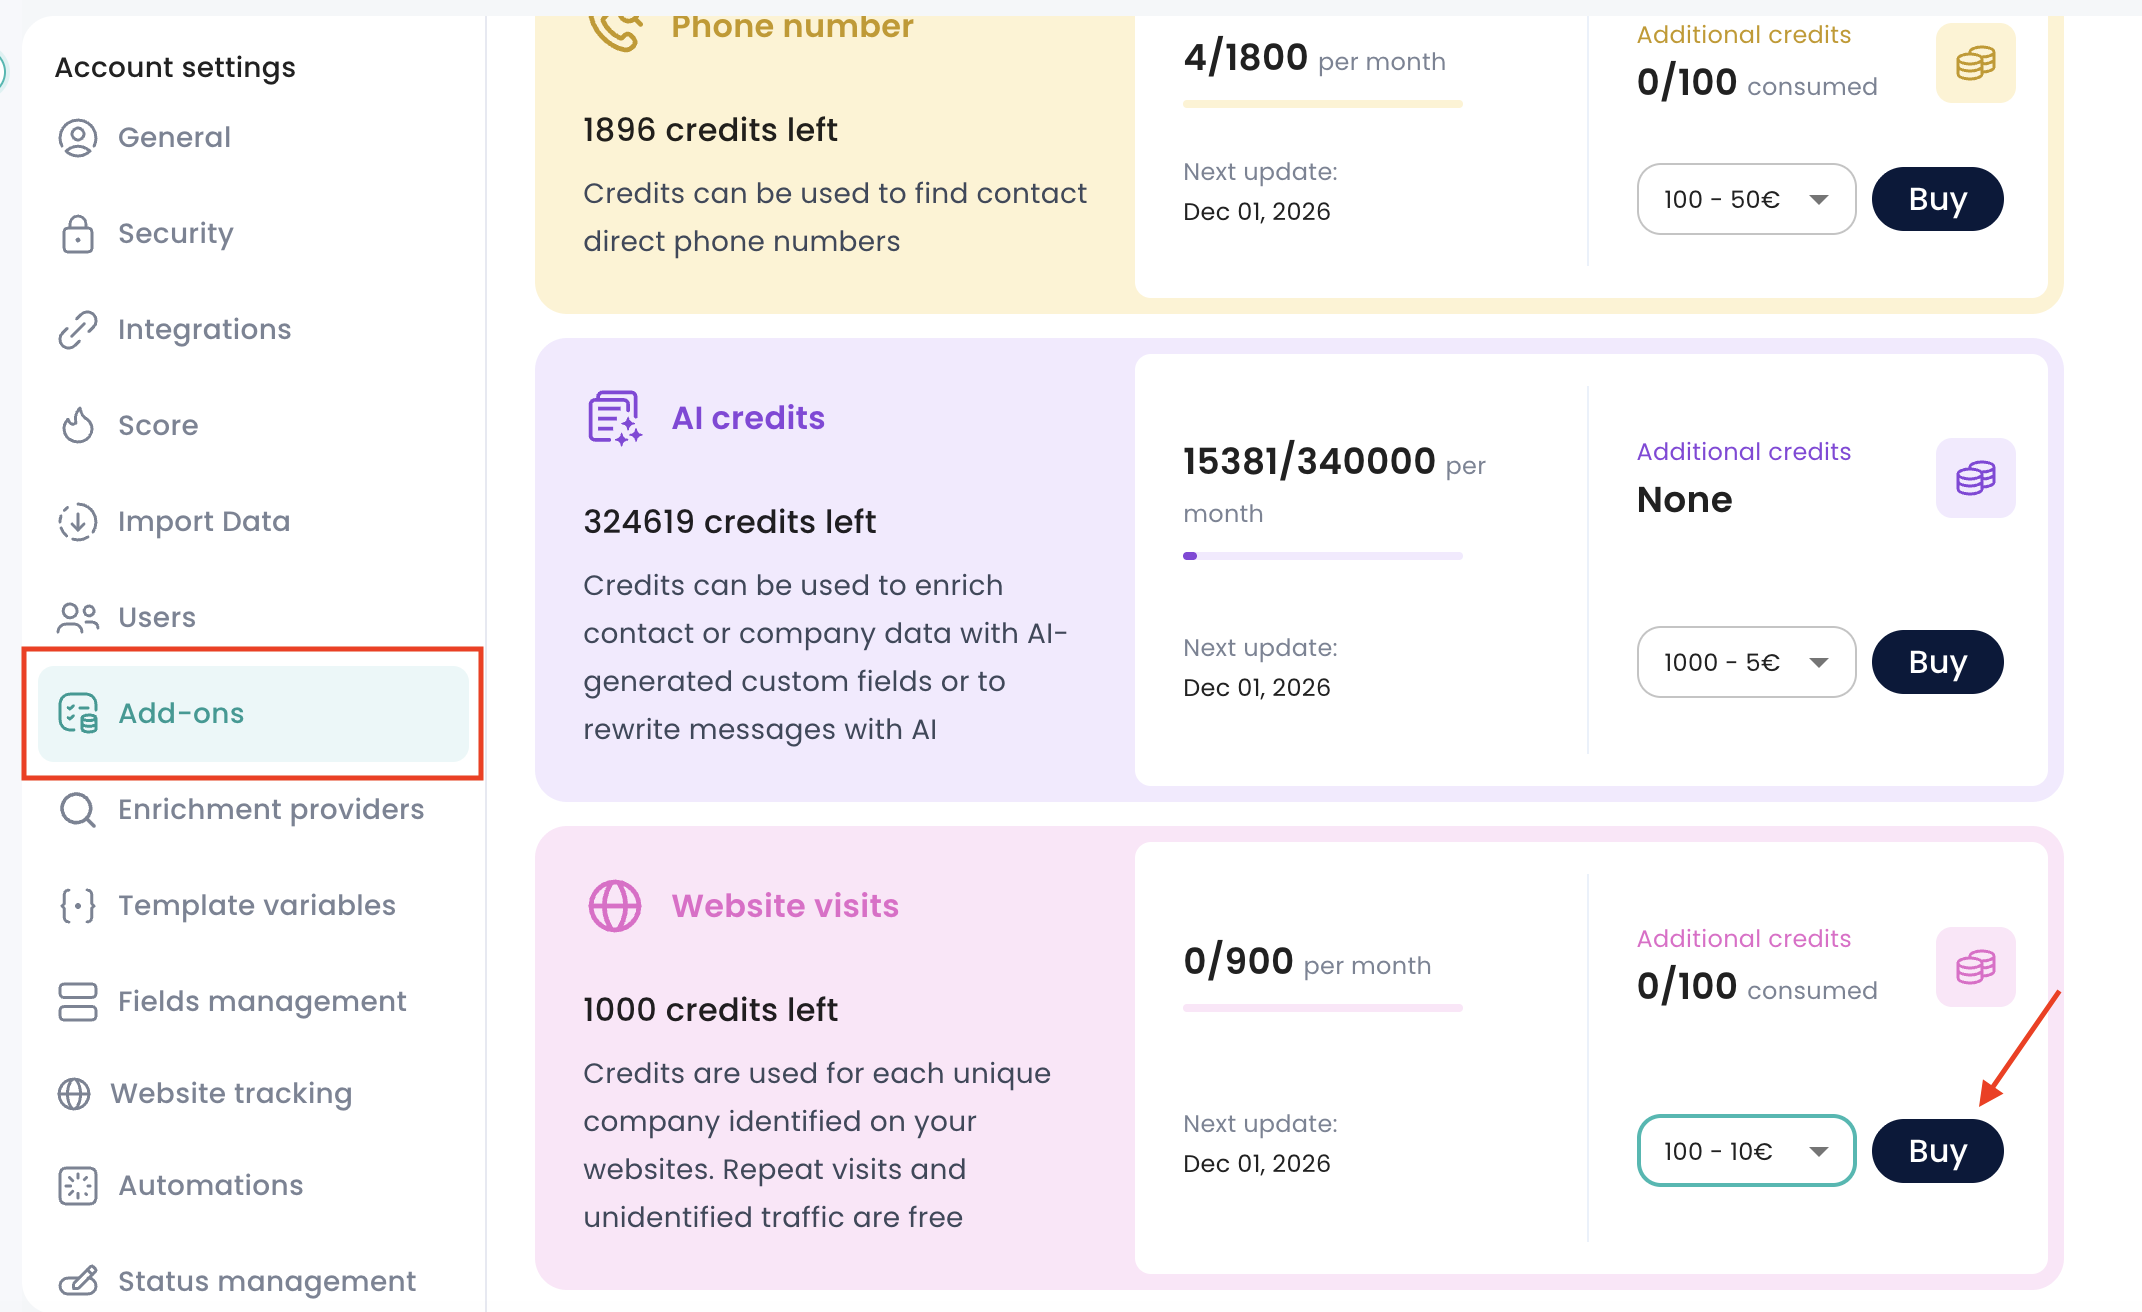
Purchased visits don't expire and are used only after your monthly allowance has been exhausted.
If your available balance reaches zero, tracking is automatically paused until your balance is renewed or additional visits are purchased.
Please note: Visits that occur while tracking is paused cannot be recovered later.
If you want to temporarily stop tracking visits, go to Settings → Website tracking and turn off Enable tracking.
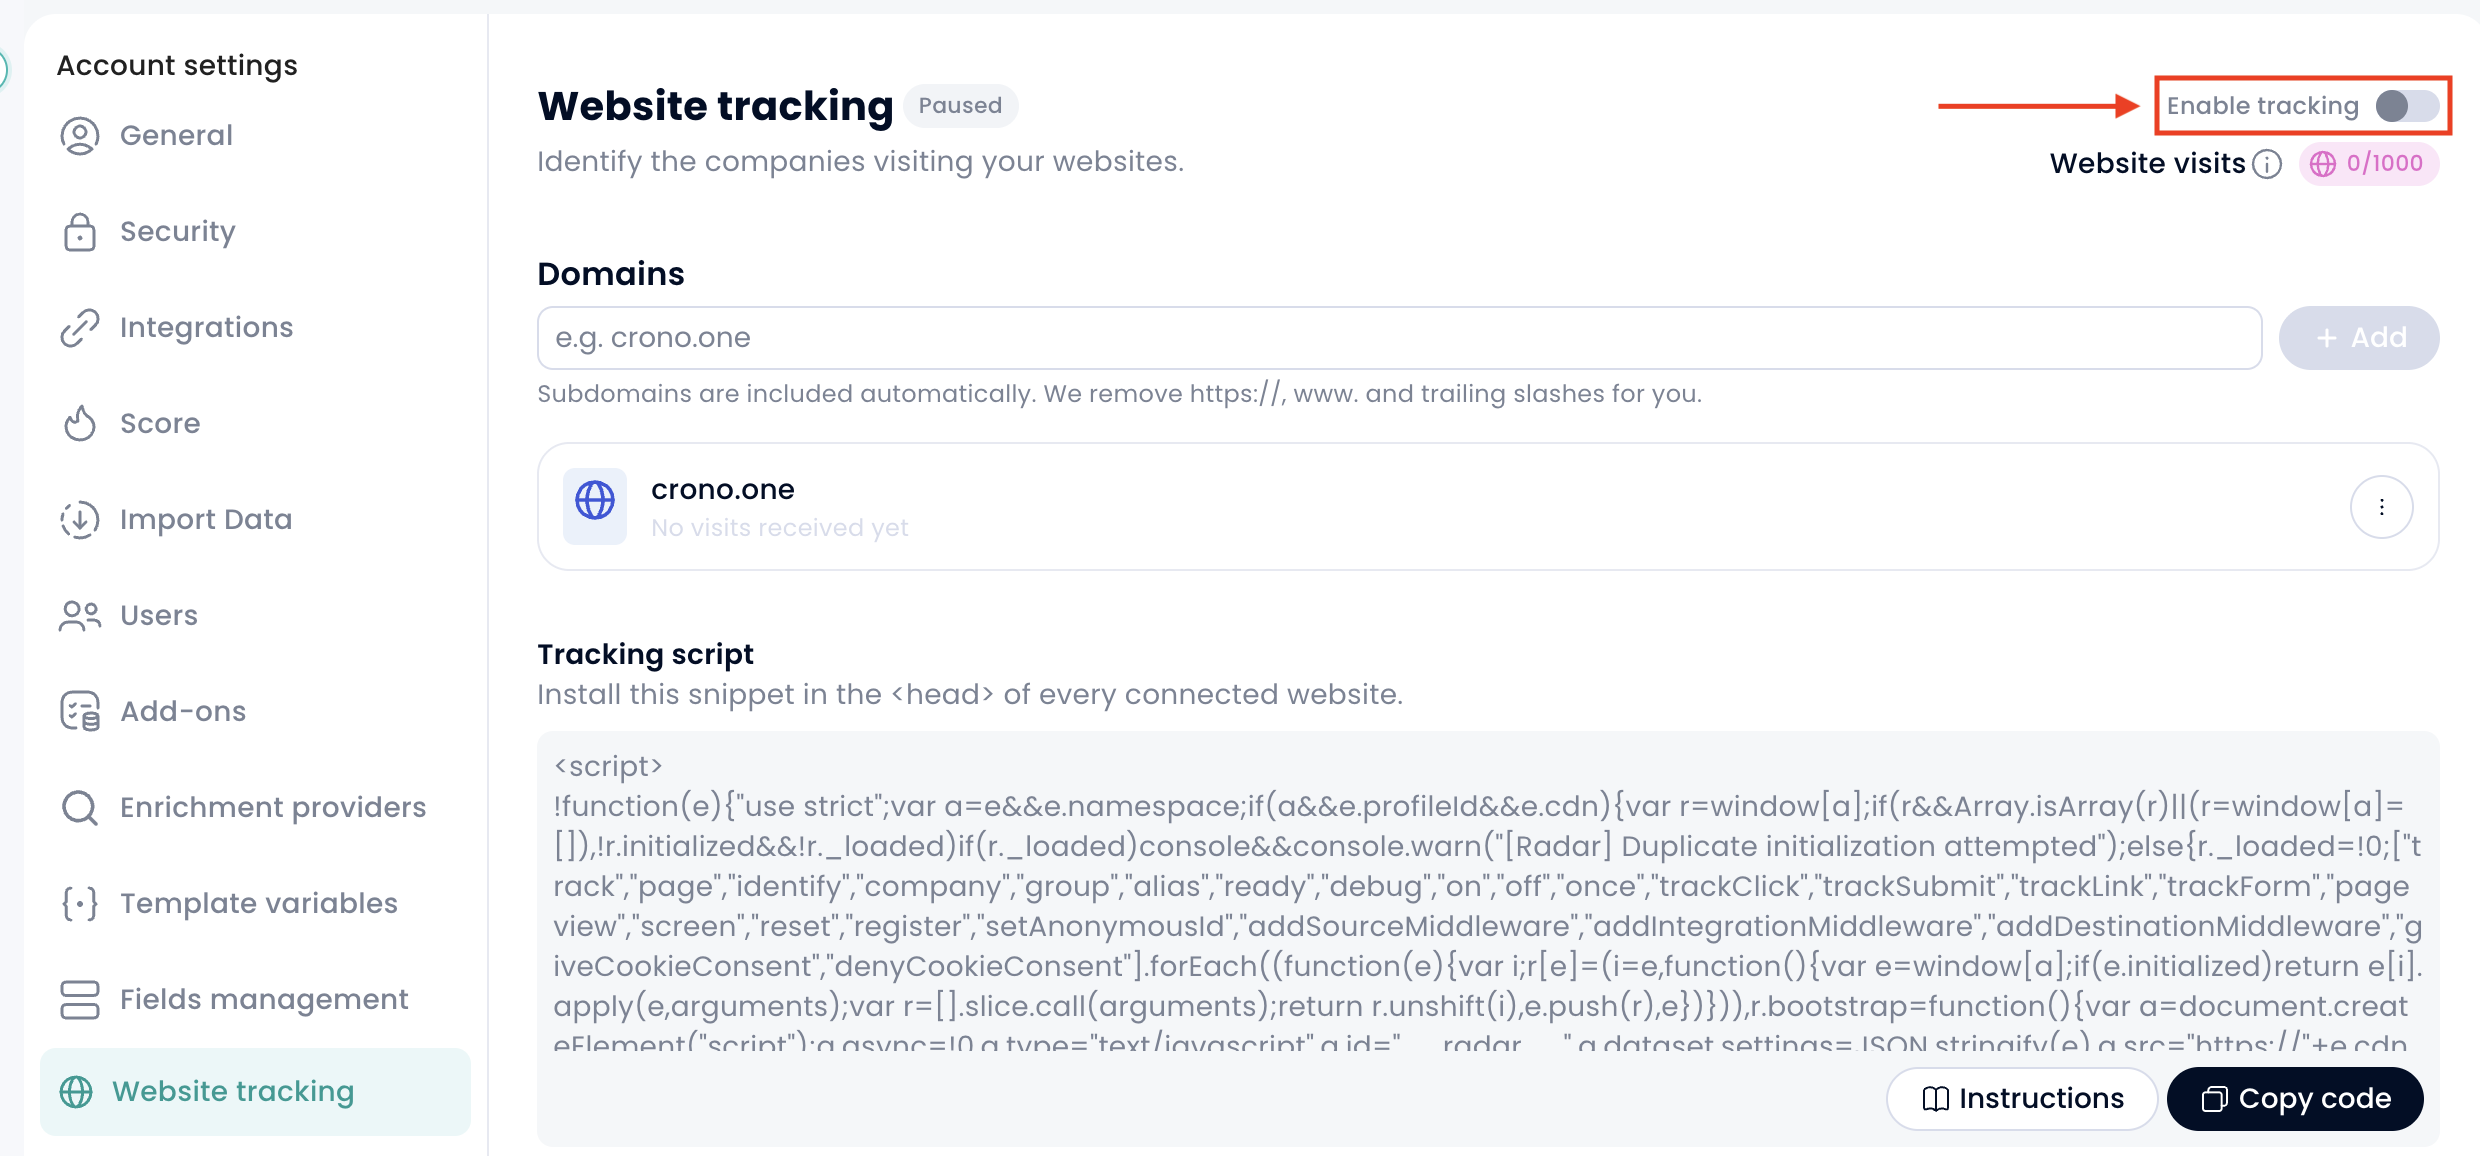
Your domains, Identification rules, and installed tracking script will remain saved, so you won't need to configure everything again when you reactivate tracking.
Website Visits can also be used with other Crono features to help you act on signals automatically.
For example:
Lead Score — Assign points to companies based on their website activity. This option is disabled by default.
Automations — Automatically create tasks or update company fields when a website visit is detected. This is available for companies already in Crono.
Webhooks, Slack, and Agents — Use the Website visit event to trigger notifications or other workflows.
This allows you to turn website activity into actionable insights and follow up with potential prospects at the right moment.
