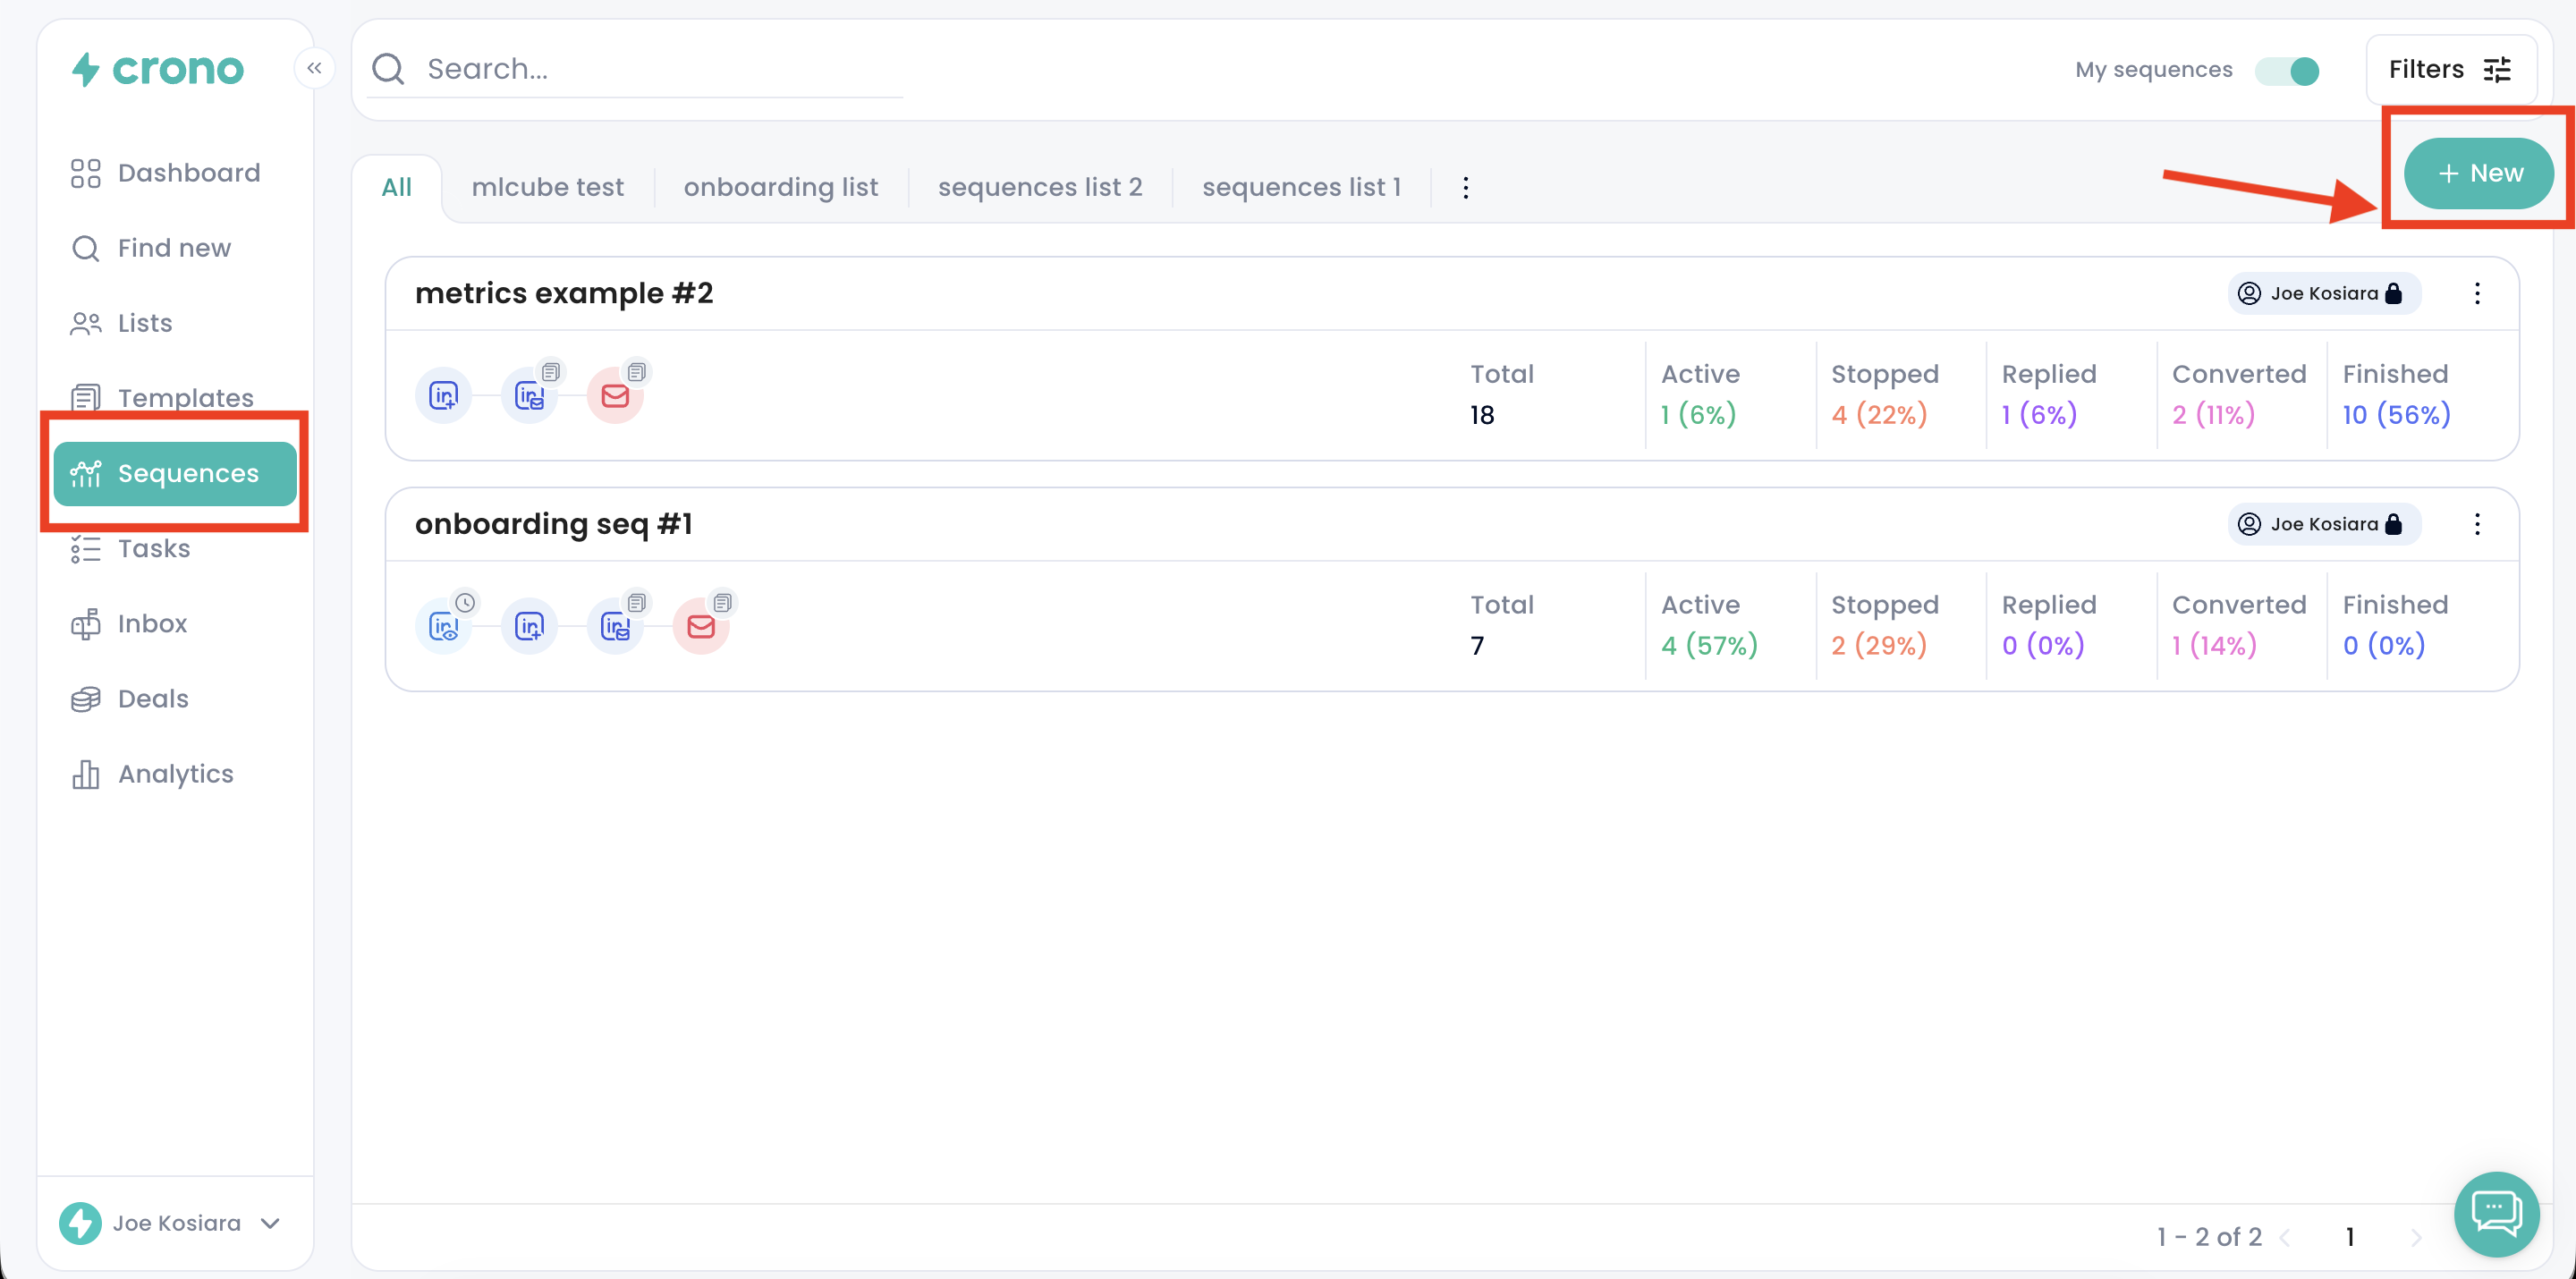
You can create a sales sequence in just a few steps. Simply navigate to the Sequences section and click Create New in the top-right corner of the screen. This will start the guided setup process, allowing you to build your sequence quickly and efficiently.
You will then be presented with two options:
Create a new sequence from scratch
Create a sequence with AI, letting Crono automatically generate the structure and messaging for you
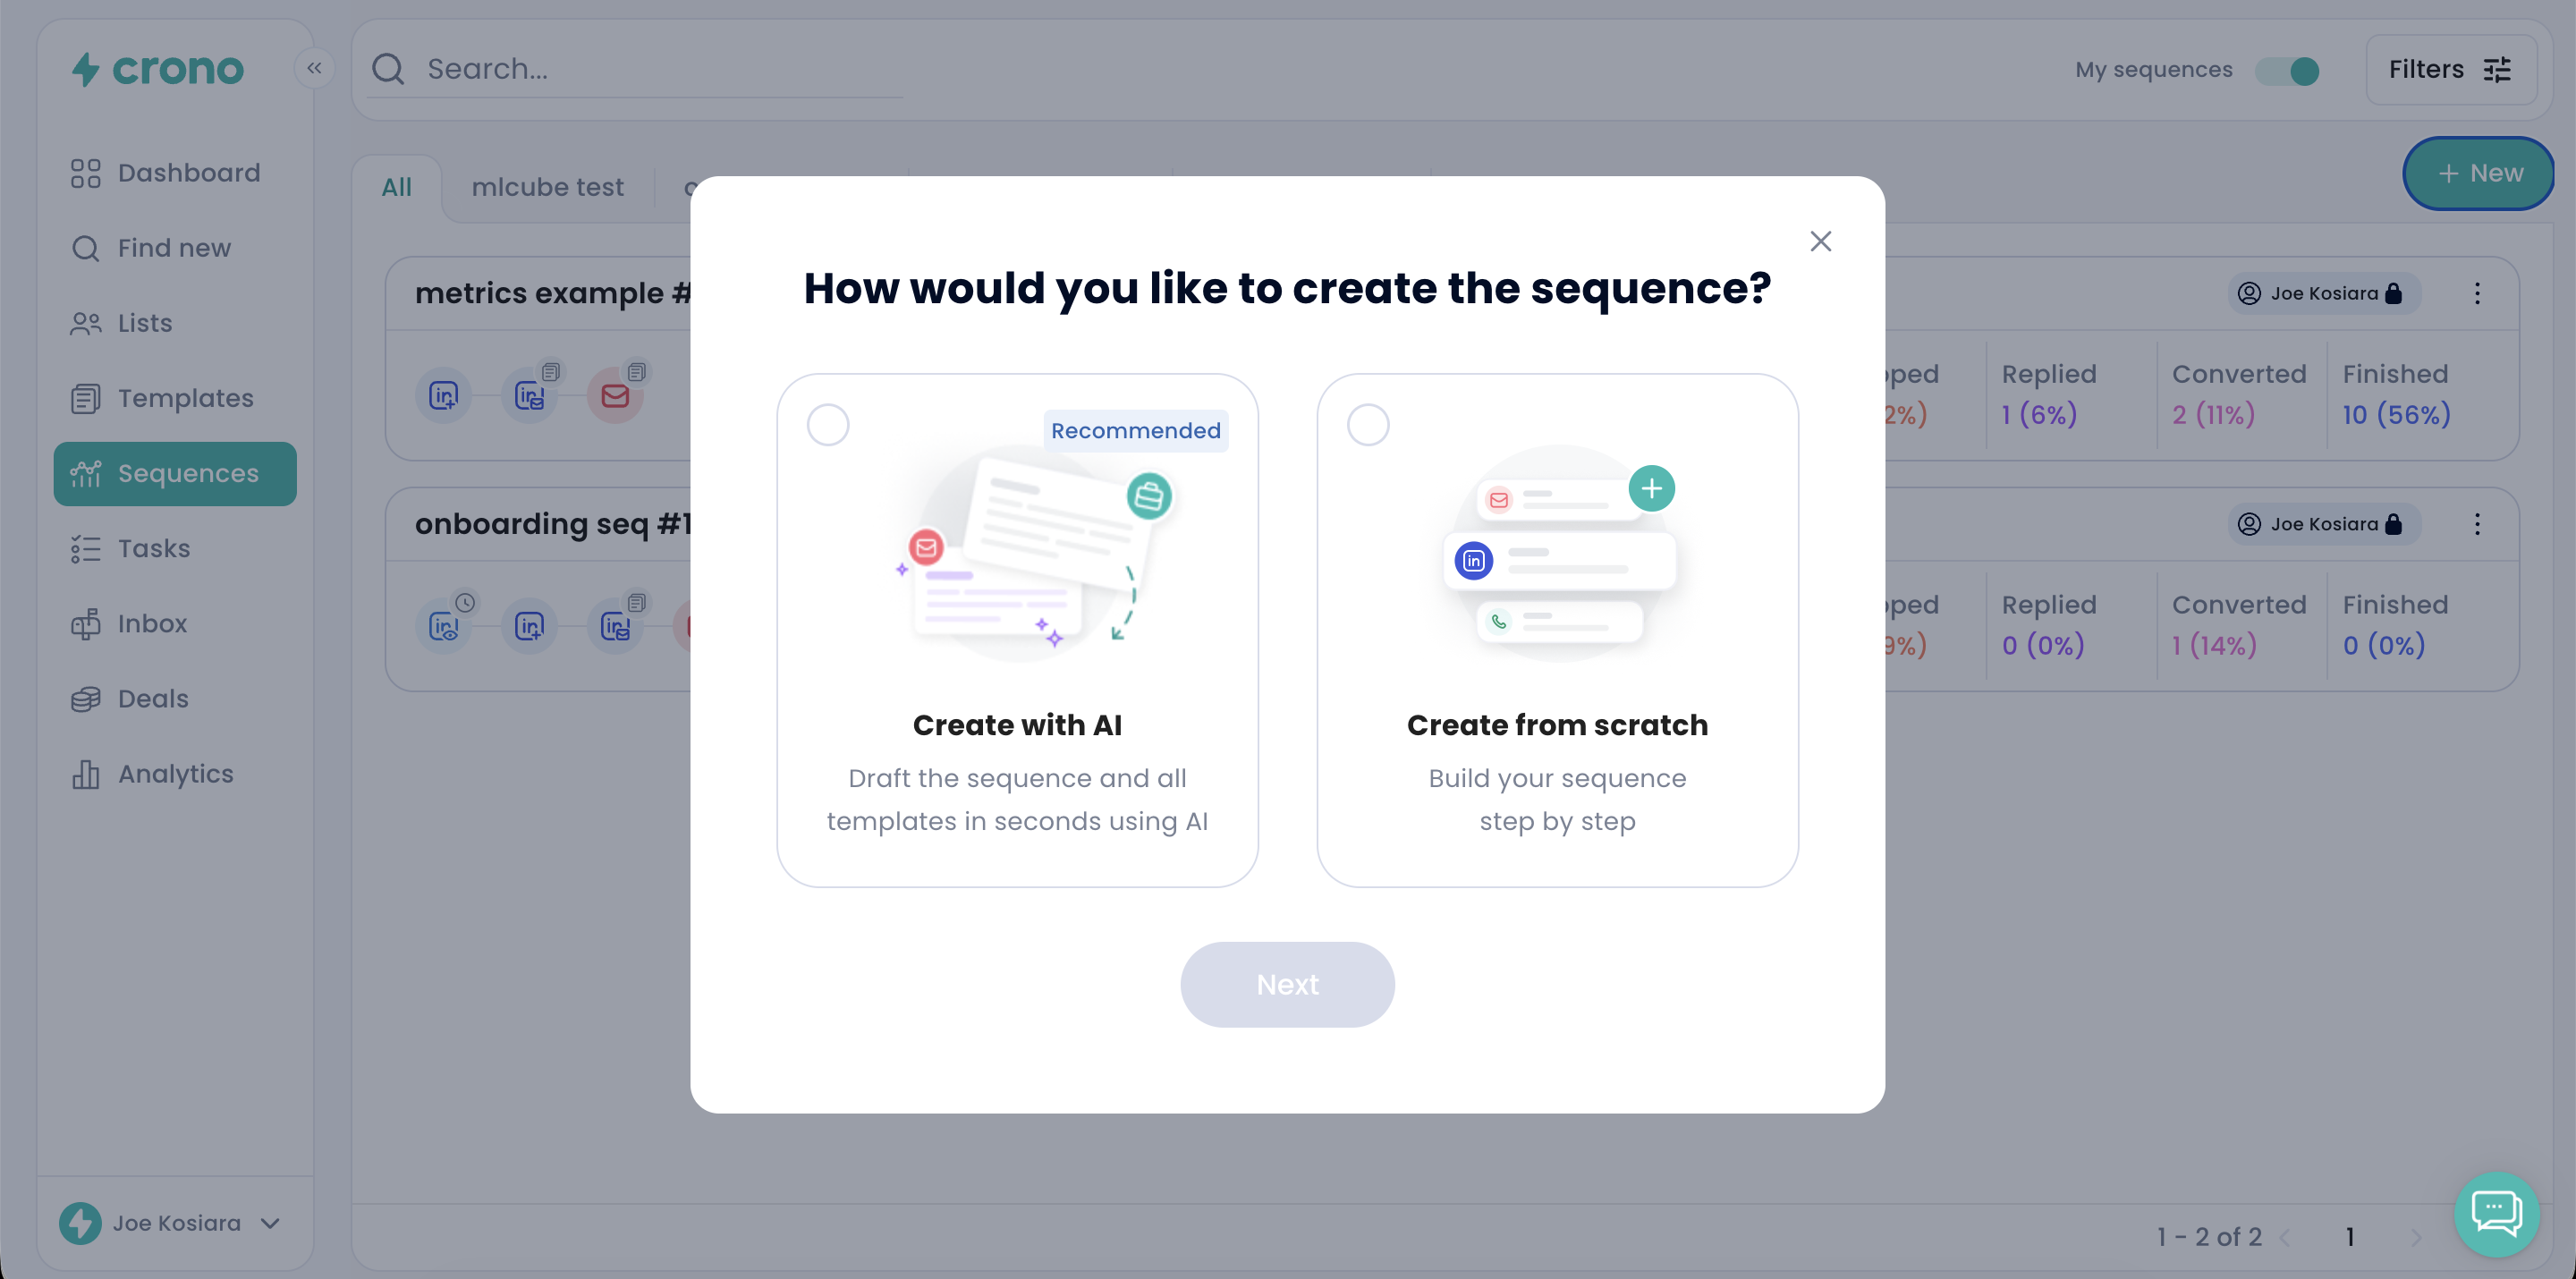
Select one of the two options, then click Next to continue.
First, choose a name for your sequence.
Next, begin building your workflow by selecting the number of steps and the channels you want to include (Email, LinkedIn, Call).
To add a step, simply click the Add Step button and start configuring each touchpoint.
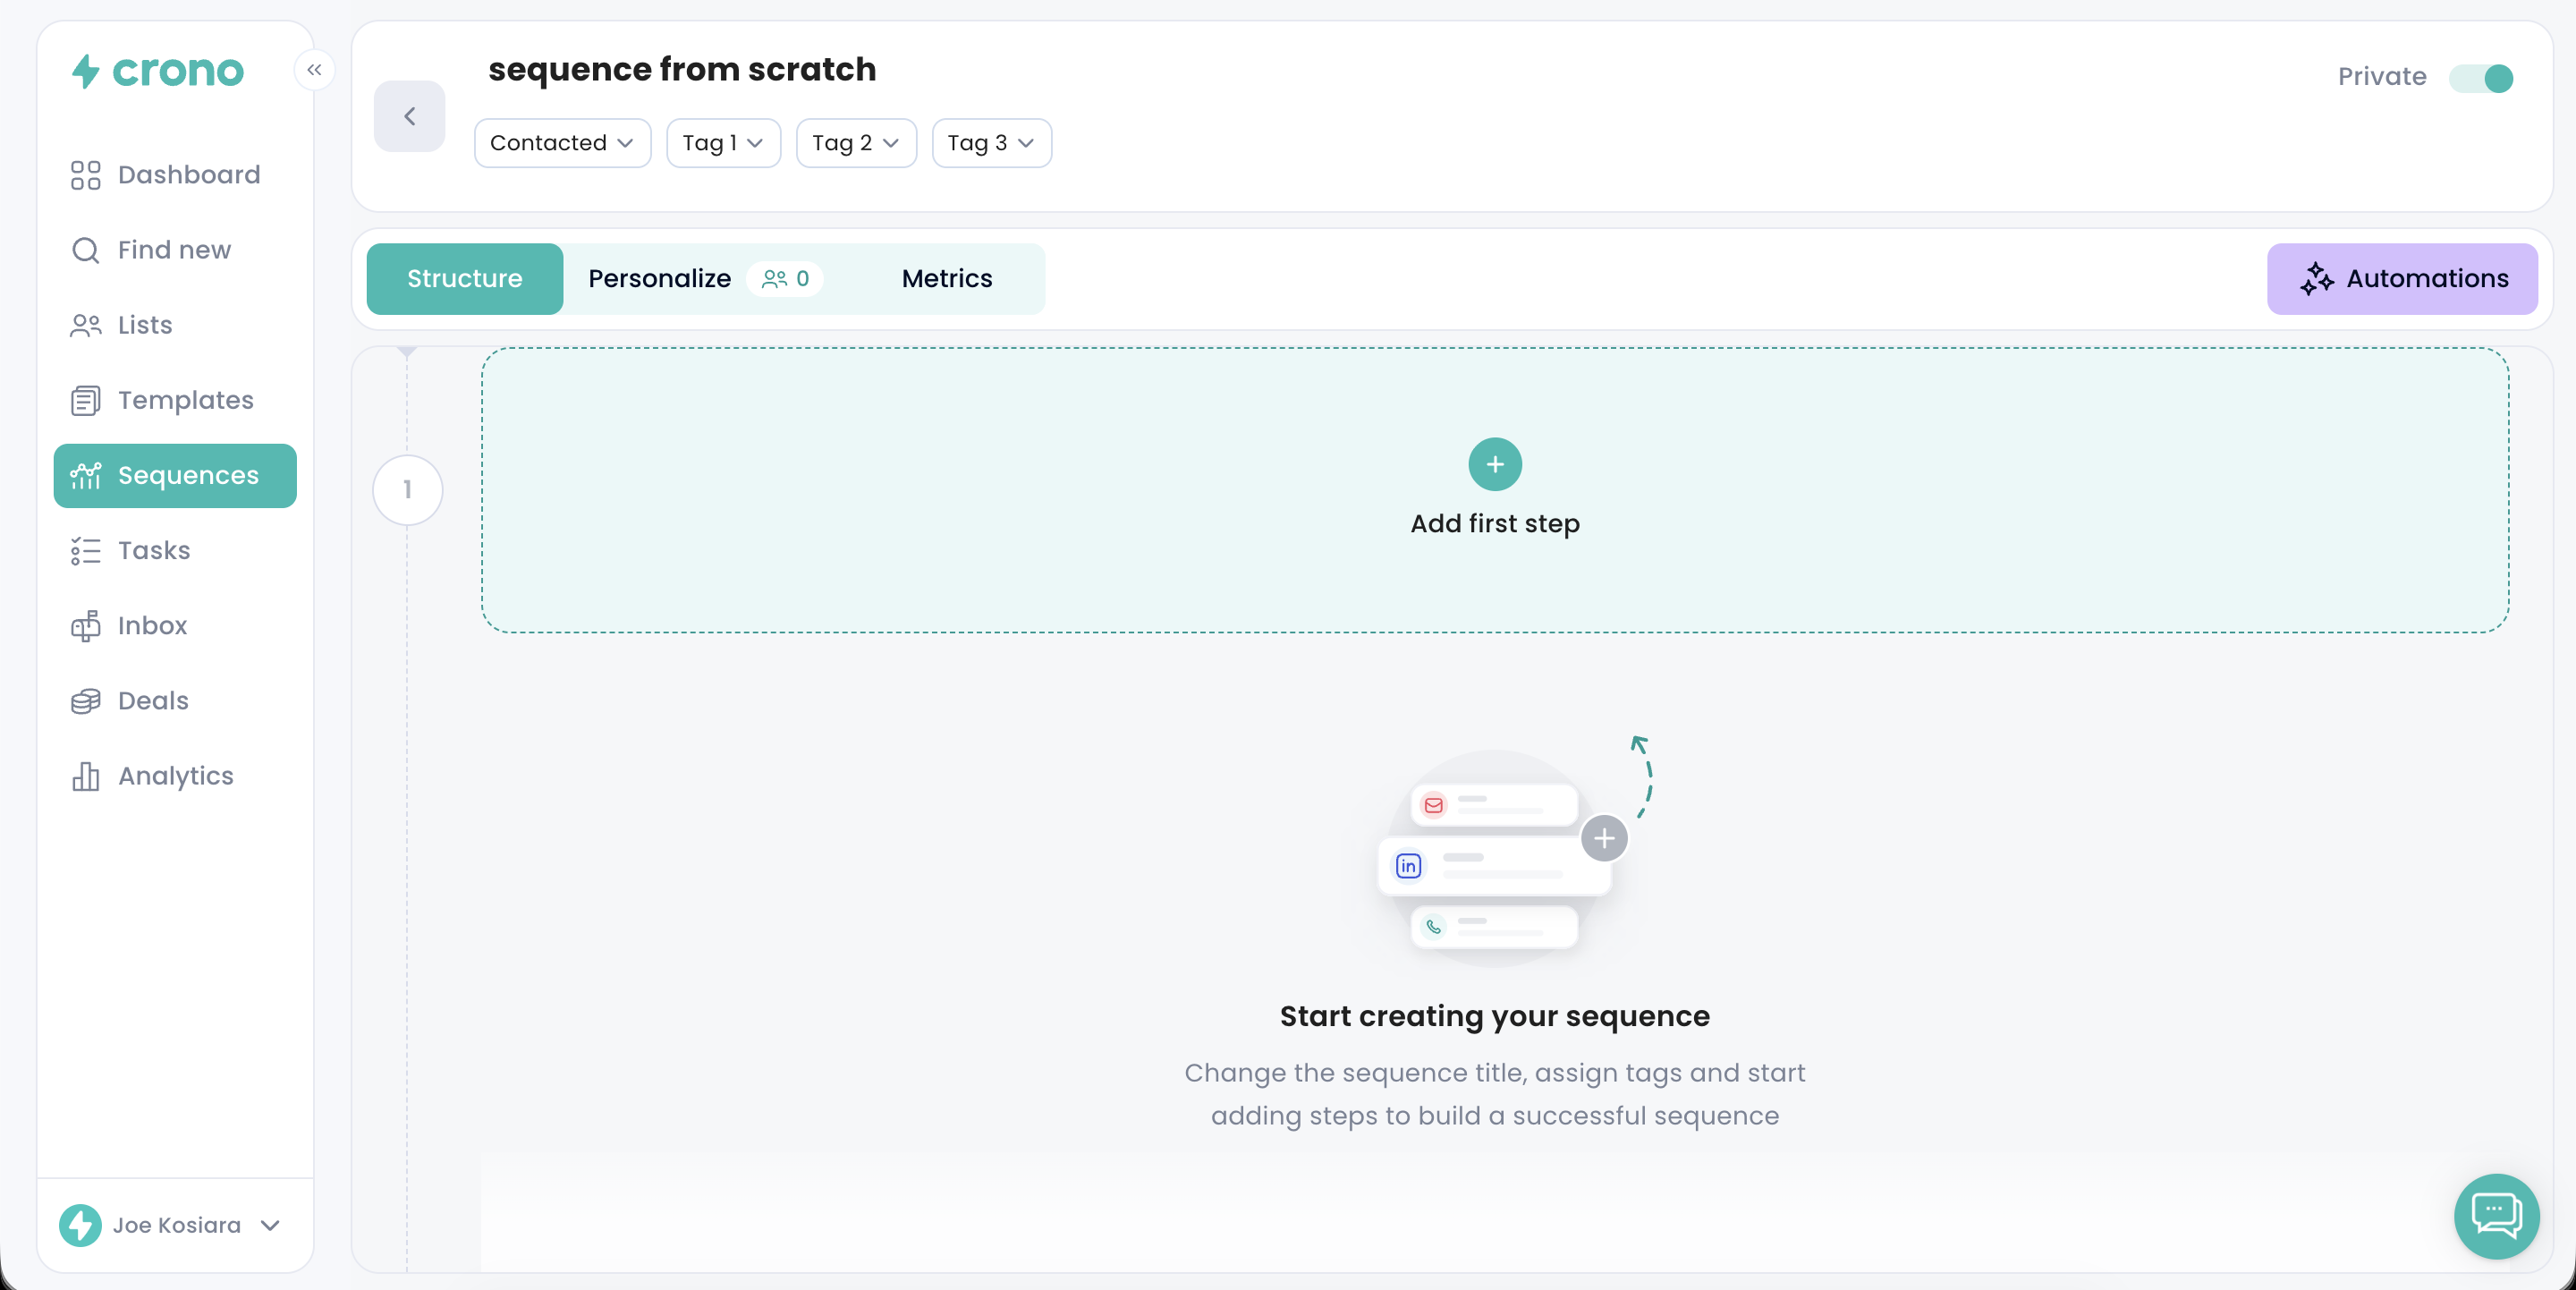
You can design your sequence freely, choosing the order and type of touchpoints that best fit your strategy.
In the example below, the sequence begins with a LinkedIn connection request:
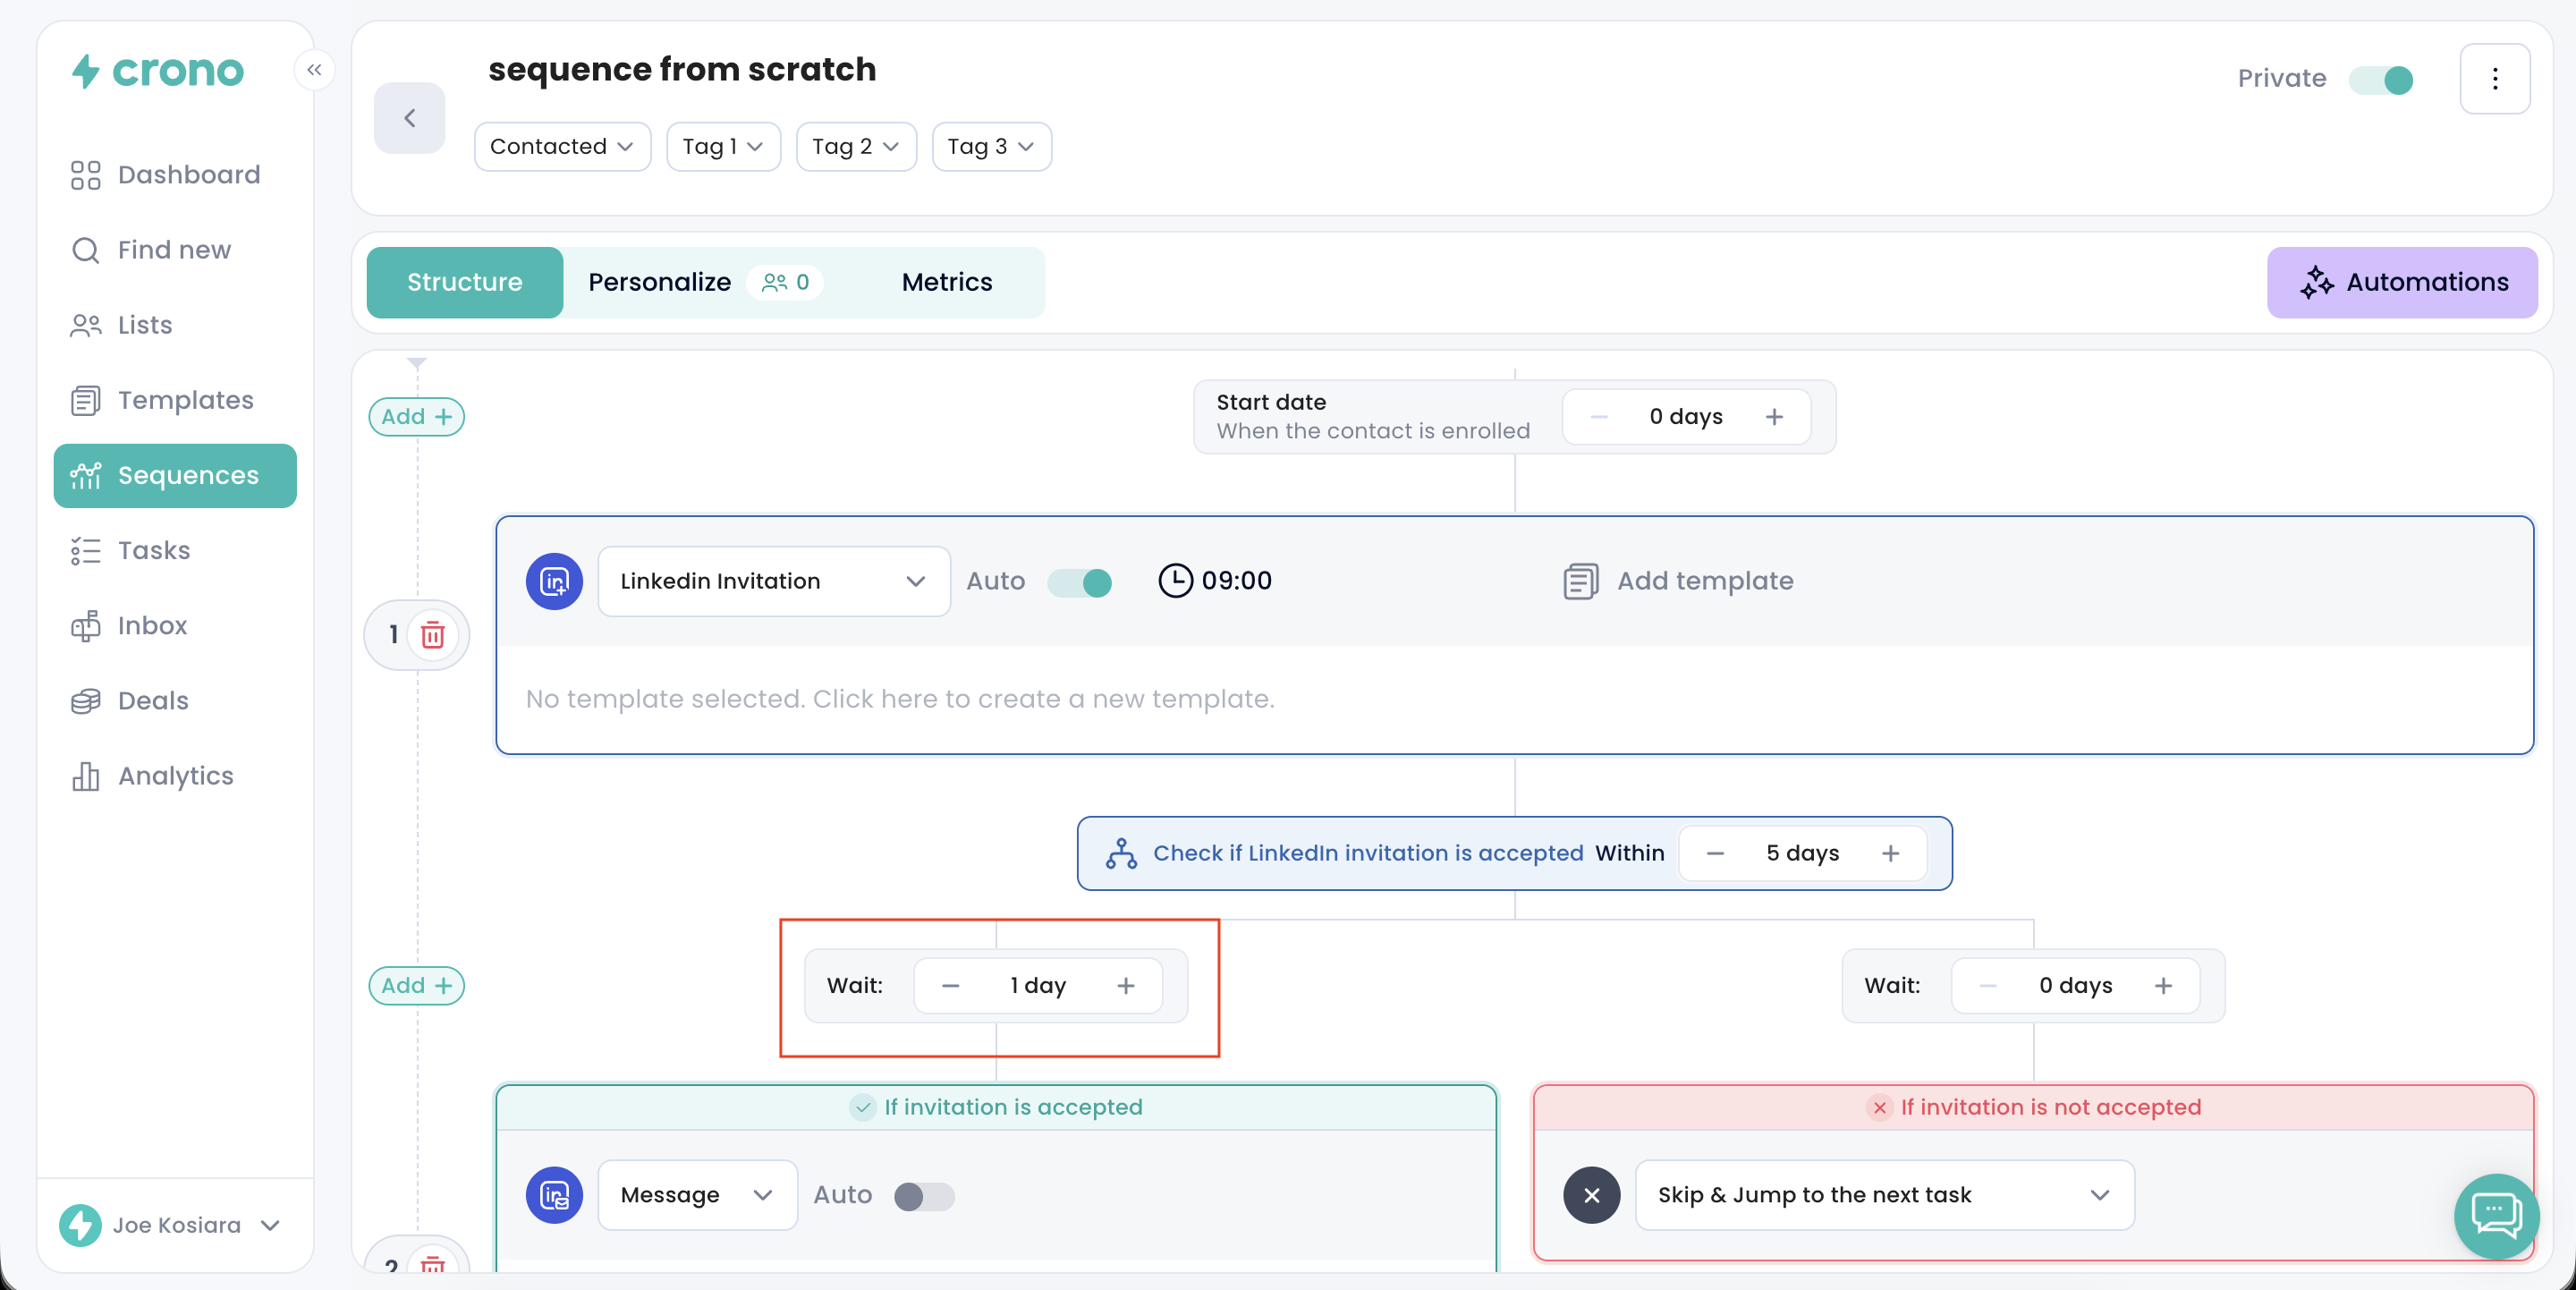
This step is configured to run after a one-day delay.
Before each step, you can choose how many days should pass between one action and the next. This allows you to space out your outreach and avoid overwhelming your prospects.
For example, by setting a one-day delay before the first step, if you add a contact to the sequence today, the LinkedIn invitation will be scheduled for tomorrow, respecting that delay. Weekend days are automatically excluded from delays, so Crono won’t schedule tasks on those days unless you manually force a reschedule.
As explained earlier, each step can be set as manual or automatic.
By enabling automation for this step, Crono will automatically send the LinkedIn invitation at the scheduled time for every contact added to the sequence — no manual action required.
If you leave this task in manual mode, you will need to execute it from the Tasks page when it becomes due.
NB: Make sure to open Crono and LinkedIn every day to refresh your LinkedIn session. This ensures that Crono’s browser extension can start properly and allows LinkedIn automation to run smoothly for the day.
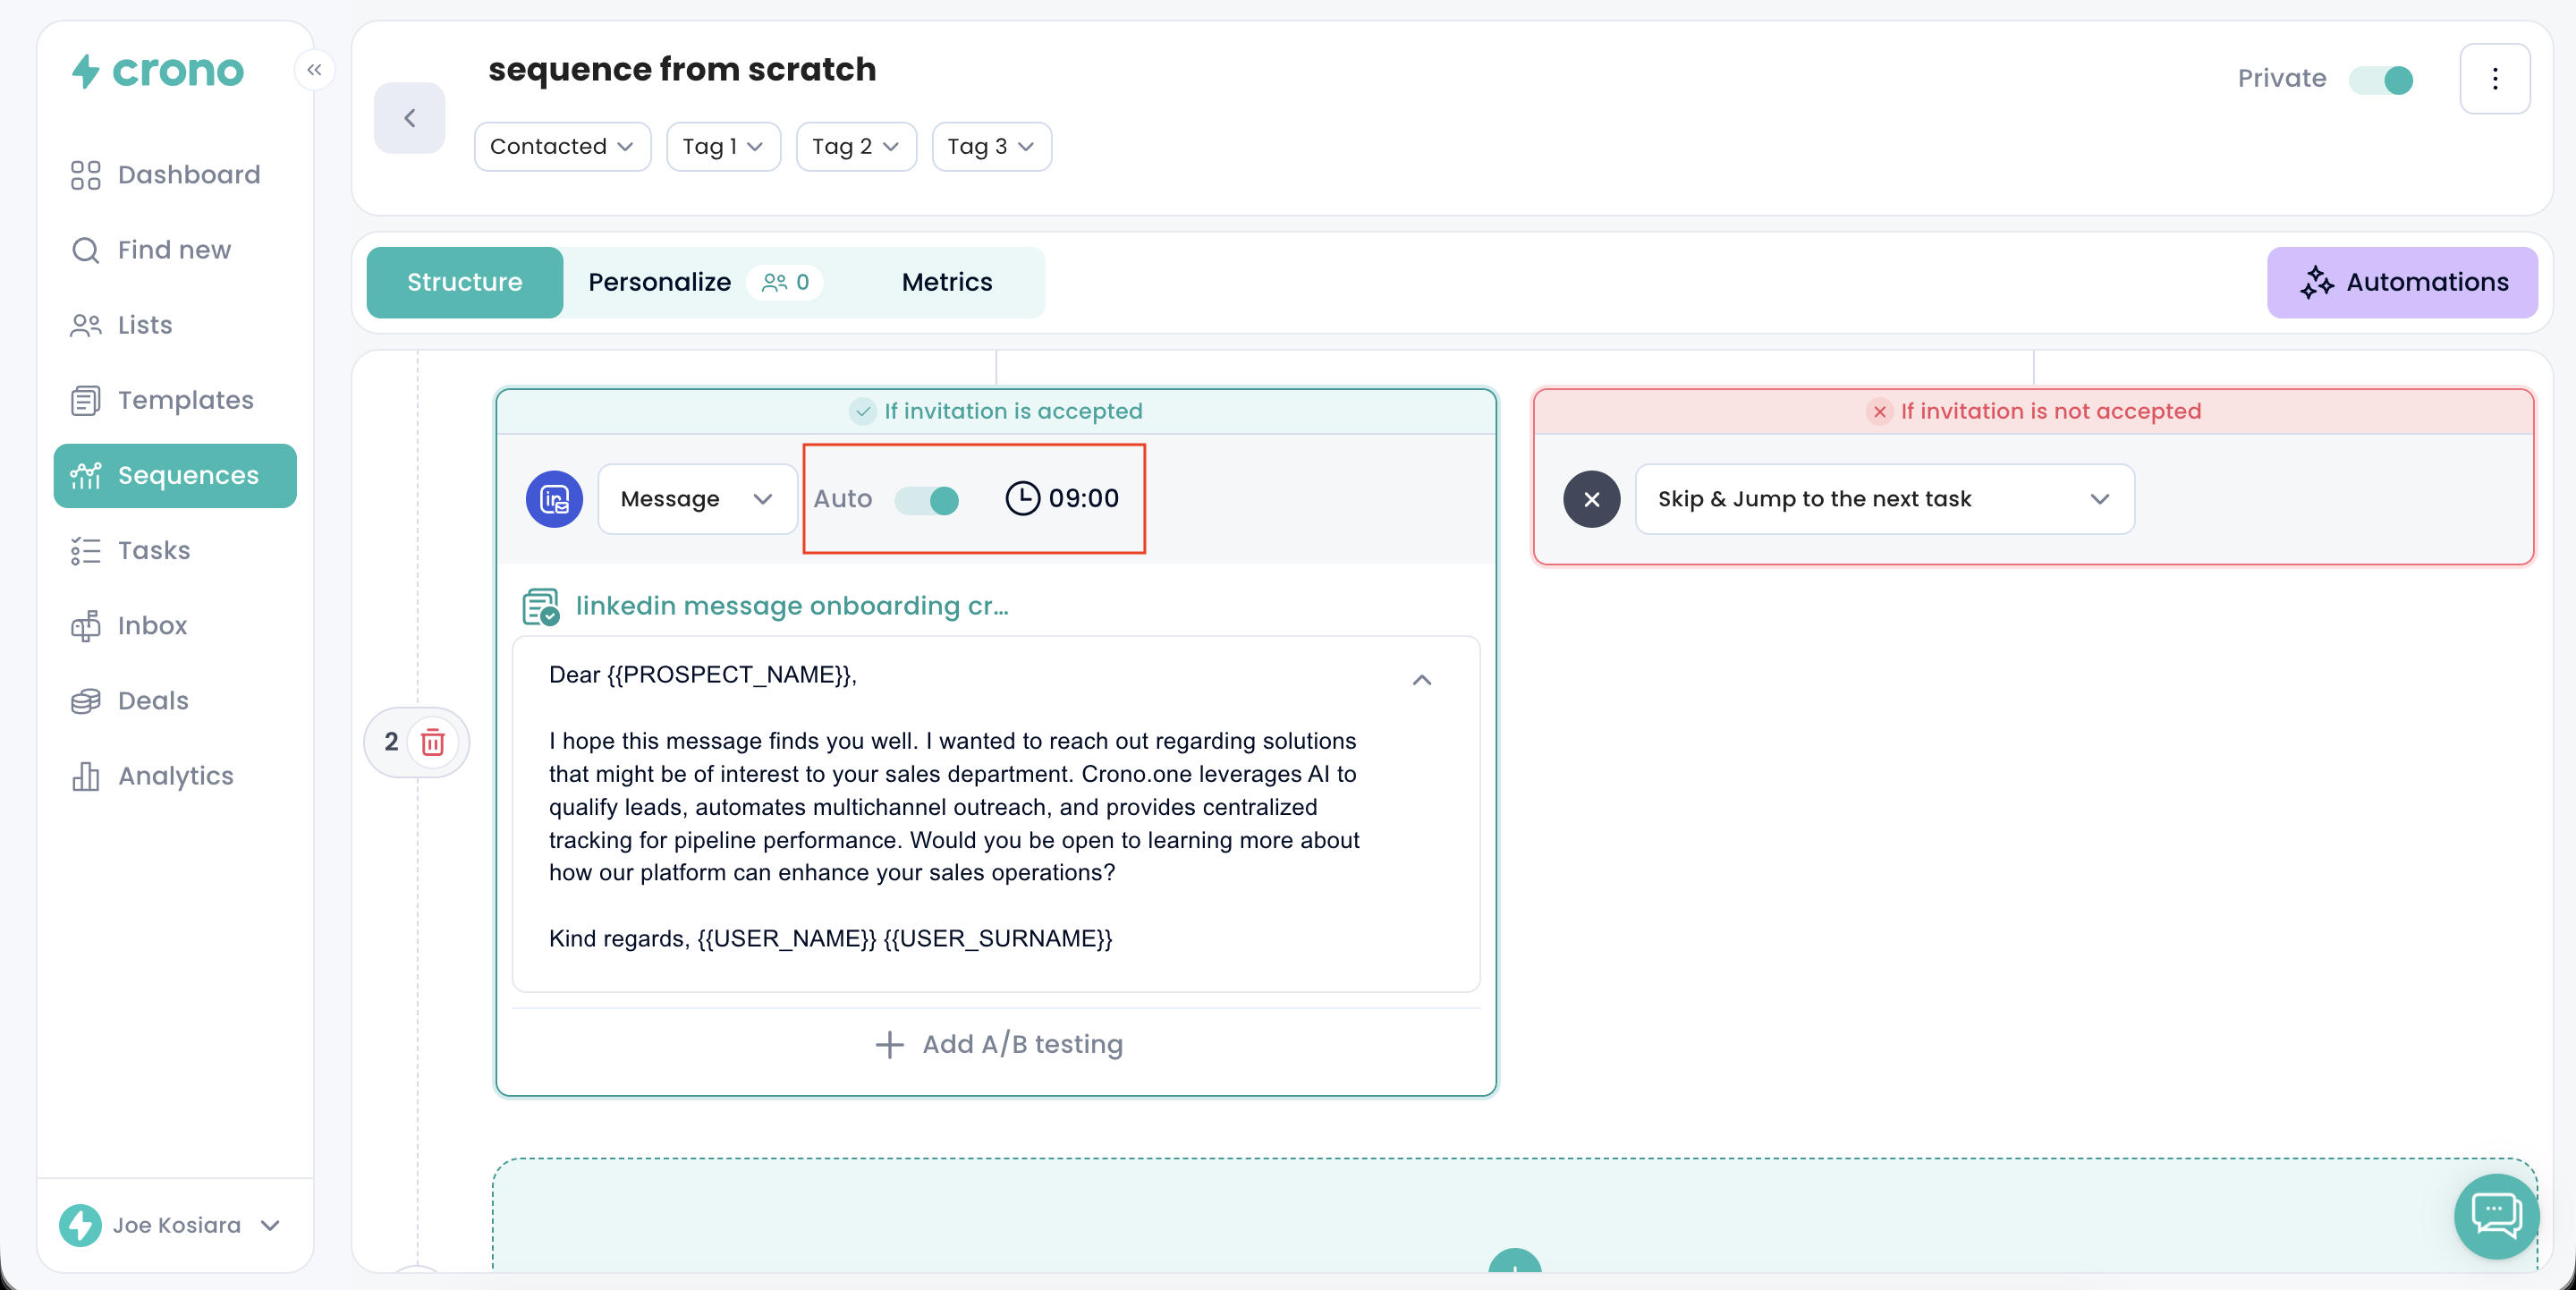
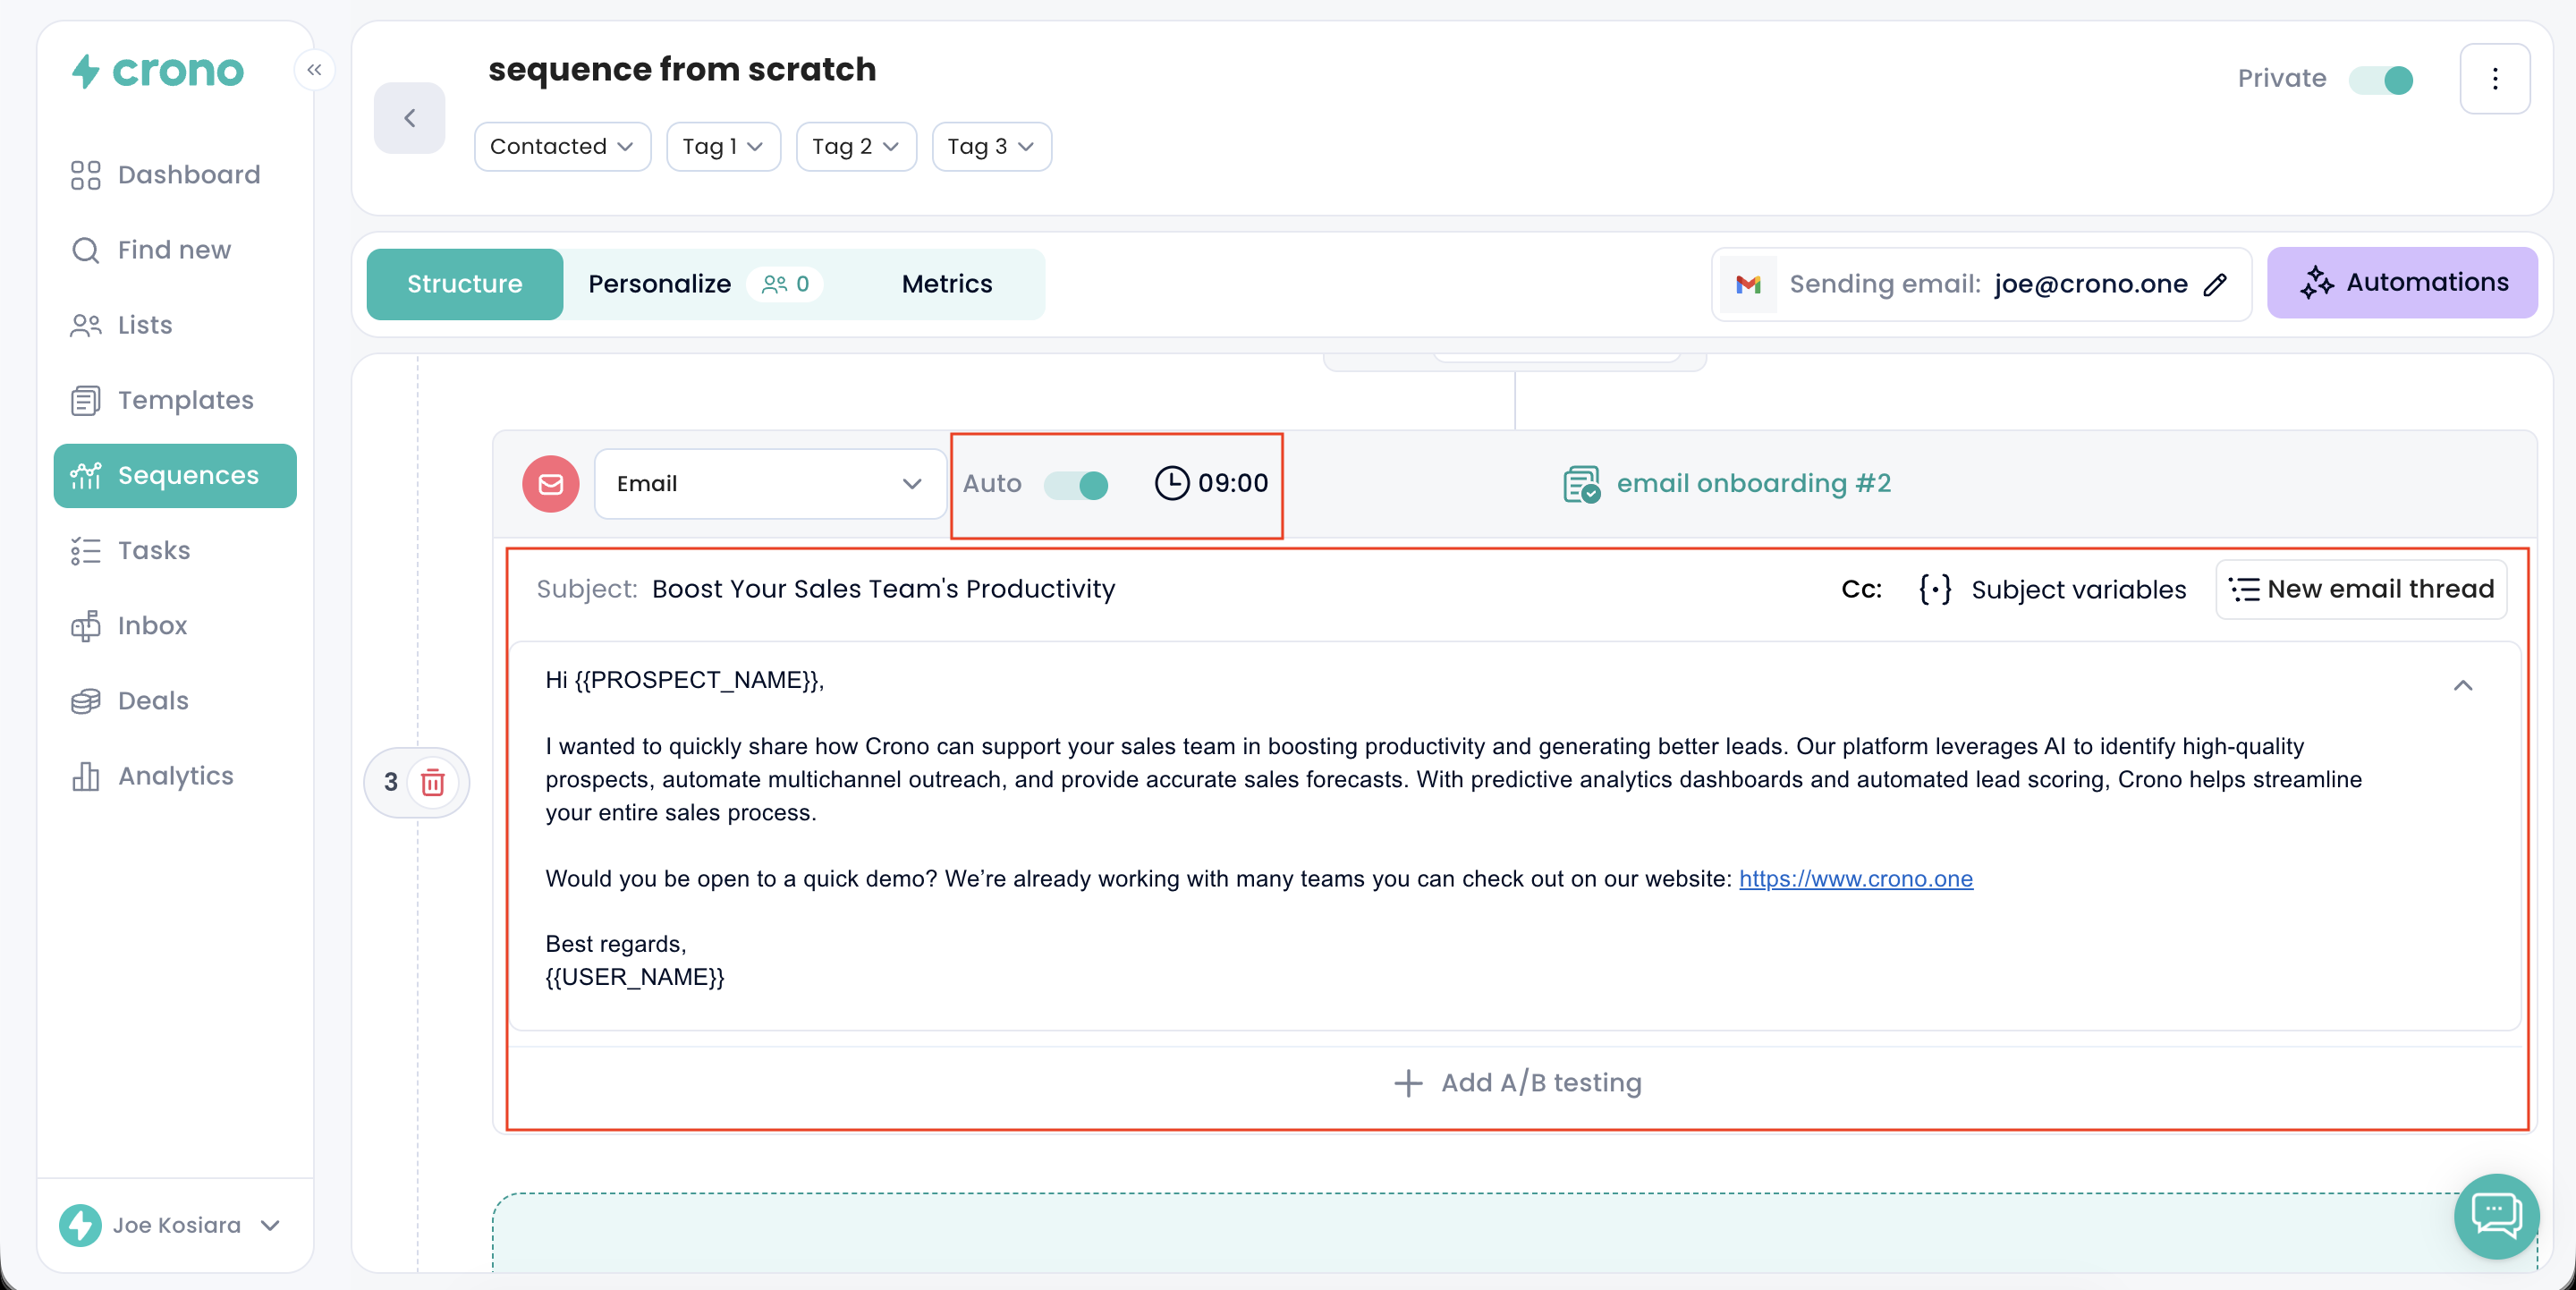
Now, let's move forward and add a template to the second step — a LinkedIn message.
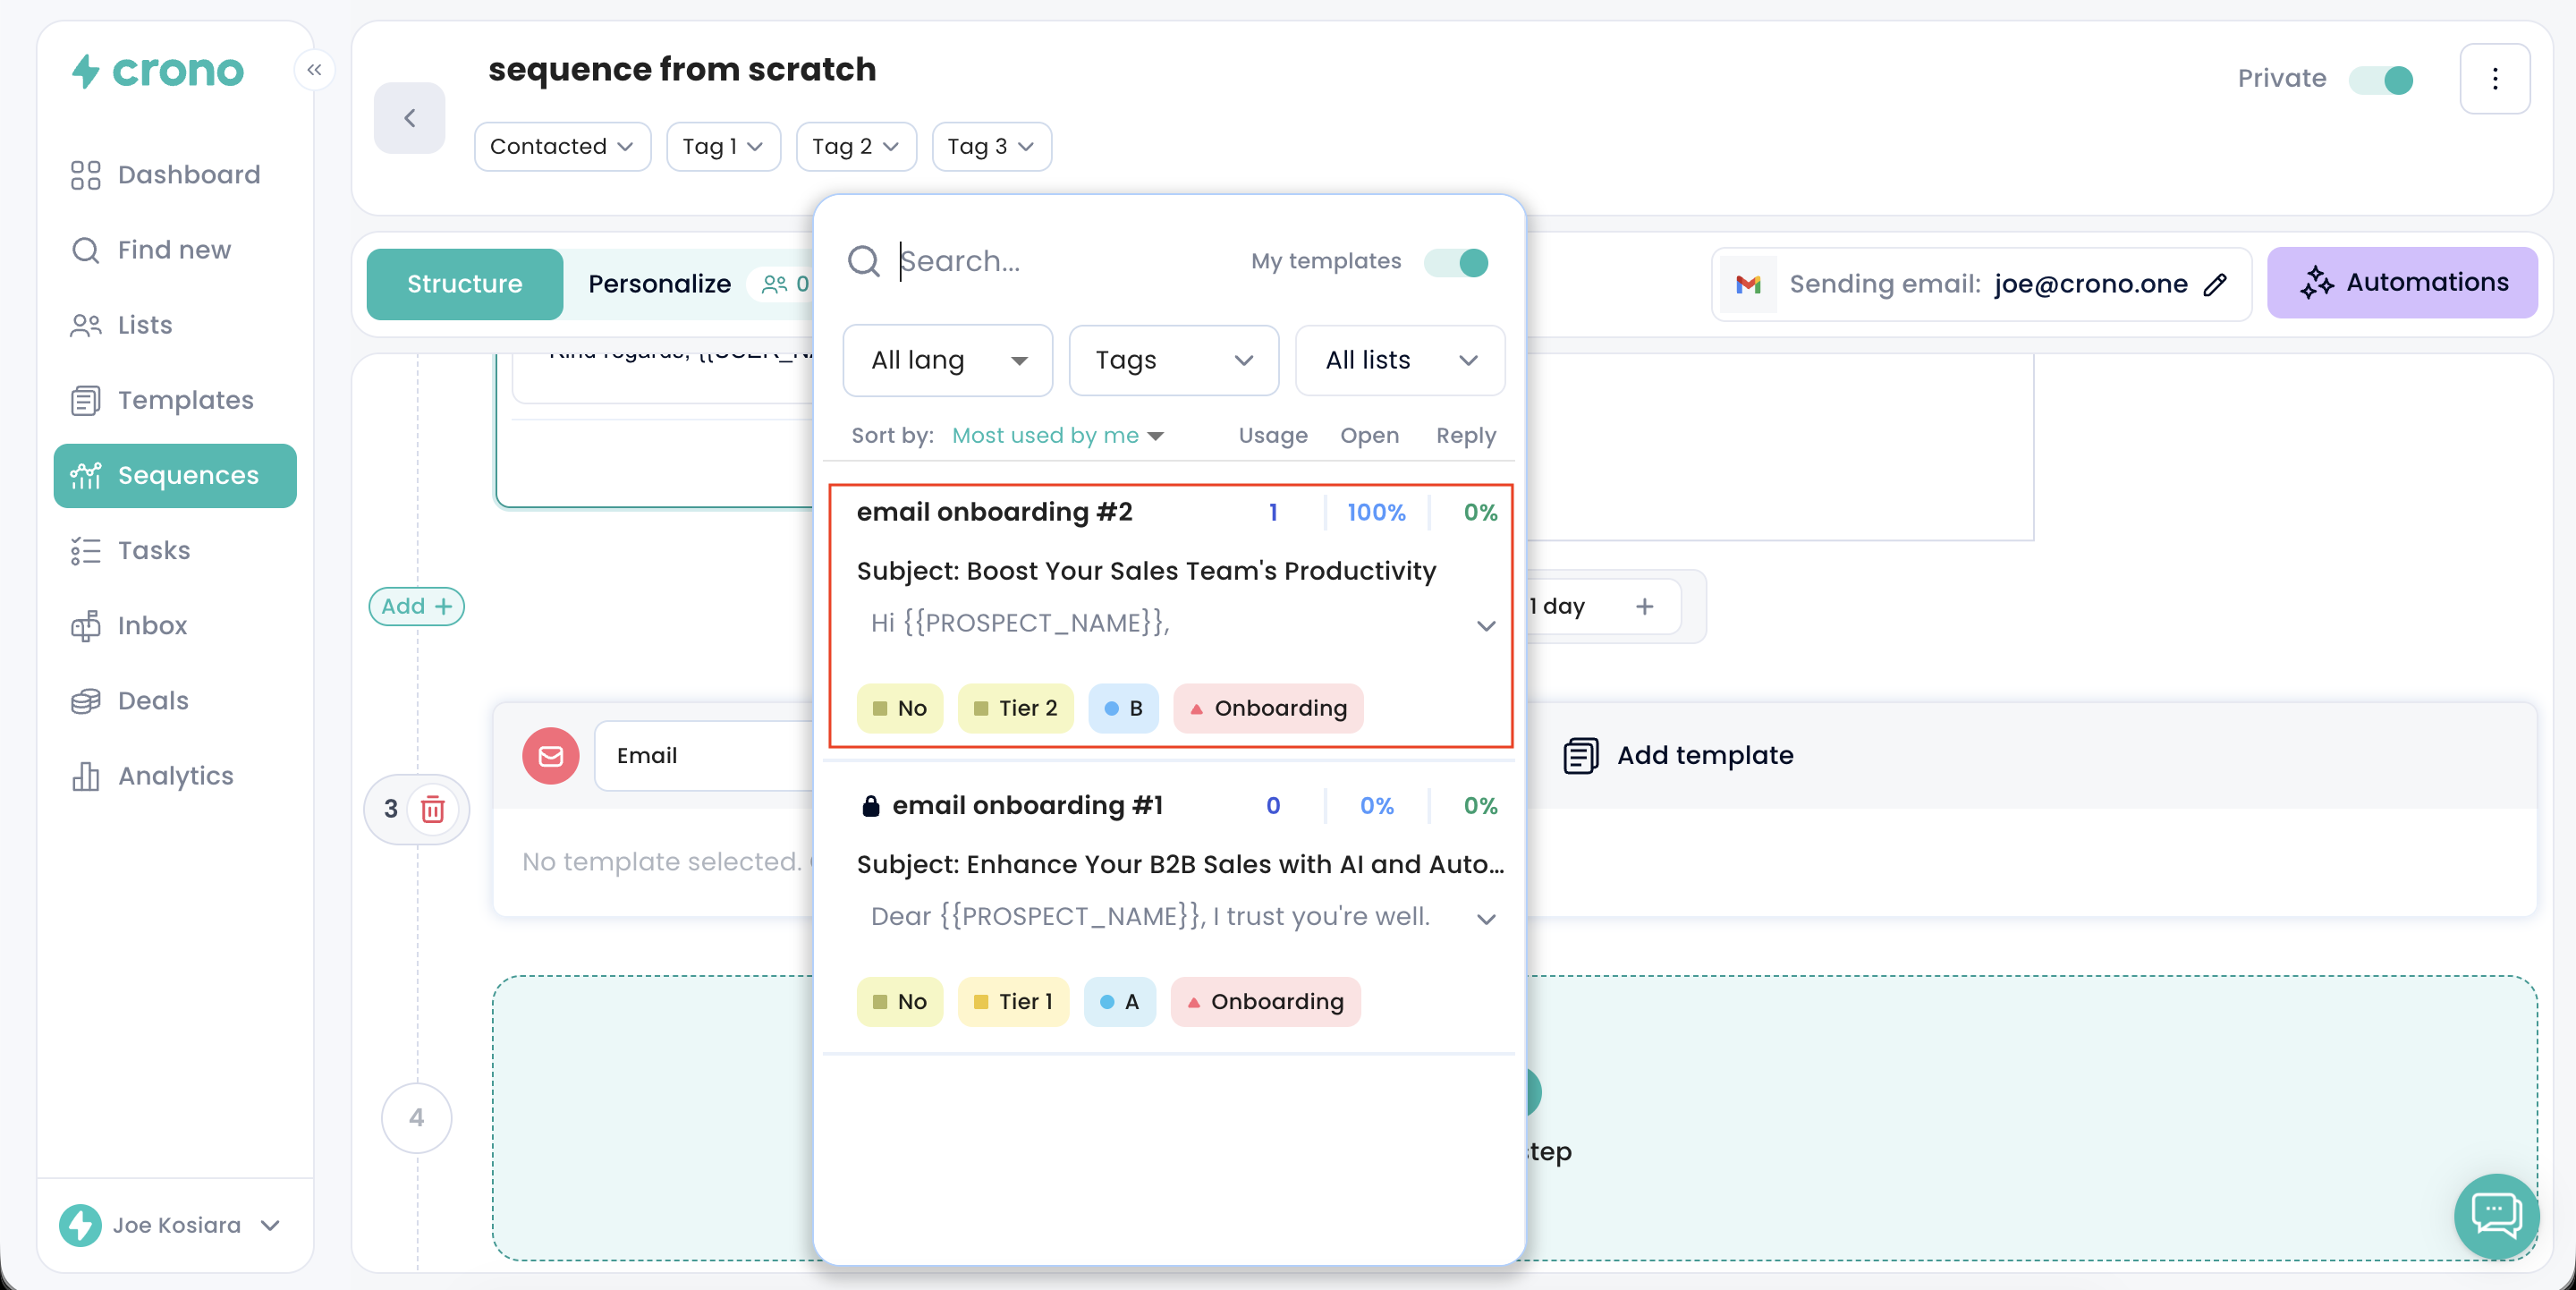
By clicking Add template, you can insert one of the templates you previously created and saved in your library.
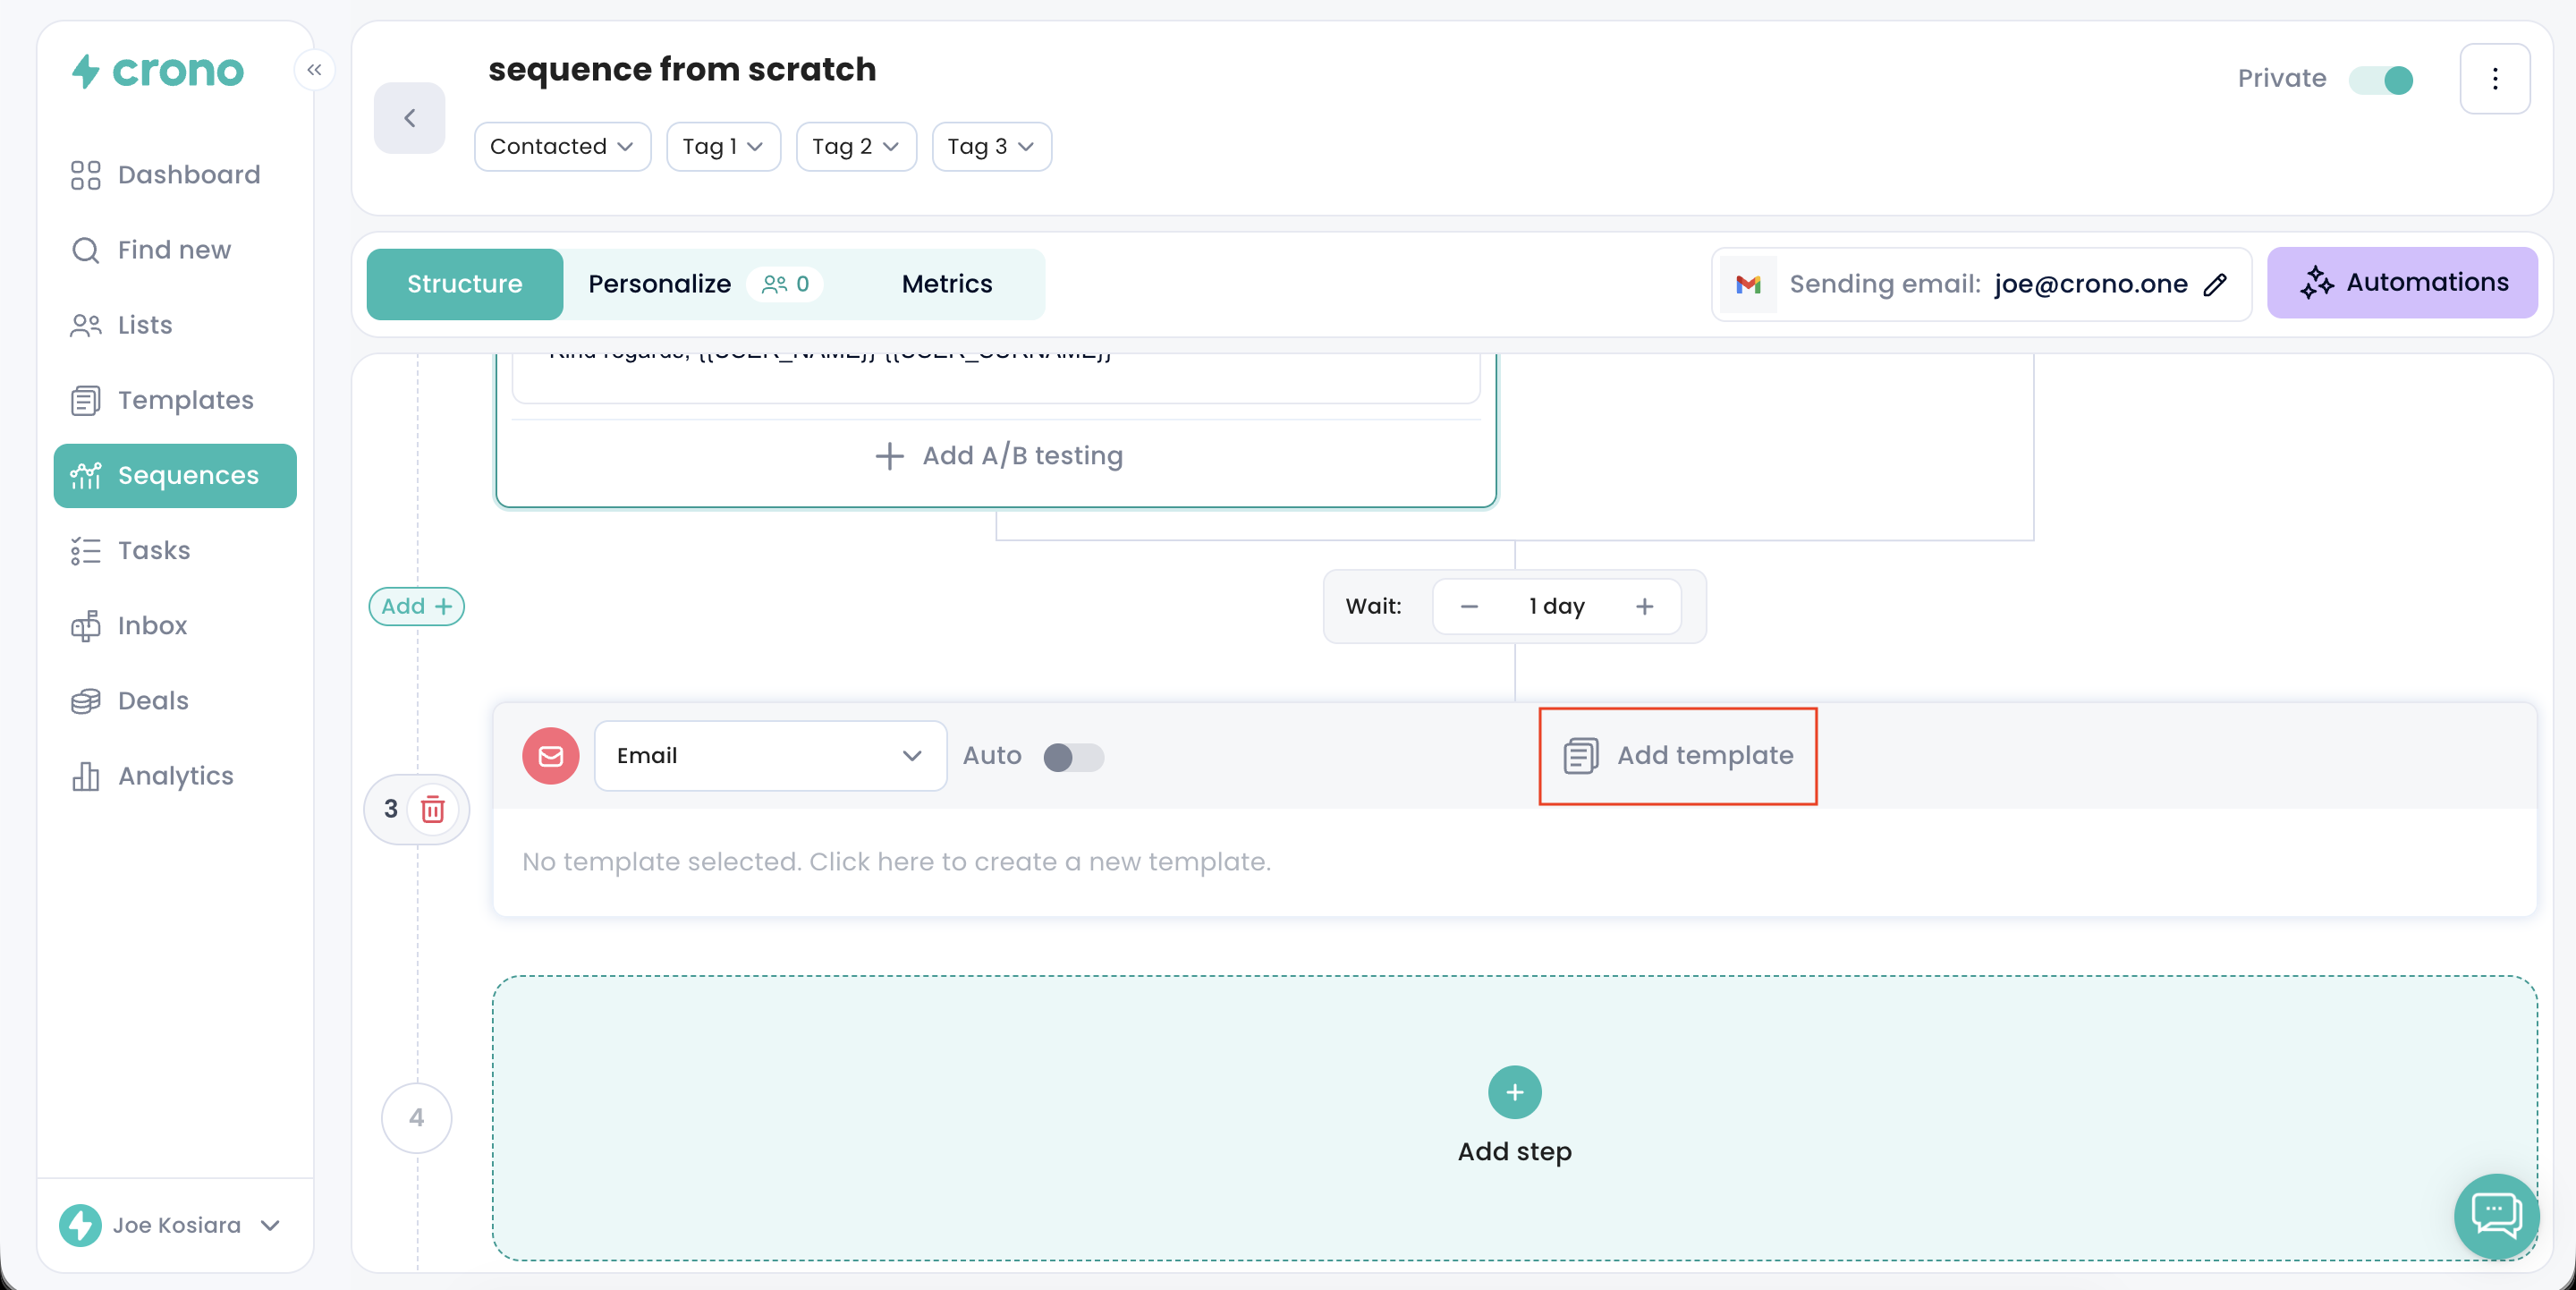
If you prefer to create a new template on the spot, you can simply start writing it directly in the editor at this stage.
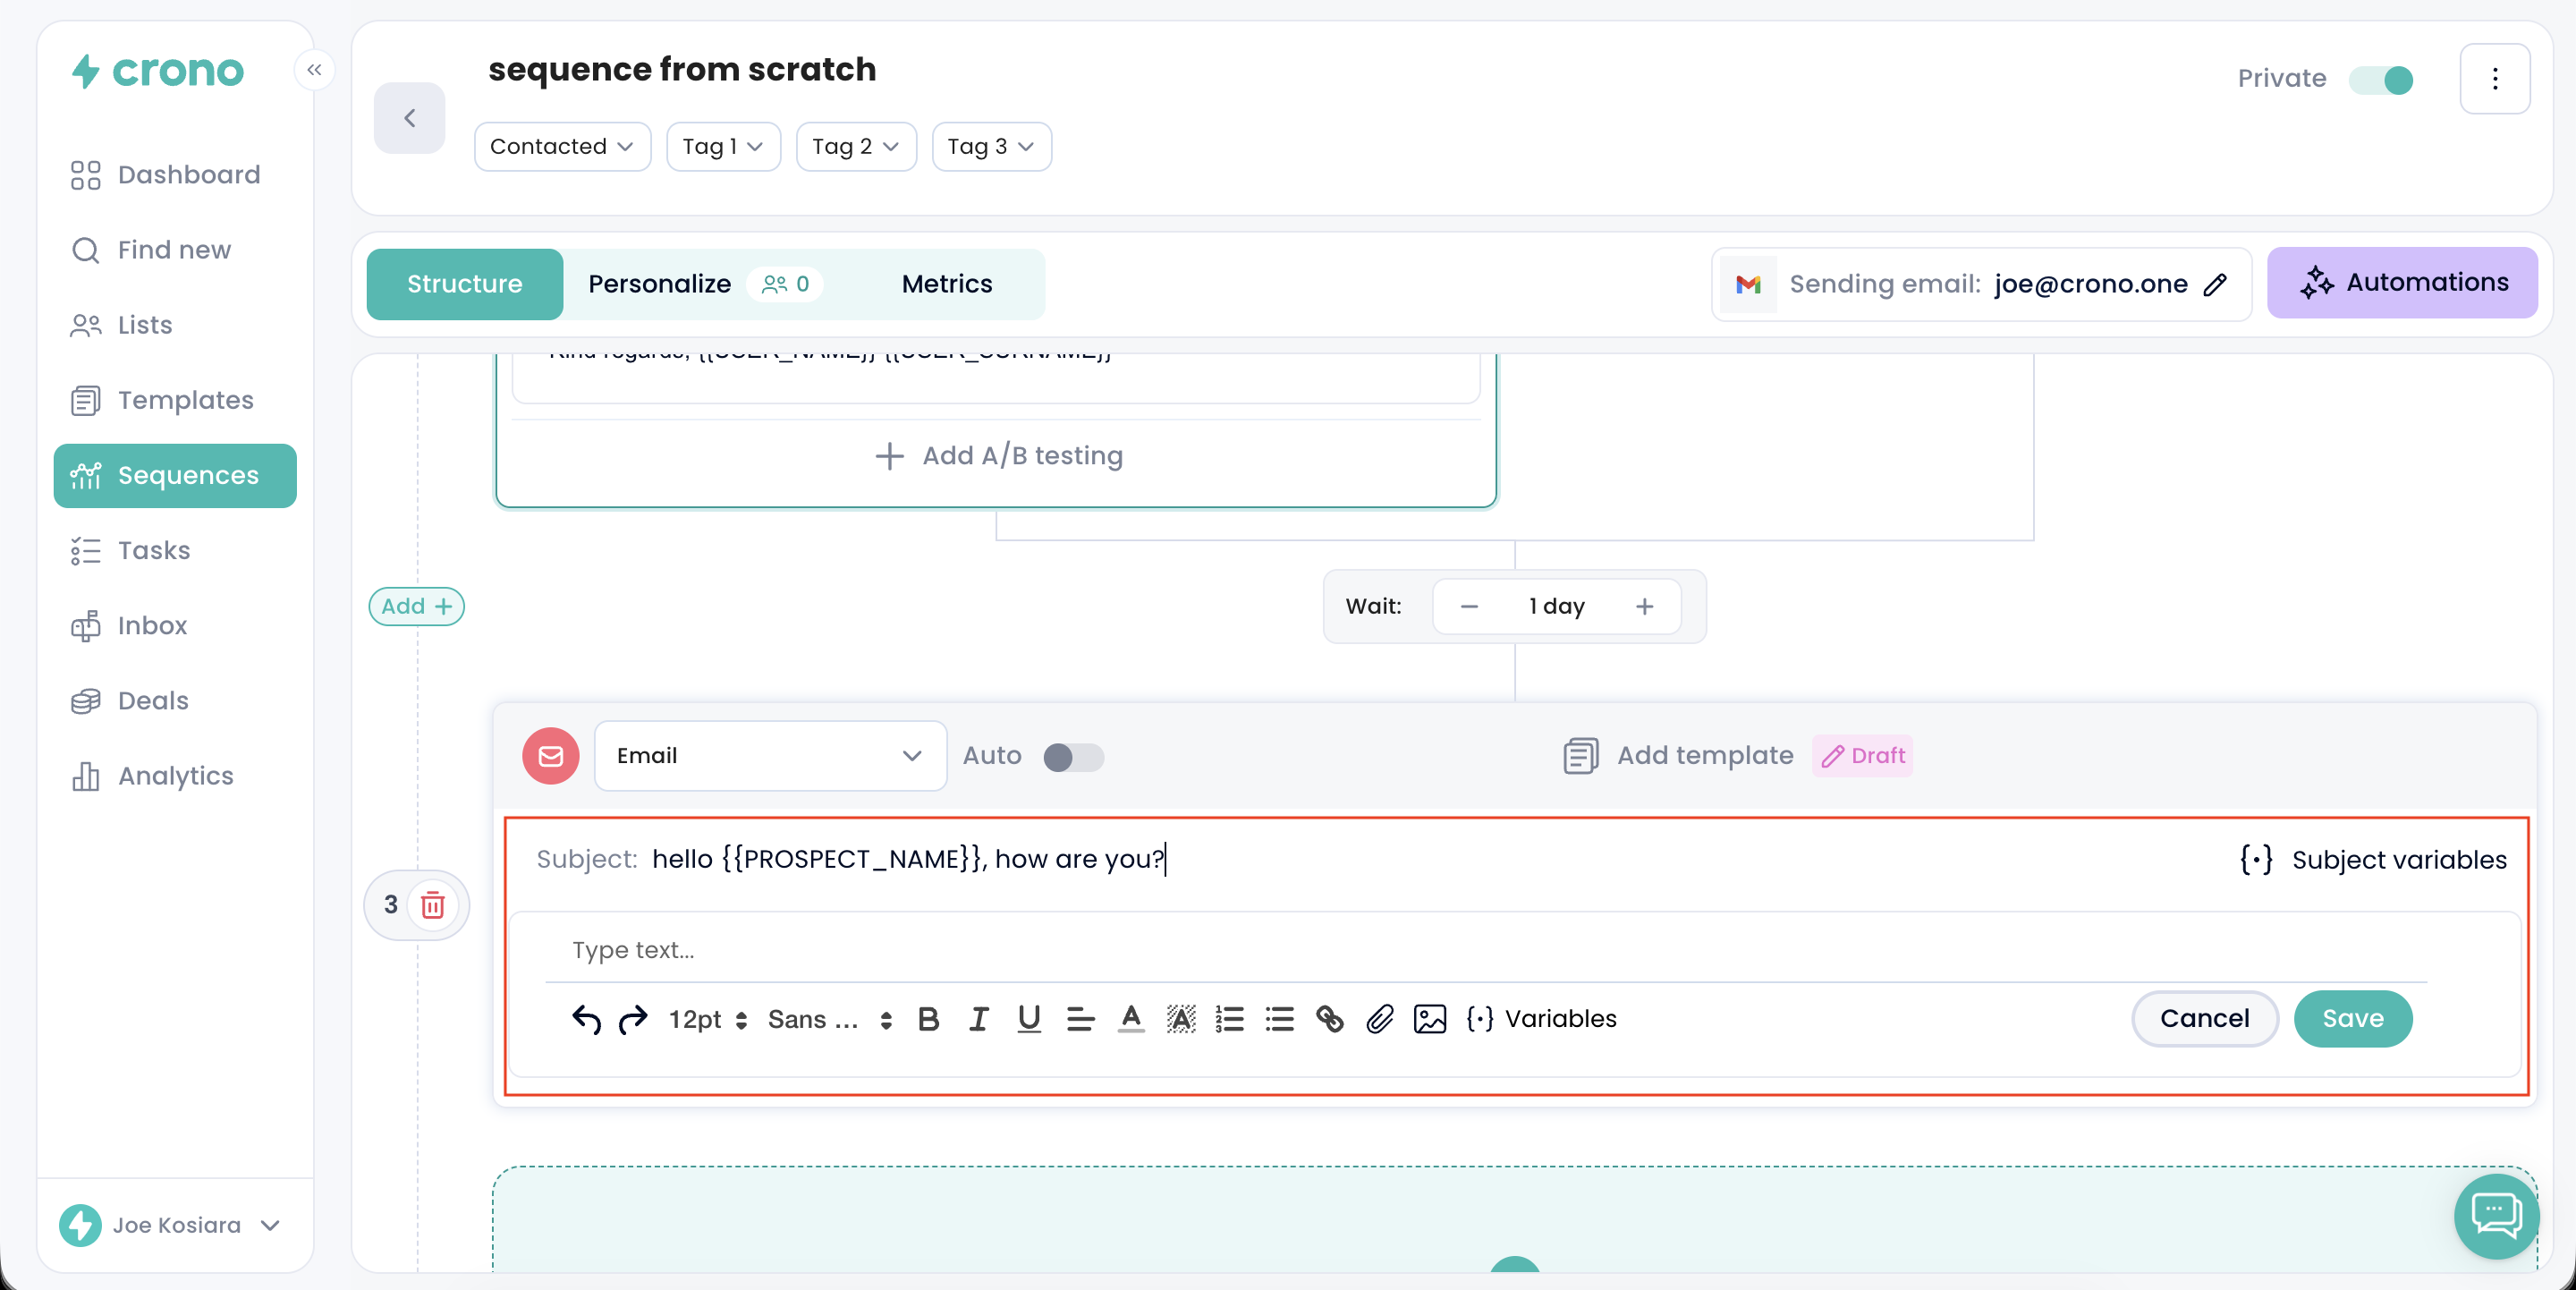
Please note that a message or email step can only be automated if a template has been selected for that step. Without a template, automation cannot be enabled.
NB: You can also create a new template while creating or modifying a sequence.
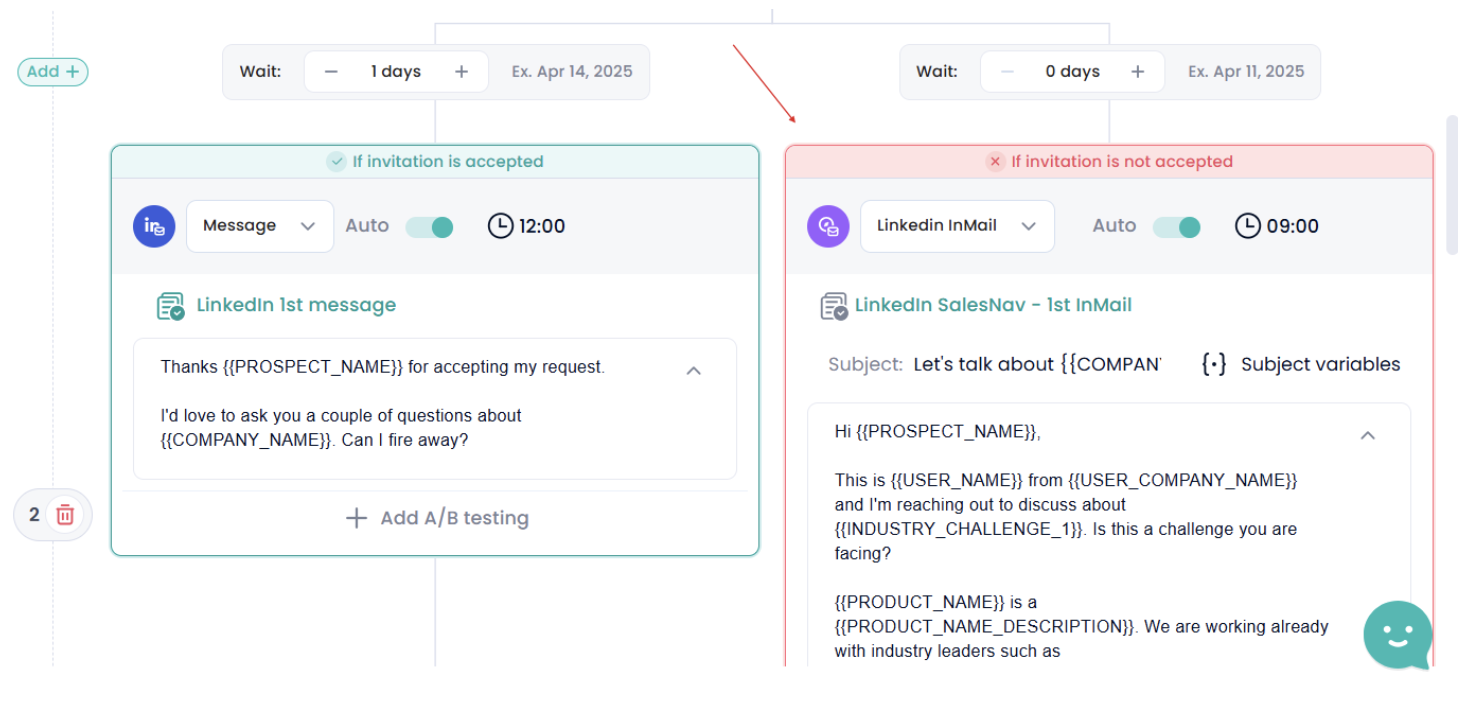
The Condition banner appears in your sequence as soon as you include both a LinkedIn Invitation step and a LinkedIn Message step.
This condition acts as a branching point in the sequence: the workflow will automatically adapt based on whether the prospect accepts your LinkedIn connection request or not.
In other words, the sequence will follow one path if the invitation is accepted — allowing the follow-up LinkedIn message to be sent — and a different path if the invitation is not accepted.

The Condition works like a time window that you set for your prospects.
During this window, Crono monitors whether the prospect accepts your LinkedIn connection request.
This check only occurs within the defined timeframe. Once the window closes, the system automatically chooses the appropriate path in the sequence.
If the connection request is not accepted within the time window, the sequence will automatically branch to the right. This path “bypasses” the LinkedIn message step (since a message can only be delivered once a connection is accepted) and continues with all the next available actions that do not rely on being connected on LinkedIn.
Let’s say you set the condition to 5 business days (Crono sequences always follow business-day logic).
You send the LinkedIn invitation (either manually or automatically).
The prospect now has 5 business days to accept it.
There are two possible outcomes:
✅ If the prospect accepts within 5 business days
The condition is satisfied, the sequence moves to the left, and the LinkedIn message step is triggered as planned.
❌ If the prospect does not accept within 5 business days
Starting on day 6, the condition expires, and the sequence branches to the right, skipping the LinkedIn message and continuing with steps that do not require a LinkedIn connection.
For users with Sales Navigator, the right-side branch can be customized by adding a LinkedIn InMail step as an alternative to the LinkedIn message.
This means that if the prospect does not accept the connection request within the set window, the sequence does not simply skip the message—it adapts by sending an InMail instead.
This ensures the sequence remains active and continues leveraging LinkedIn touchpoints, even without a connection.
The longer you set the condition window, the more flexibility you allow for prospects to accept your LinkedIn invitation. However, keep in mind that extending the window may also slow down the overall pace of your sequence.
Important: Any wait days configured before individual steps still apply and are not influenced by the condition window.
Once your sequence is fully configured, you can start enrolling prospects and begin guiding them through the journey toward conversion!
