When managing contacts enrolled in a sequence, you can either stop them or remove them from the sequence.
These two actions are different:
Stopping a contact prevents them from receiving any future steps of that sequence, but keeps them inside the sequence with the status Stopped.
Removing a contact deletes them from that sequence entirely.
This distinction is important, especially if you plan to pause or restart a sequence later. Stopping does not remove anyone: a stopped contact is still enrolled in the sequence and still appears in it with the status Stopped. Only removing a contact takes them out of the sequence.
Stopping a sequence for a contact allows you to prevent that specific contact from receiving any further steps.
This is useful when the conversation has moved forward, the contact is no longer relevant, or you want to manually manage the next touchpoints.
To stop a sequence for a single contact:
Go to the Sequences section
Open the sequence where the contact is currently enrolled
Access the Personalize or the Metrics section where you find the Contacts enrolled into that sequence
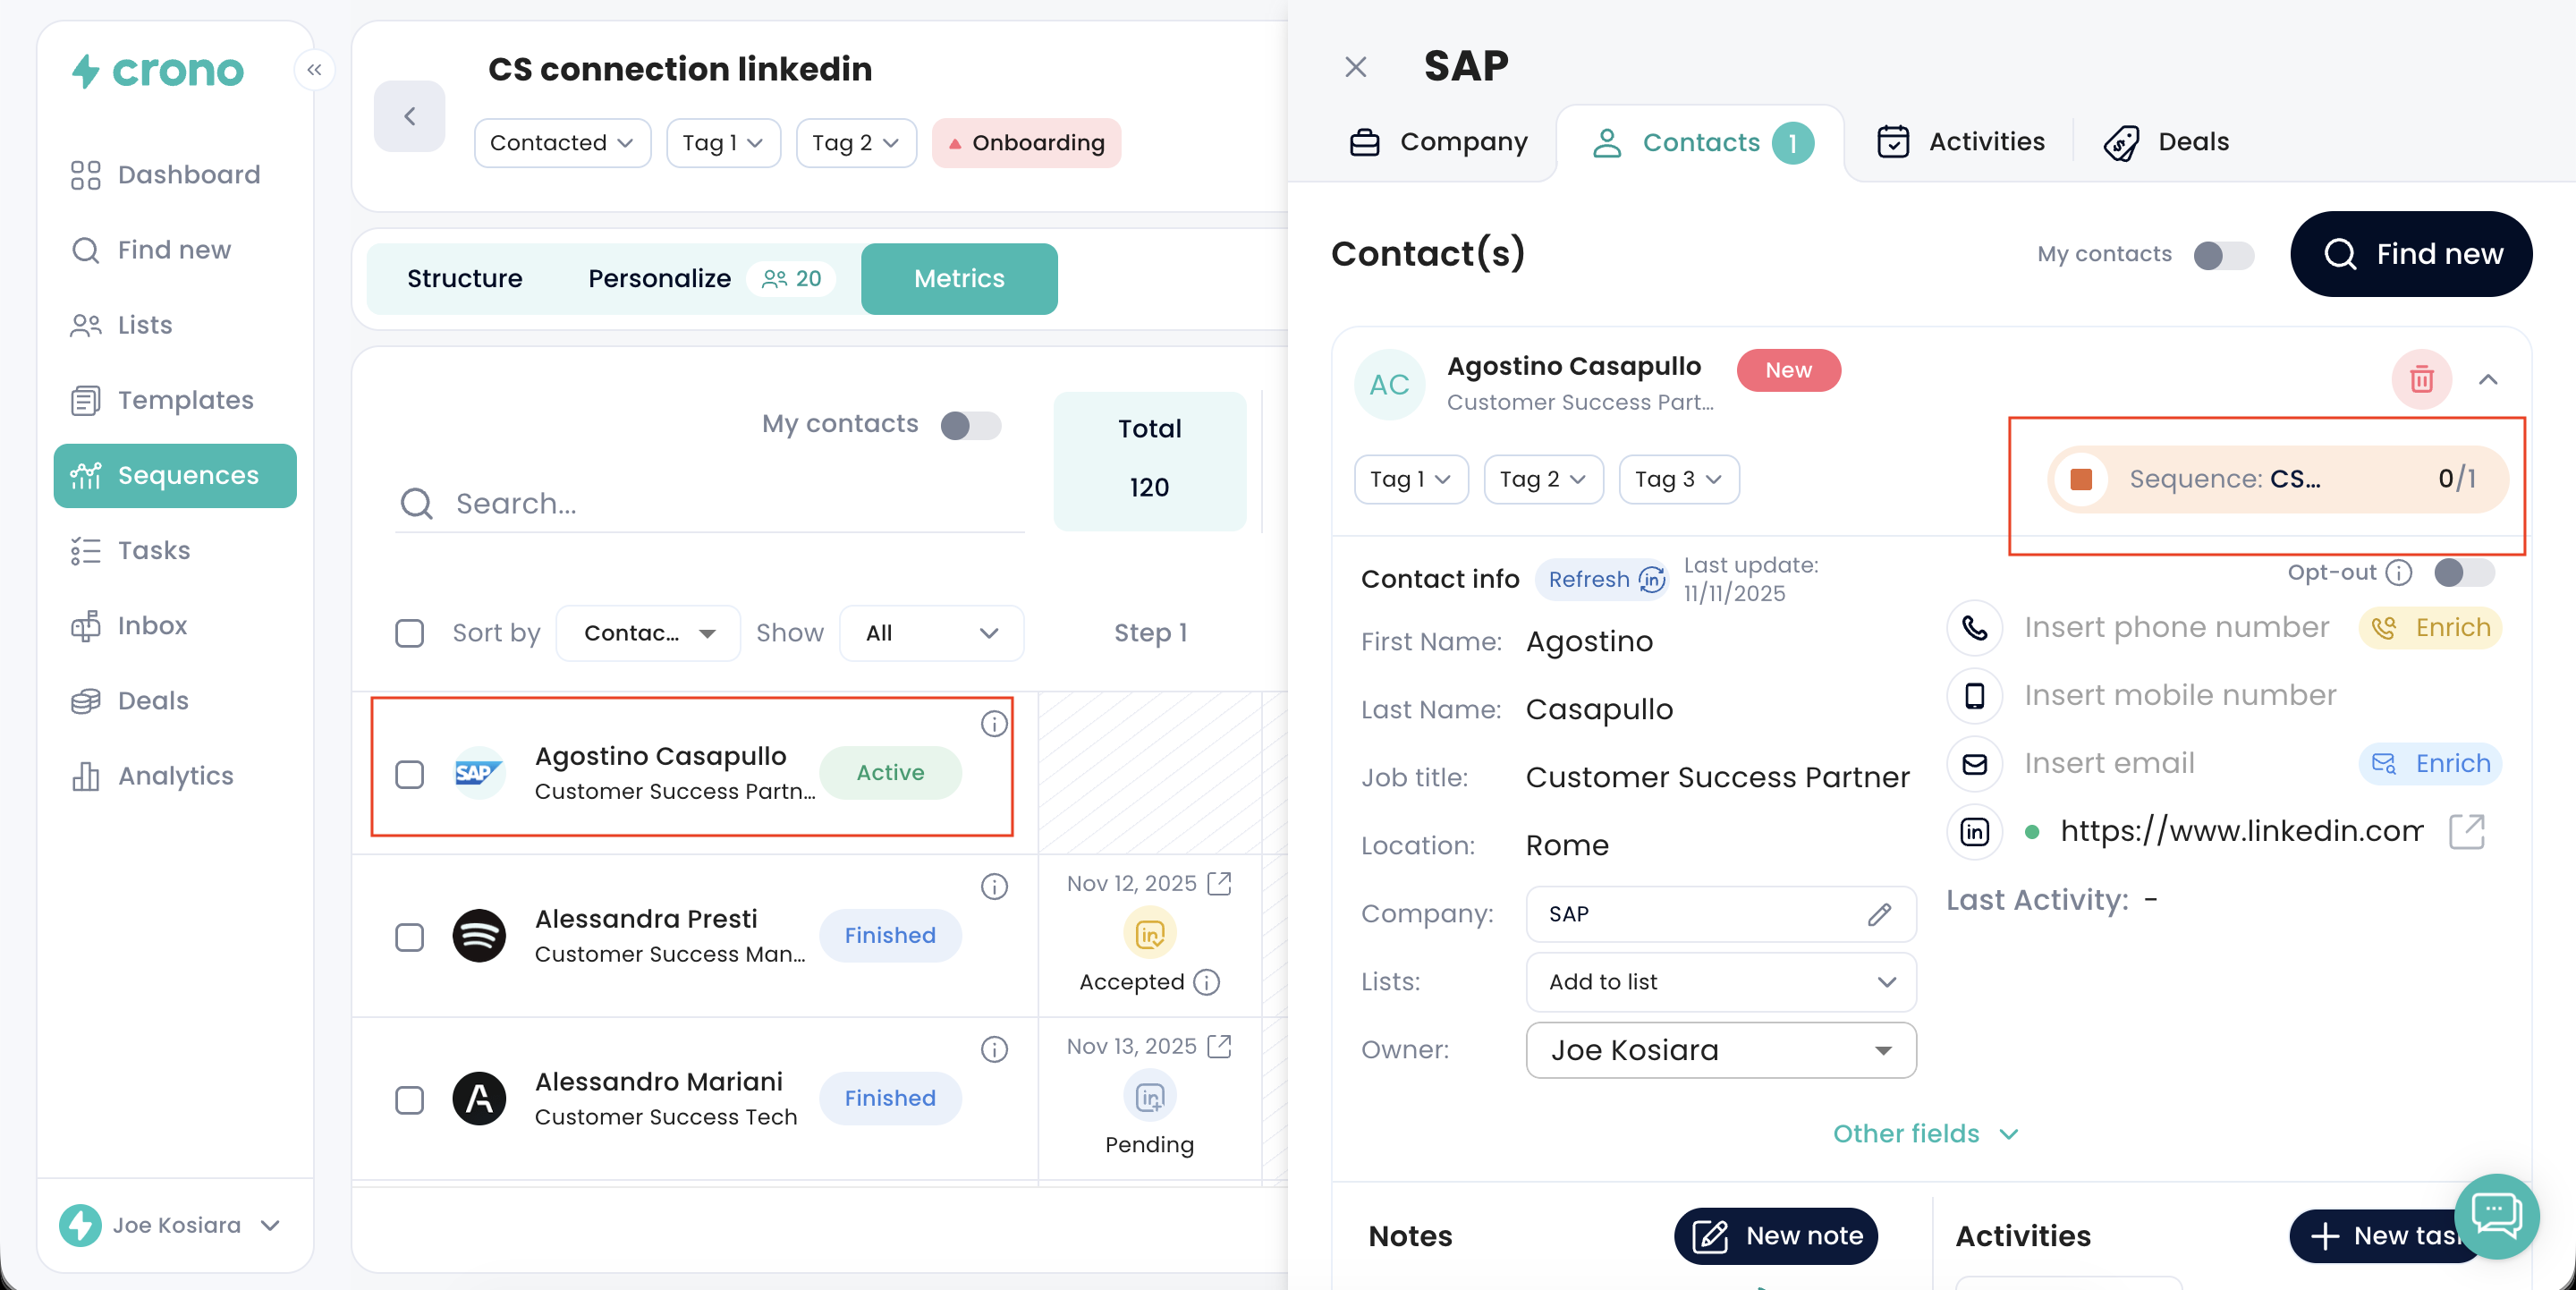
Find the contact you want to stop, and click on his/her name and surname to open the contact card
Click Stop on the sequence (the stop icon) next to their name
The contact will immediately stop receiving future steps of that sequence. They stay enrolled in the sequence with the status Stopped.
You can also stop multiple contacts at once.
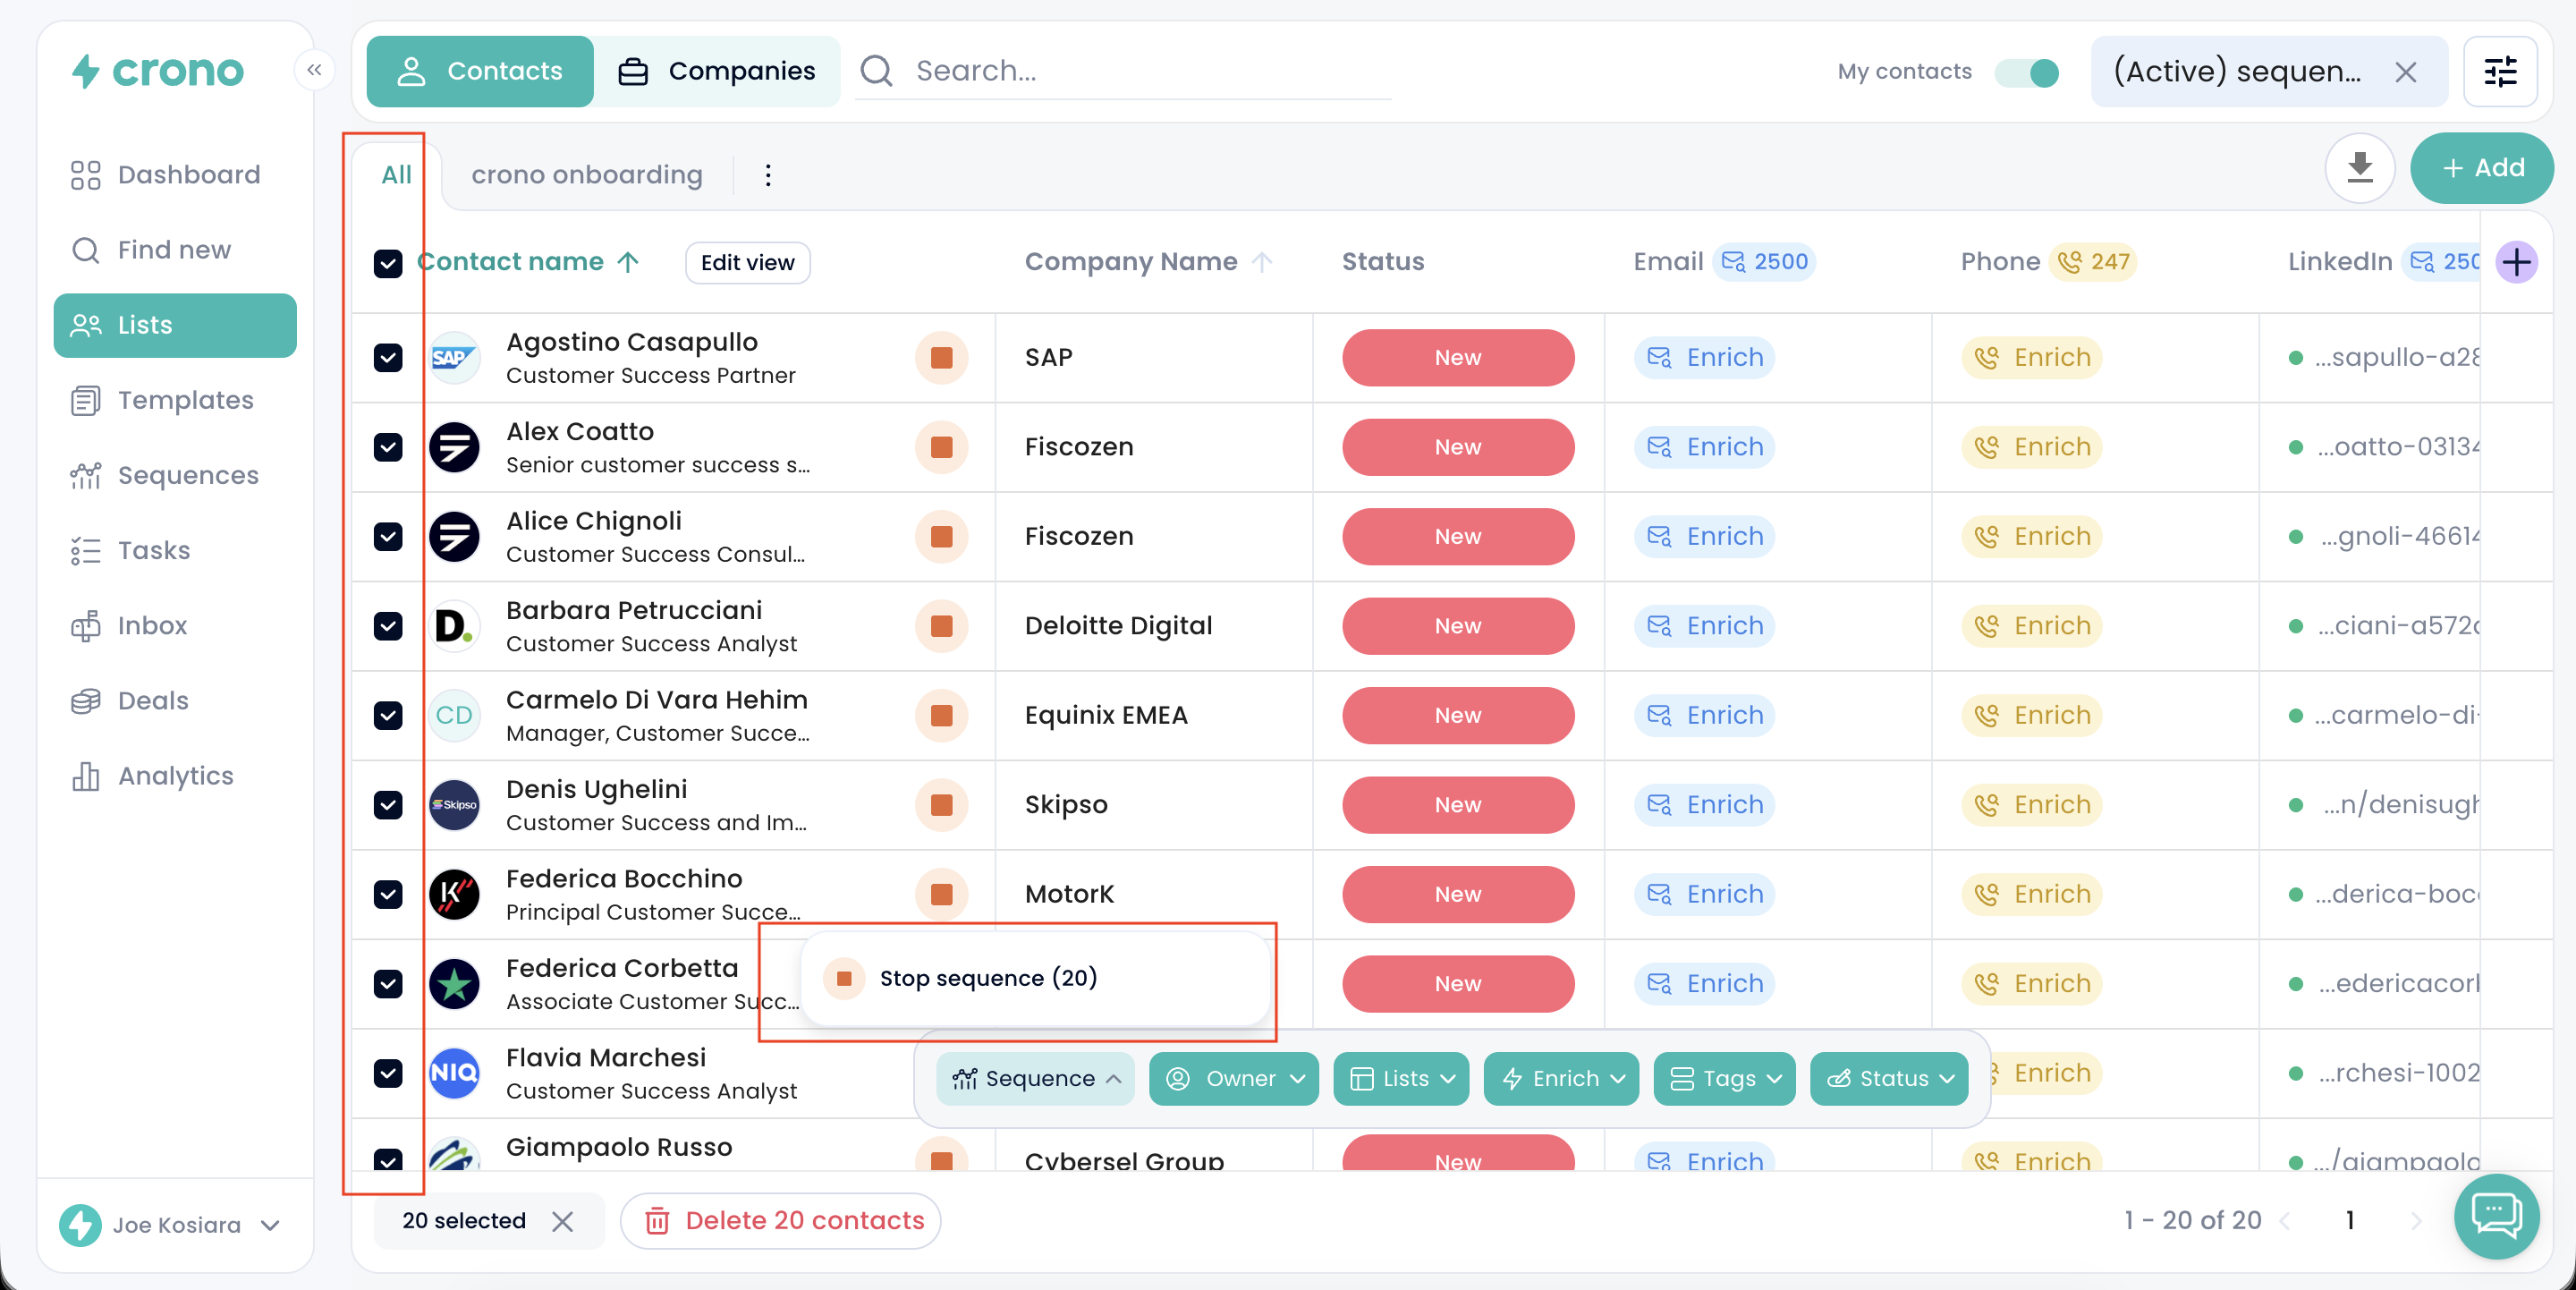
Bulk stop happens on a different page from the steps above. The Sequences page has no bulk actions at all, so you need to leave it and go to the Lists page instead.
To bulk stop contacts:
Go to the Lists page.
Open the Contacts tab.
Tick the checkboxes of the contacts you want to stop.
In the bar that appears at the bottom, click Sequence.
Choose Stop sequence.
Click Apply.
All selected contacts stop receiving future steps at once. They stay enrolled in the sequence with the status Stopped — a bulk stop does not remove them from the sequence.
Stop sequence is the only bulk sequence action, so be careful with the two neighbouring actions in that bottom bar: Remove takes the contacts out of a list, not out of a sequence, and Delete contacts deletes the contacts themselves. Neither of them removes a contact from a sequence.
To take contacts out of a sequence in bulk, use the Remove contacts from a sequence steps below instead.
The contact will not receive any remaining steps from that sequence
The contact stays enrolled in the sequence, and their status in it changes to Stopped
Their past activity in the sequence remains visible
You can still manually message the contact outside of the sequence
If needed, you can reactivate them later by adding them back into the sequence or by selecting “resume sequence”
Removing a contact from a sequence is different from stopping them.
When you remove a contact, they are deleted from that sequence and will no longer appear as enrolled or stopped in it.
This can be useful if you want to clean up a sequence or make sure that certain contacts are not included if the sequence is restarted later.
For example, you may want to temporarily stop a sequence for all contacts, but you already know that some of them should not be included again in the future. In that case, removing those contacts from the sequence ensures they will not be part of it anymore.
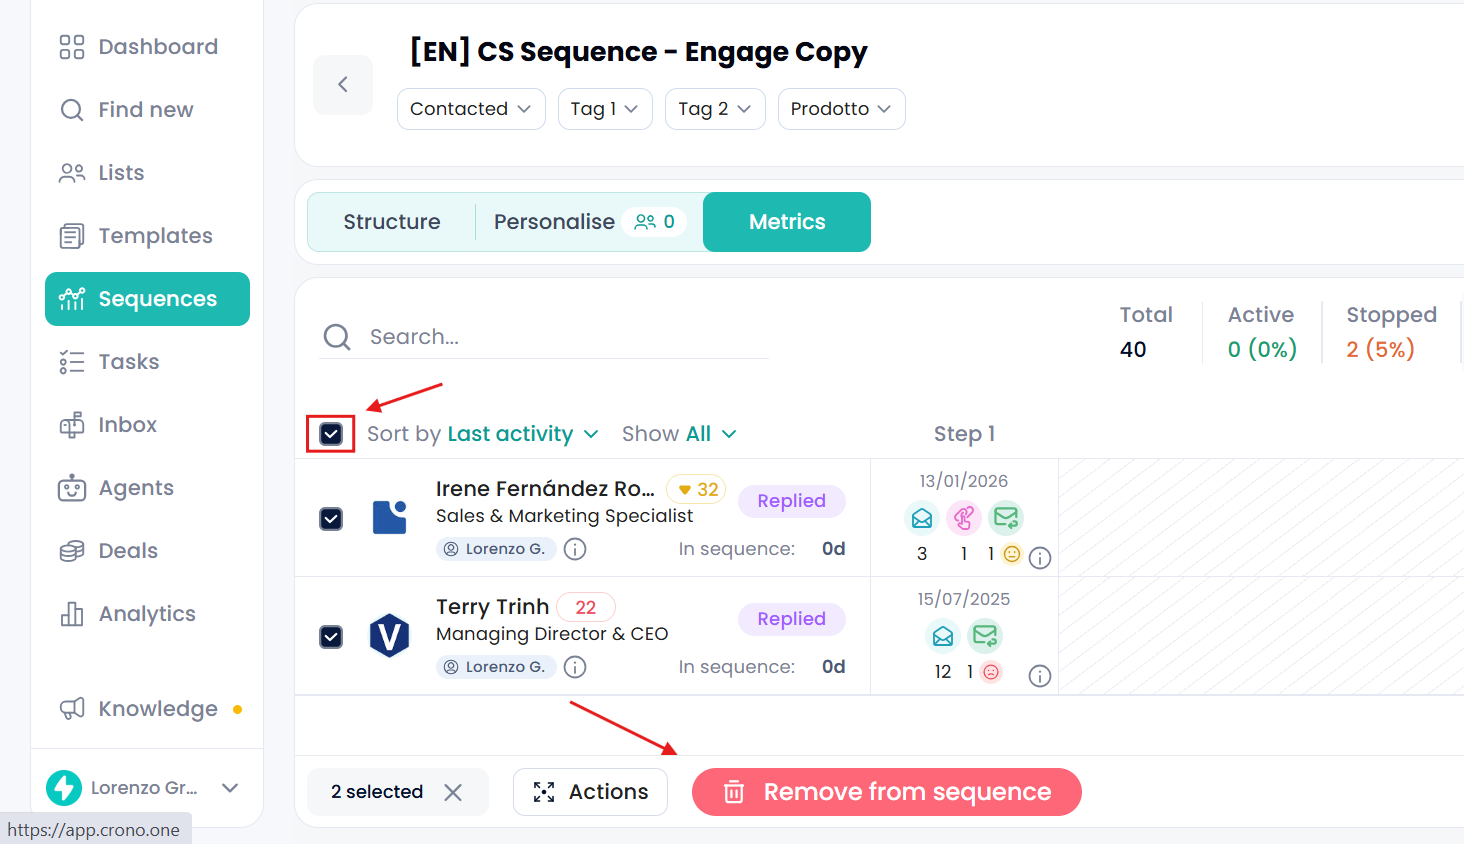
You can remove contacts from the Metrics page of the sequence.
To do this:
Go to the Sequences section.
Open the sequence where the contacts are currently enrolled.
Go to the Metrics page.
Select the contacts you want to remove using the checkboxes.
Click Remove from sequence at the bottom of the page.
Confirm your choice.
The selected contacts will be removed from the sequence.
You can also remove a contact from a sequence directly from their contact card.
To do this:
Open the contact card of a contact currently enrolled in a sequence.
In the top-right corner of the card, click the name of the sequence the contact is enrolled in.
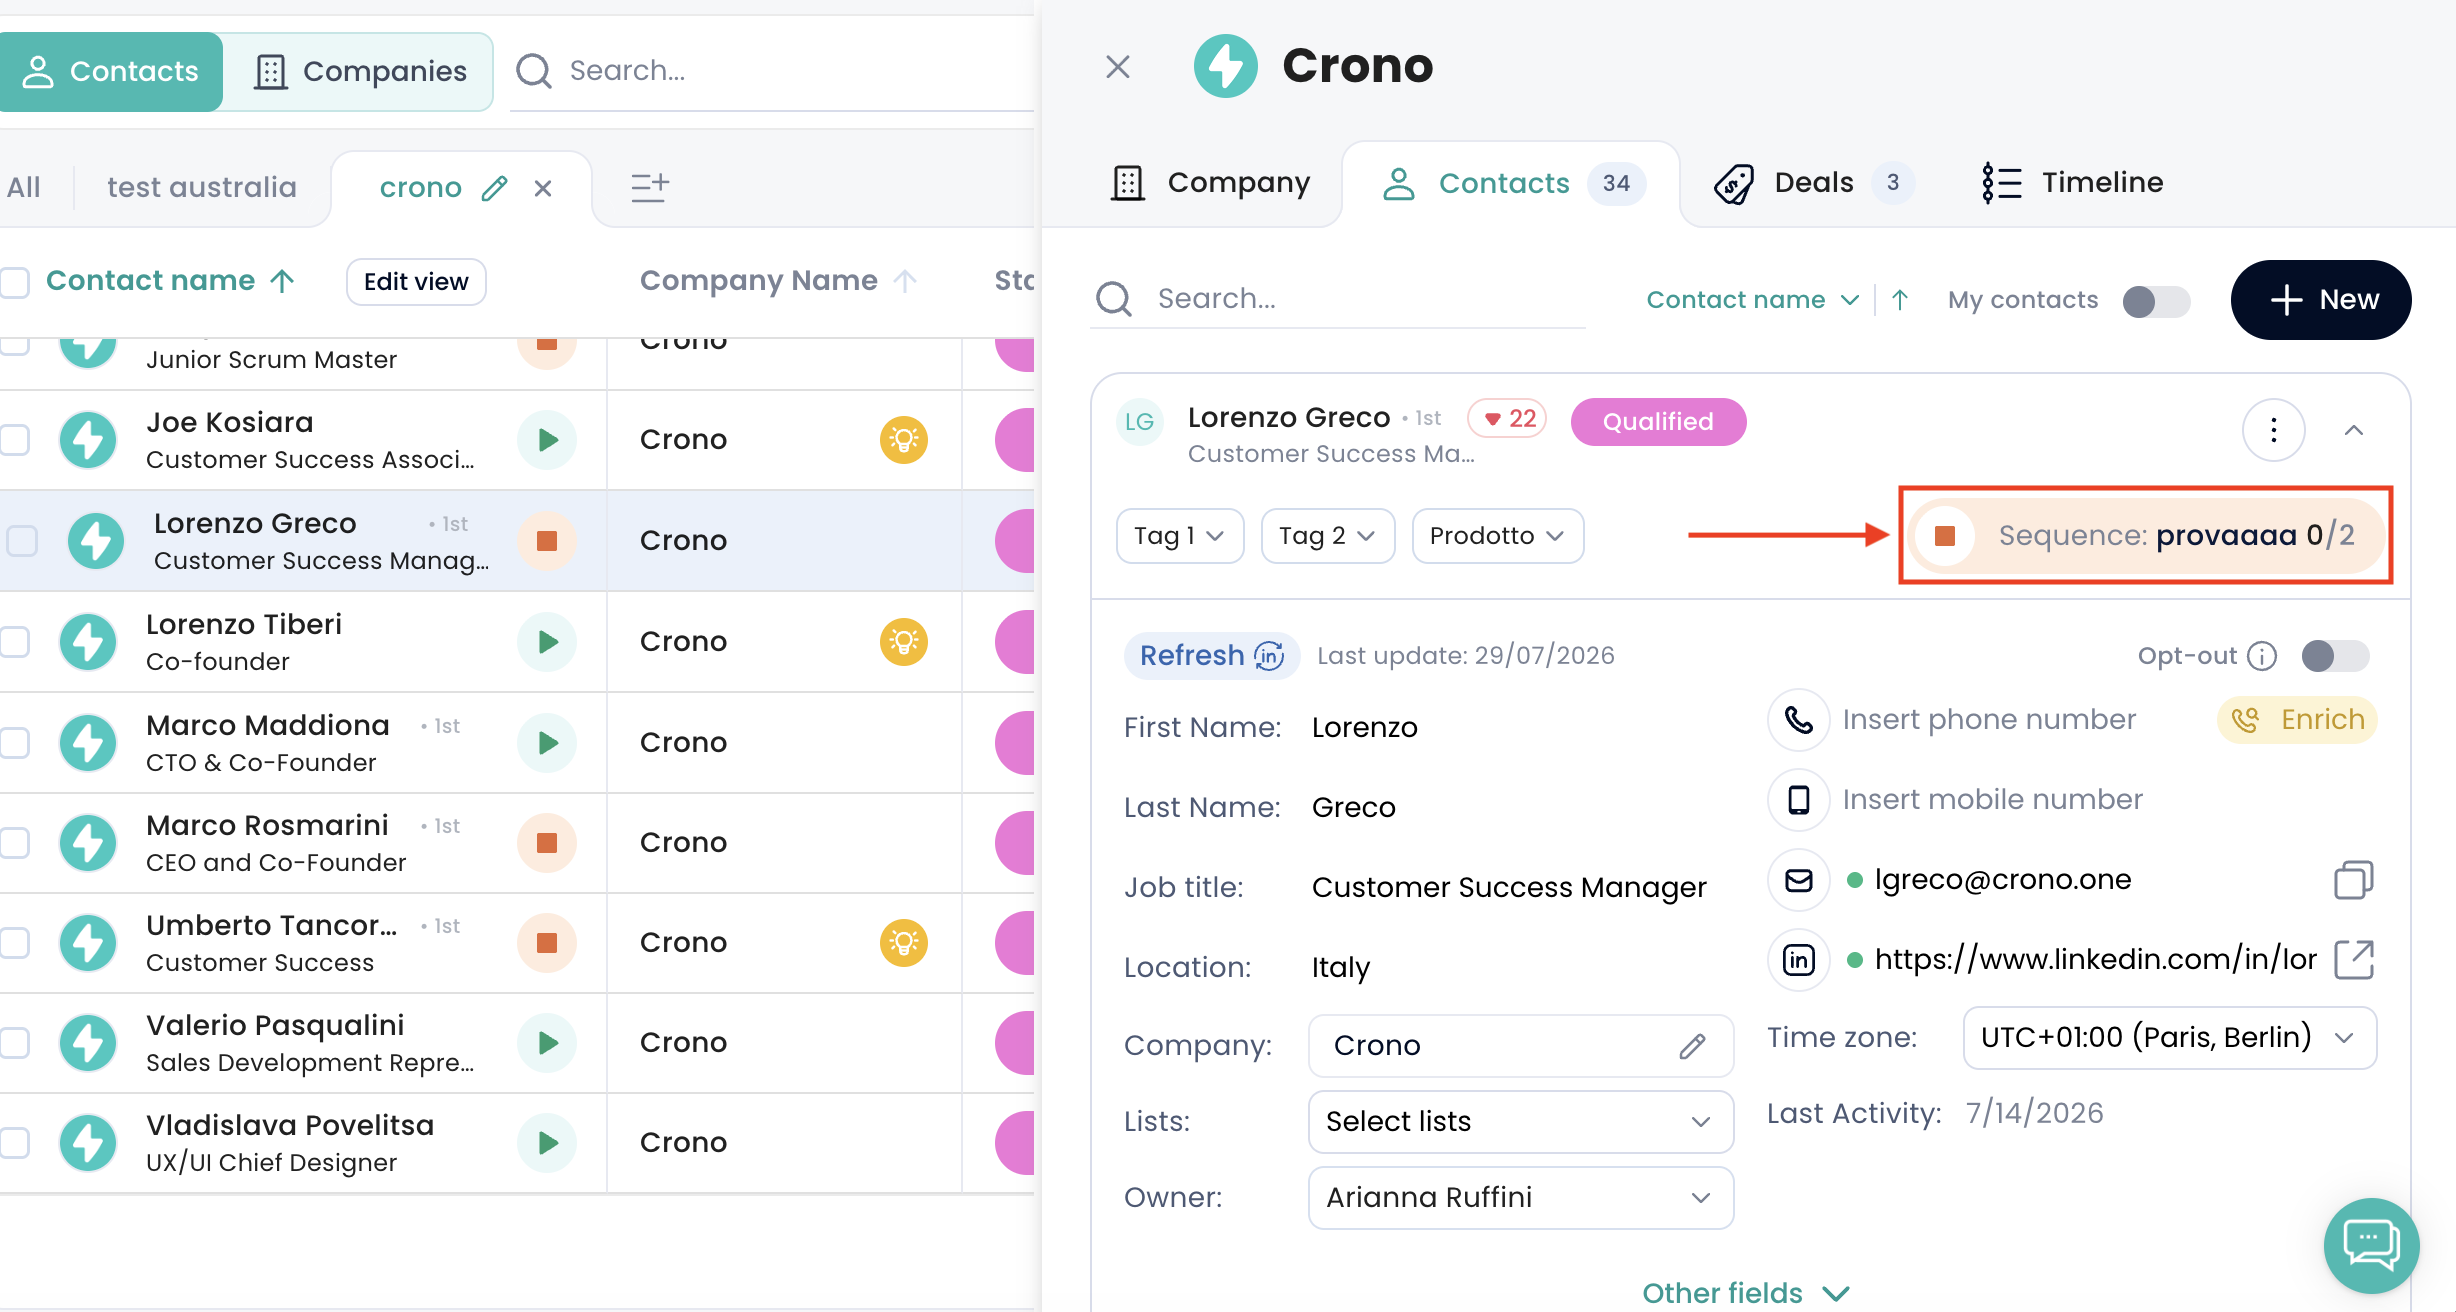
Click the trash bin icon that appears in the top-right corner.
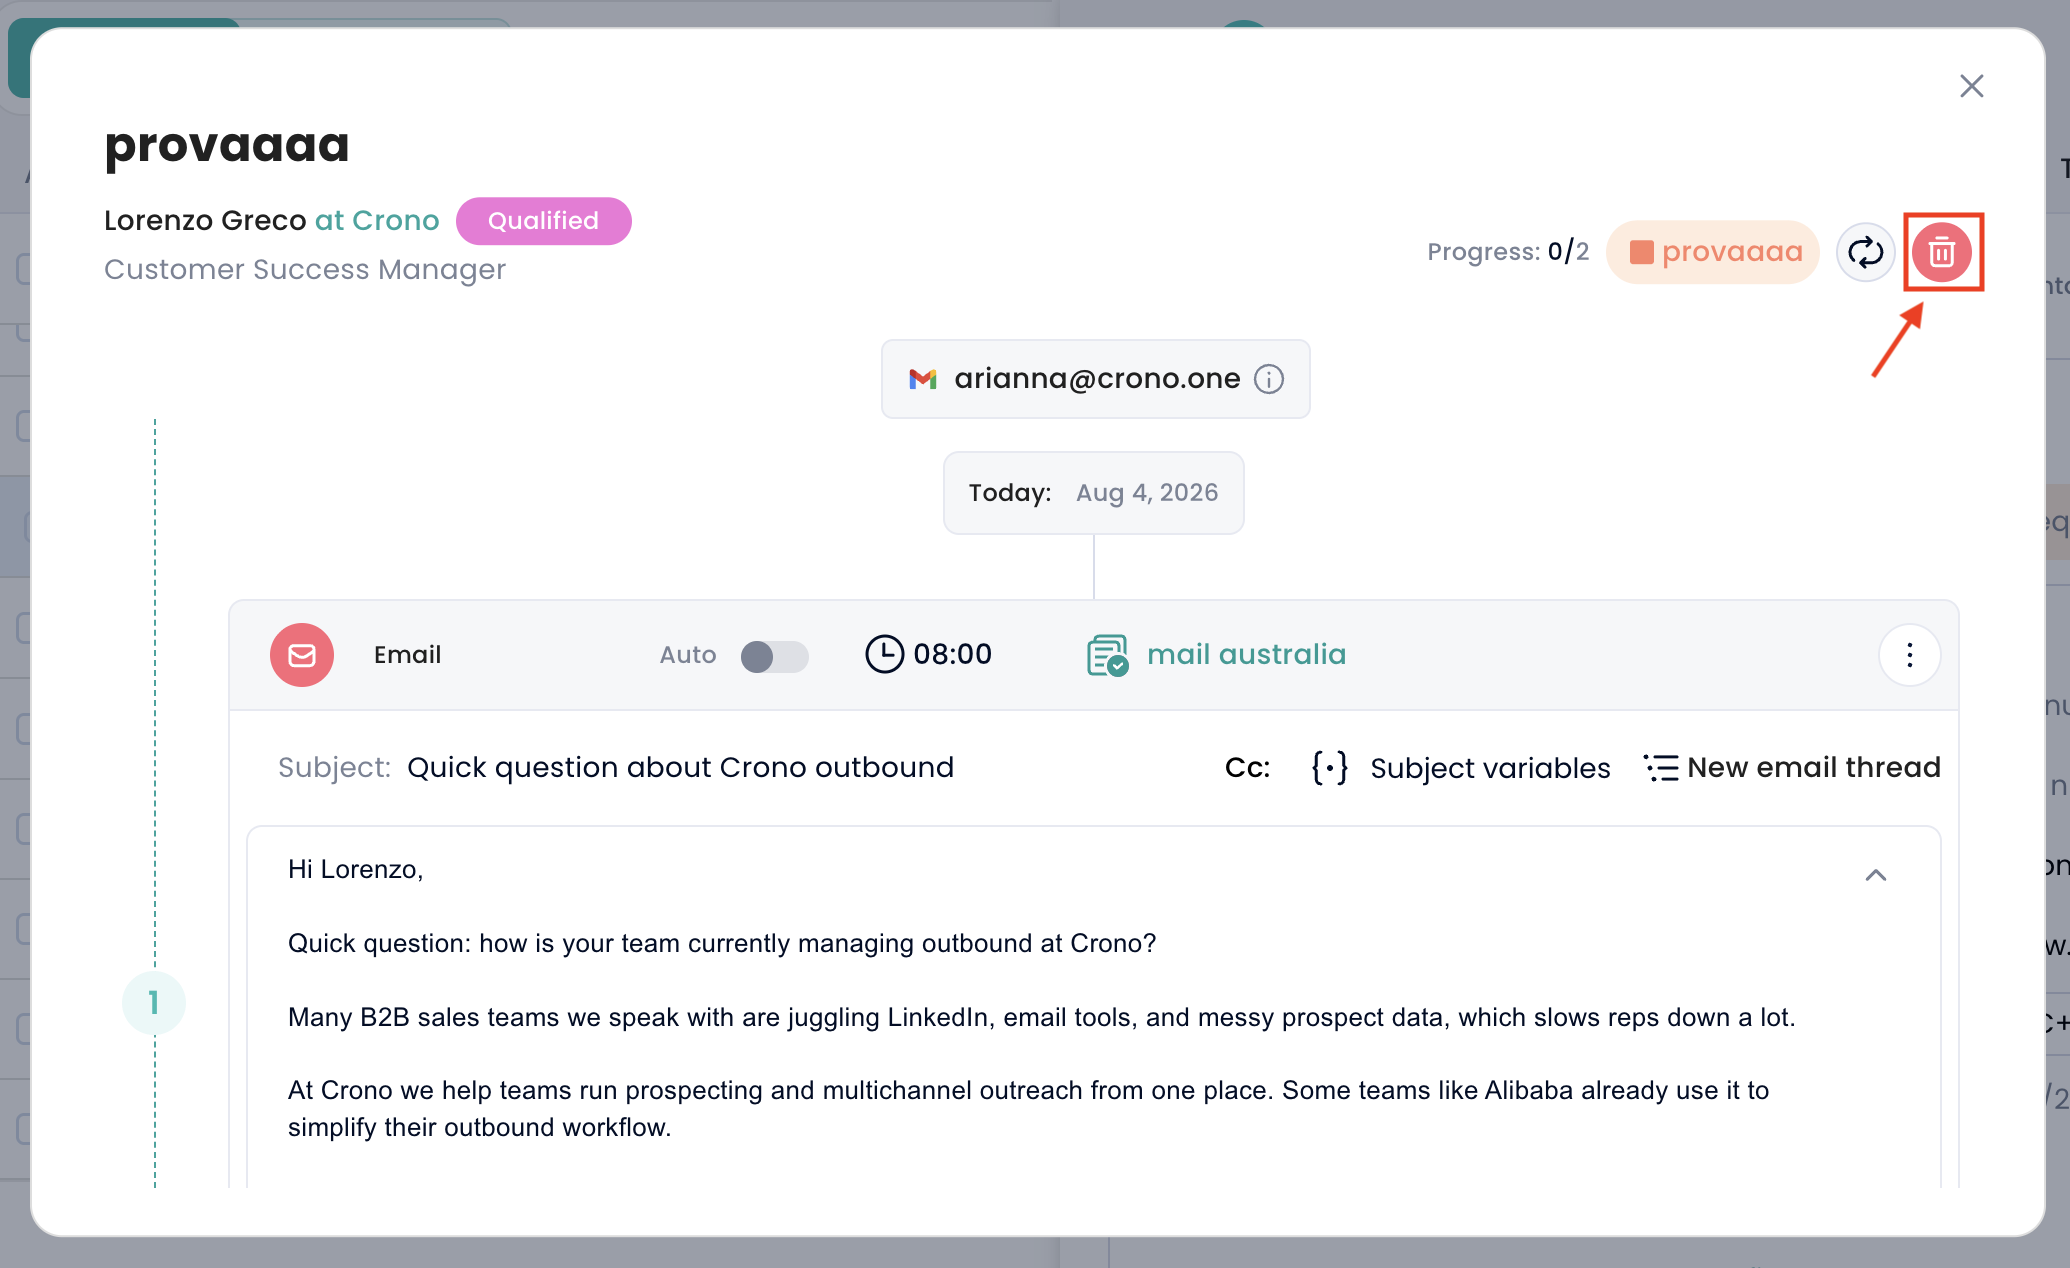
The contact will be removed from that sequence.
When you remove a contact from a sequence, all sequence-related data for that contact is removed from the sequence view.
This means the contact will no longer appear as enrolled, stopped, or active in that sequence.
However, the previous sequence activities will remain logged in the contact’s activity history, inside the contact card.
