If your email provider is not Gmail or Outlook, you can connect it to Crono using your custom SMTP and IMAP settings.
This setup lets you send and receive emails directly from Crono.
Open Crono.
Navigate to Account Settings → Integrations → Mailbox.
Click Add new.
In the modal that appears, select Other email provider.
Click Connect.
You’ll now see this form:
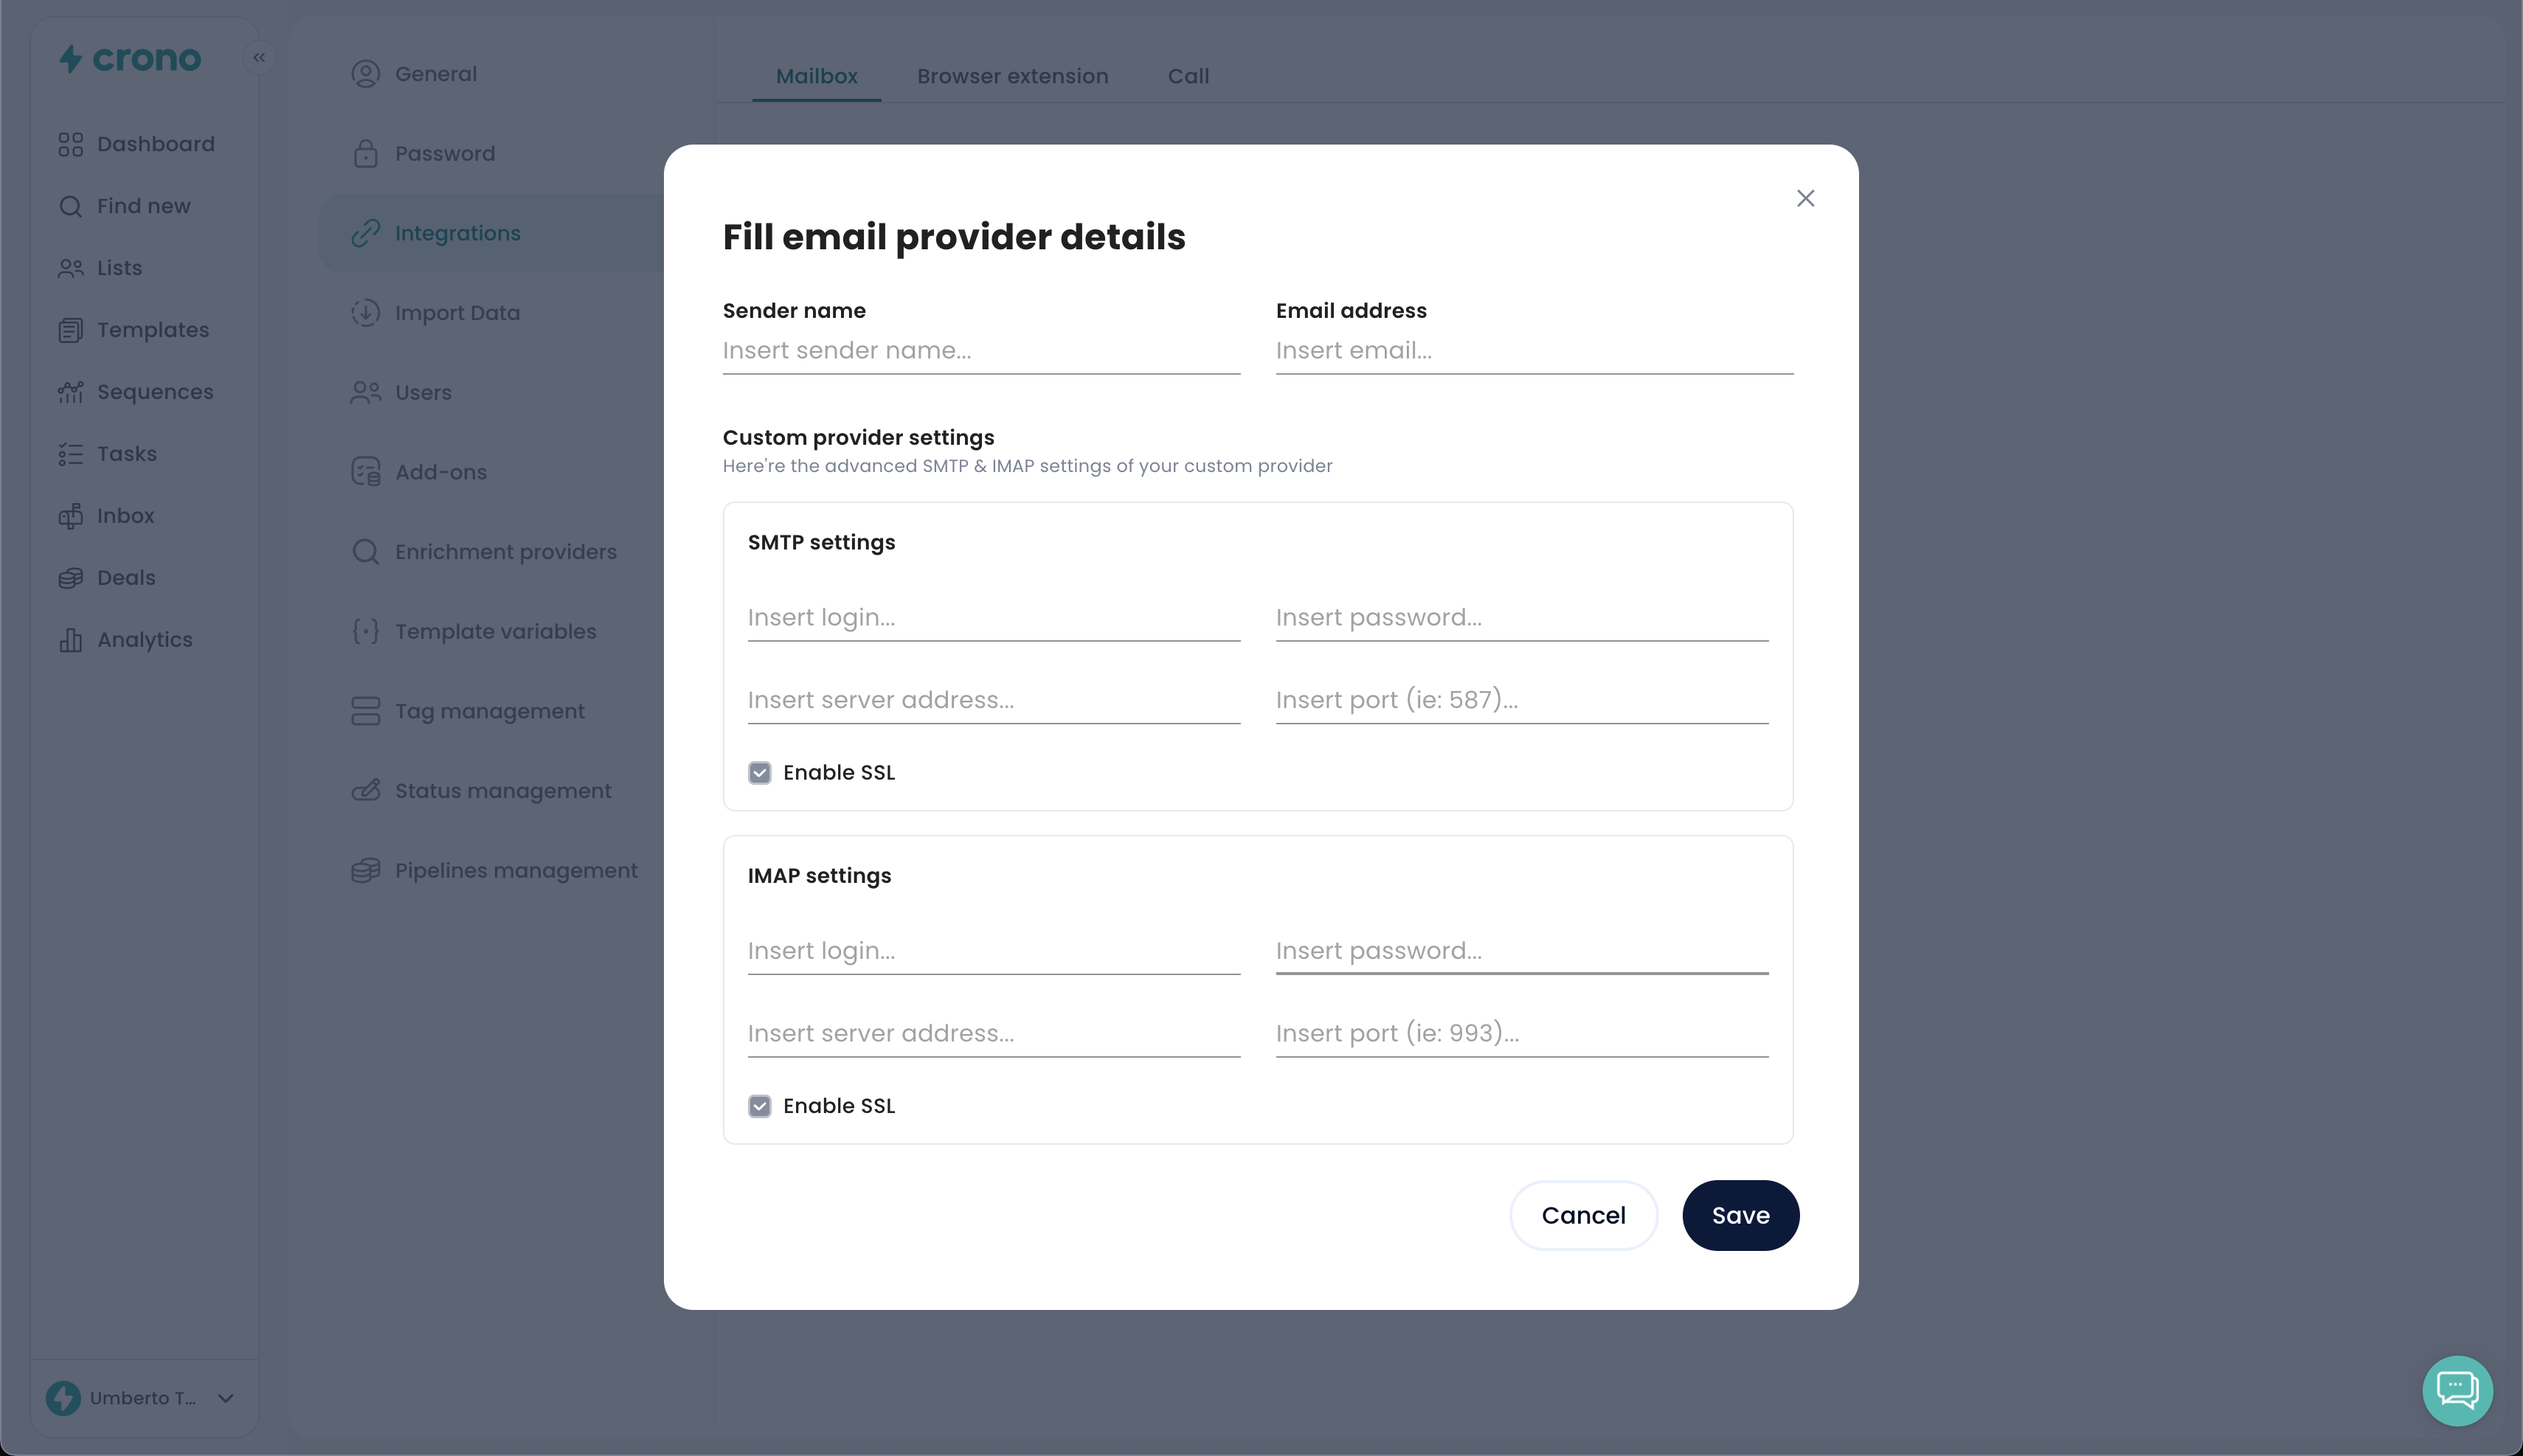
Fill in each field as follows:
Sender name: The name shown when you send emails from Crono
Email address: Your full email address
SMTP settings:
Login: Your full email address
Password: Your email password
Server address: SMTP host from your provider
Port: Usually 465
Enable SSL: Keep this checked if your provider supports SSL
IMAP settings:
Login: Your full email address
Password: Your email password
Server address: IMAP host from your provider
Port: Usually 993
Enable SSL: Keep this checked if your provider supports SSL
Once all fields are filled in, click Save.
Crono will verify your SMTP and IMAP configuration automatically.
If the connection is successful, your mailbox will appear in the list and start syncing.
If the connection fails, double-check:
Your email and password are correct.
You’re using the right ports and SSL/TLS settings.
IMAP access is enabled in your email account.
Provider | SMTP Host | SMTP Port | IMAP Host | IMAP Port |
Aruba | smtps.aruba.it | 465 | imaps.aruba.it | 993 |
Gmail | smtp.gmail.com | 587 | imap.gmail.com | 993 |
Hostinger | smtp.hostinger.com | 465 | imap.hostinger.com | 993 |
Fastmail | smtp.fastmail.com | 465 | imap.fastmail.com | 993 |
SiteGround | am6.siteground.biz | 465 | am6.siteground.biz | 993 |
Titan Email | smtp.titan.email | 465 | imap.titan.email | 993 |
If you’re unsure about your provider settings, feel free to contact us via chat
