This article explains how statuses work in Crono, how to update them manually, and how status lists are managed for both contacts and companies.
To have Crono change a status automatically when something happens, see Setting up Automations in Crono.
Statuses are labels that show the stage of a contact or company in your workflow. They help organize large lists, improve filtering, and give teams visibility into the progression of leads or accounts.
Each workspace can define its own list of statuses for:
Contacts
Companies
These two categories are independent, allowing different pipelines and workflows.
Open Contacts or Companies.
Locate the Status column.
Click the current status.
Select a new status from the dropdown.
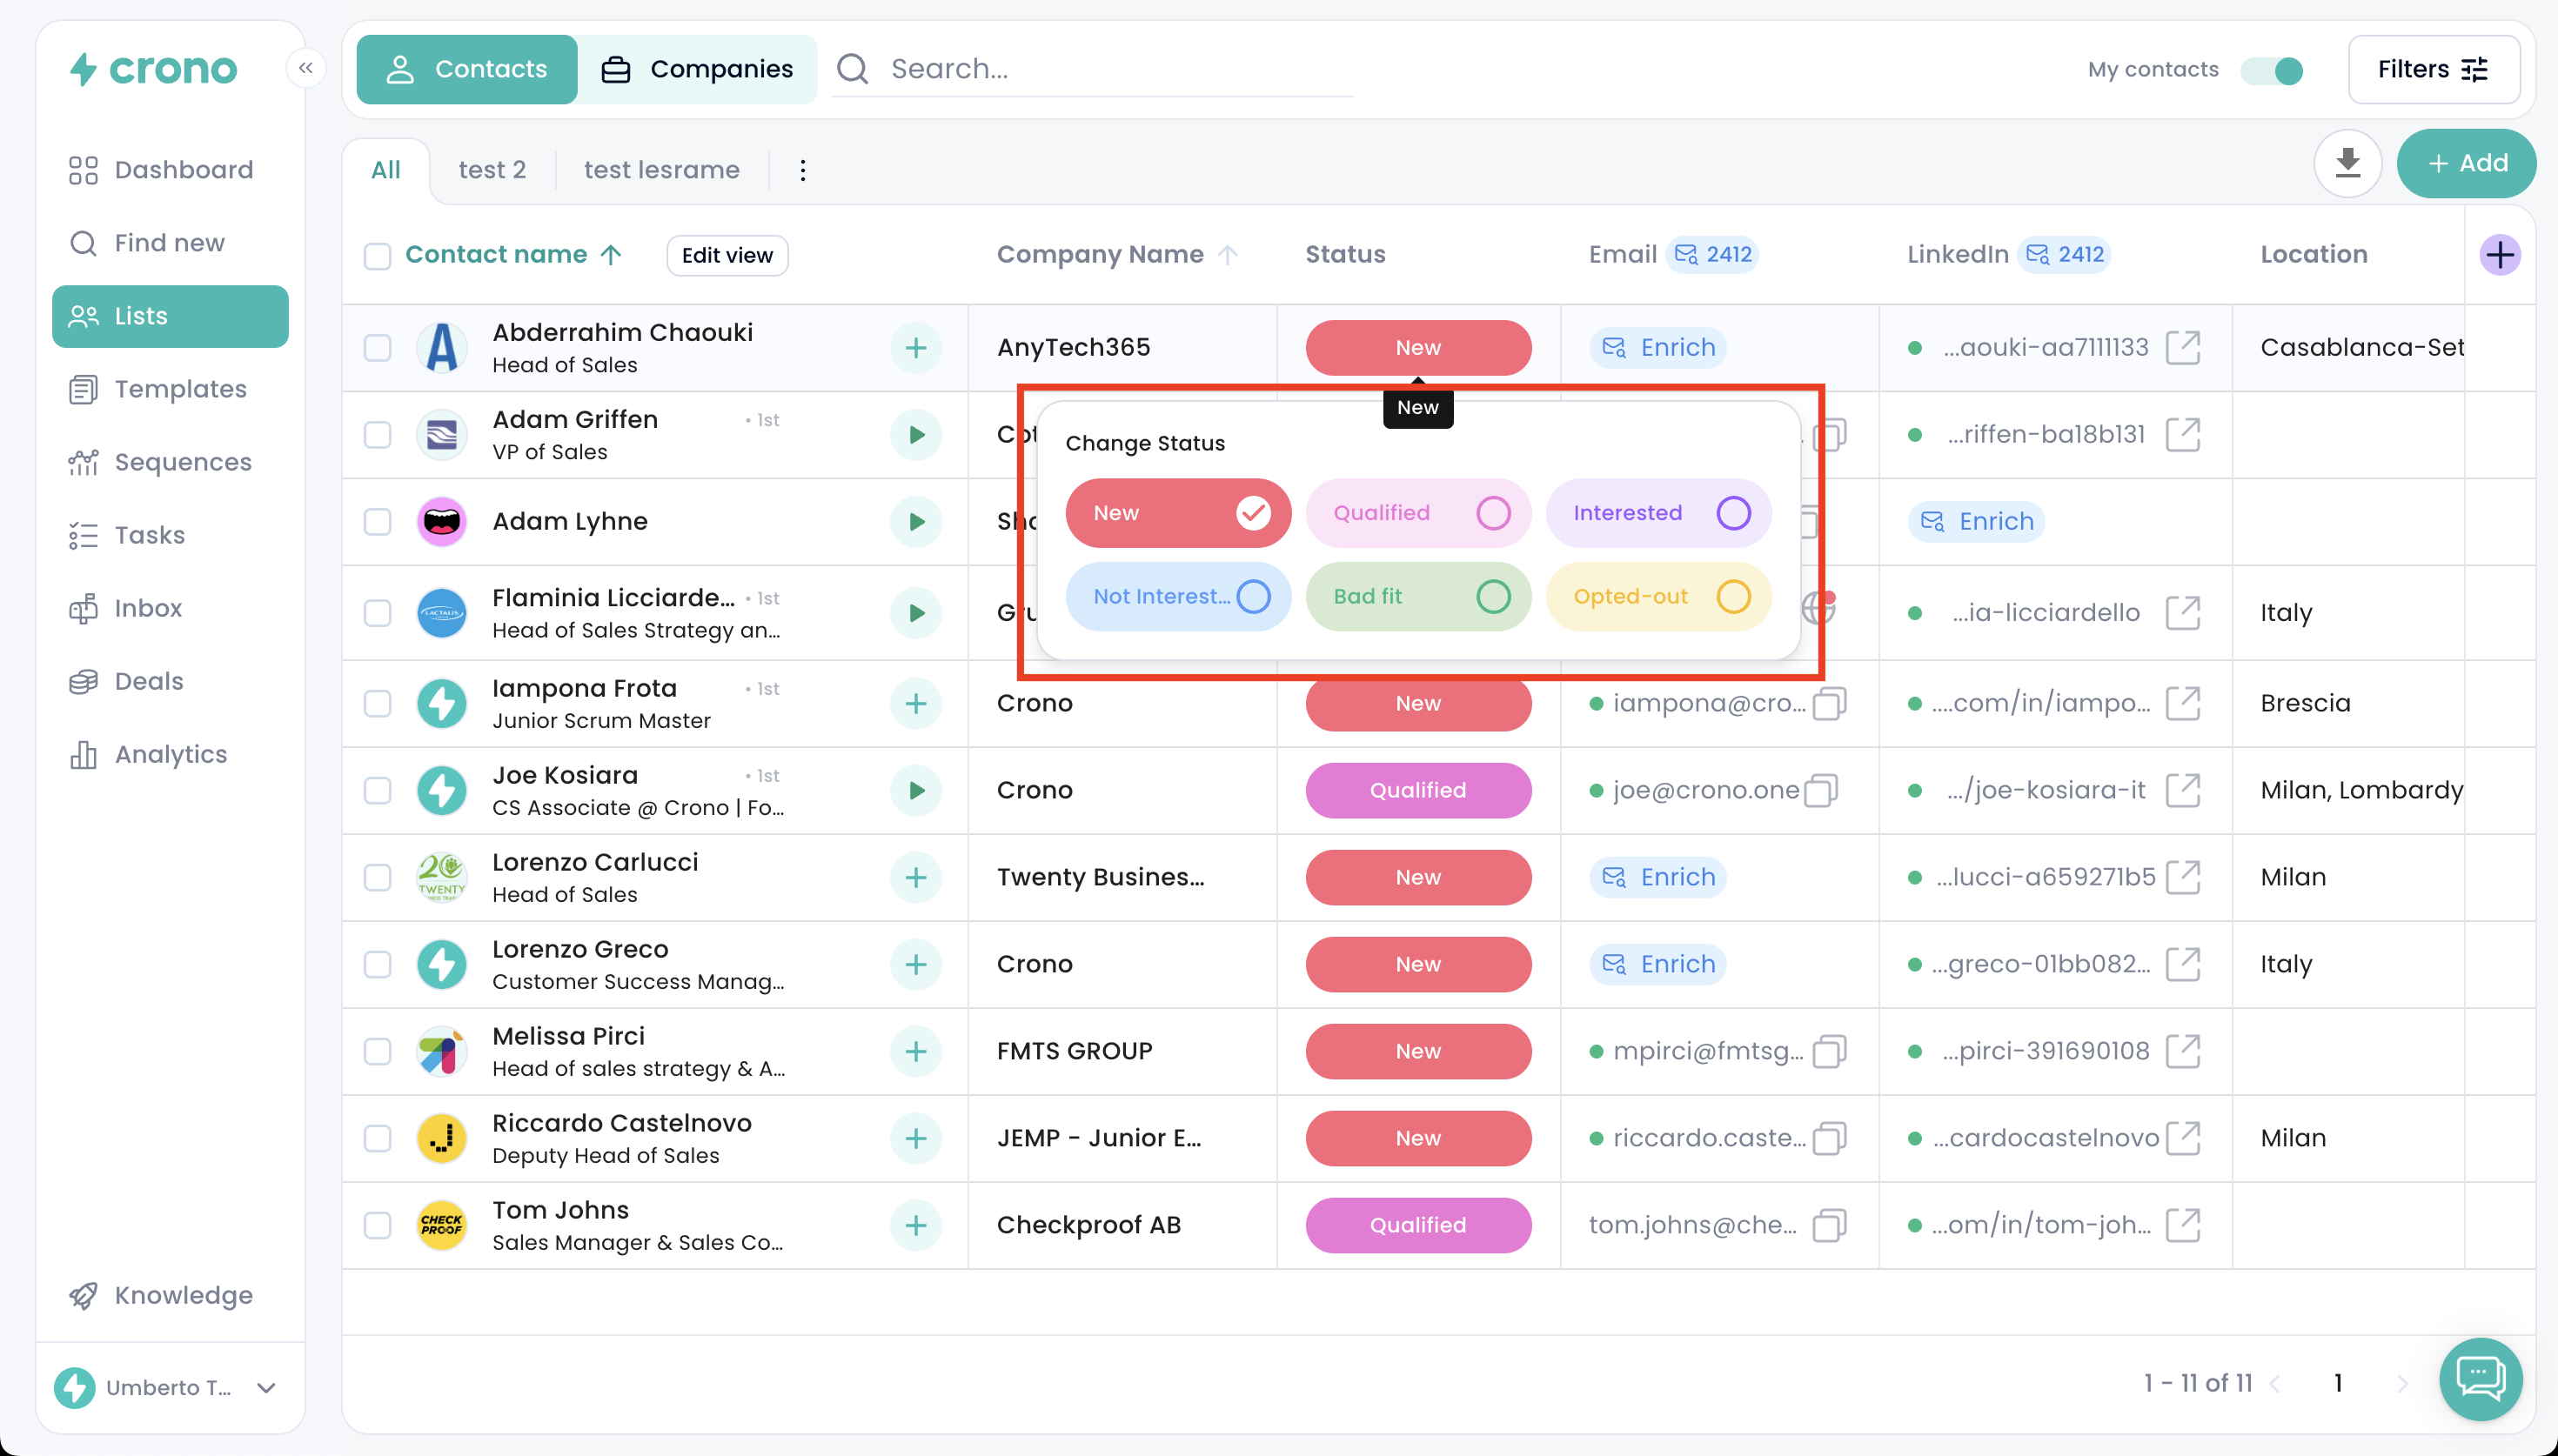
Updates save automatically.
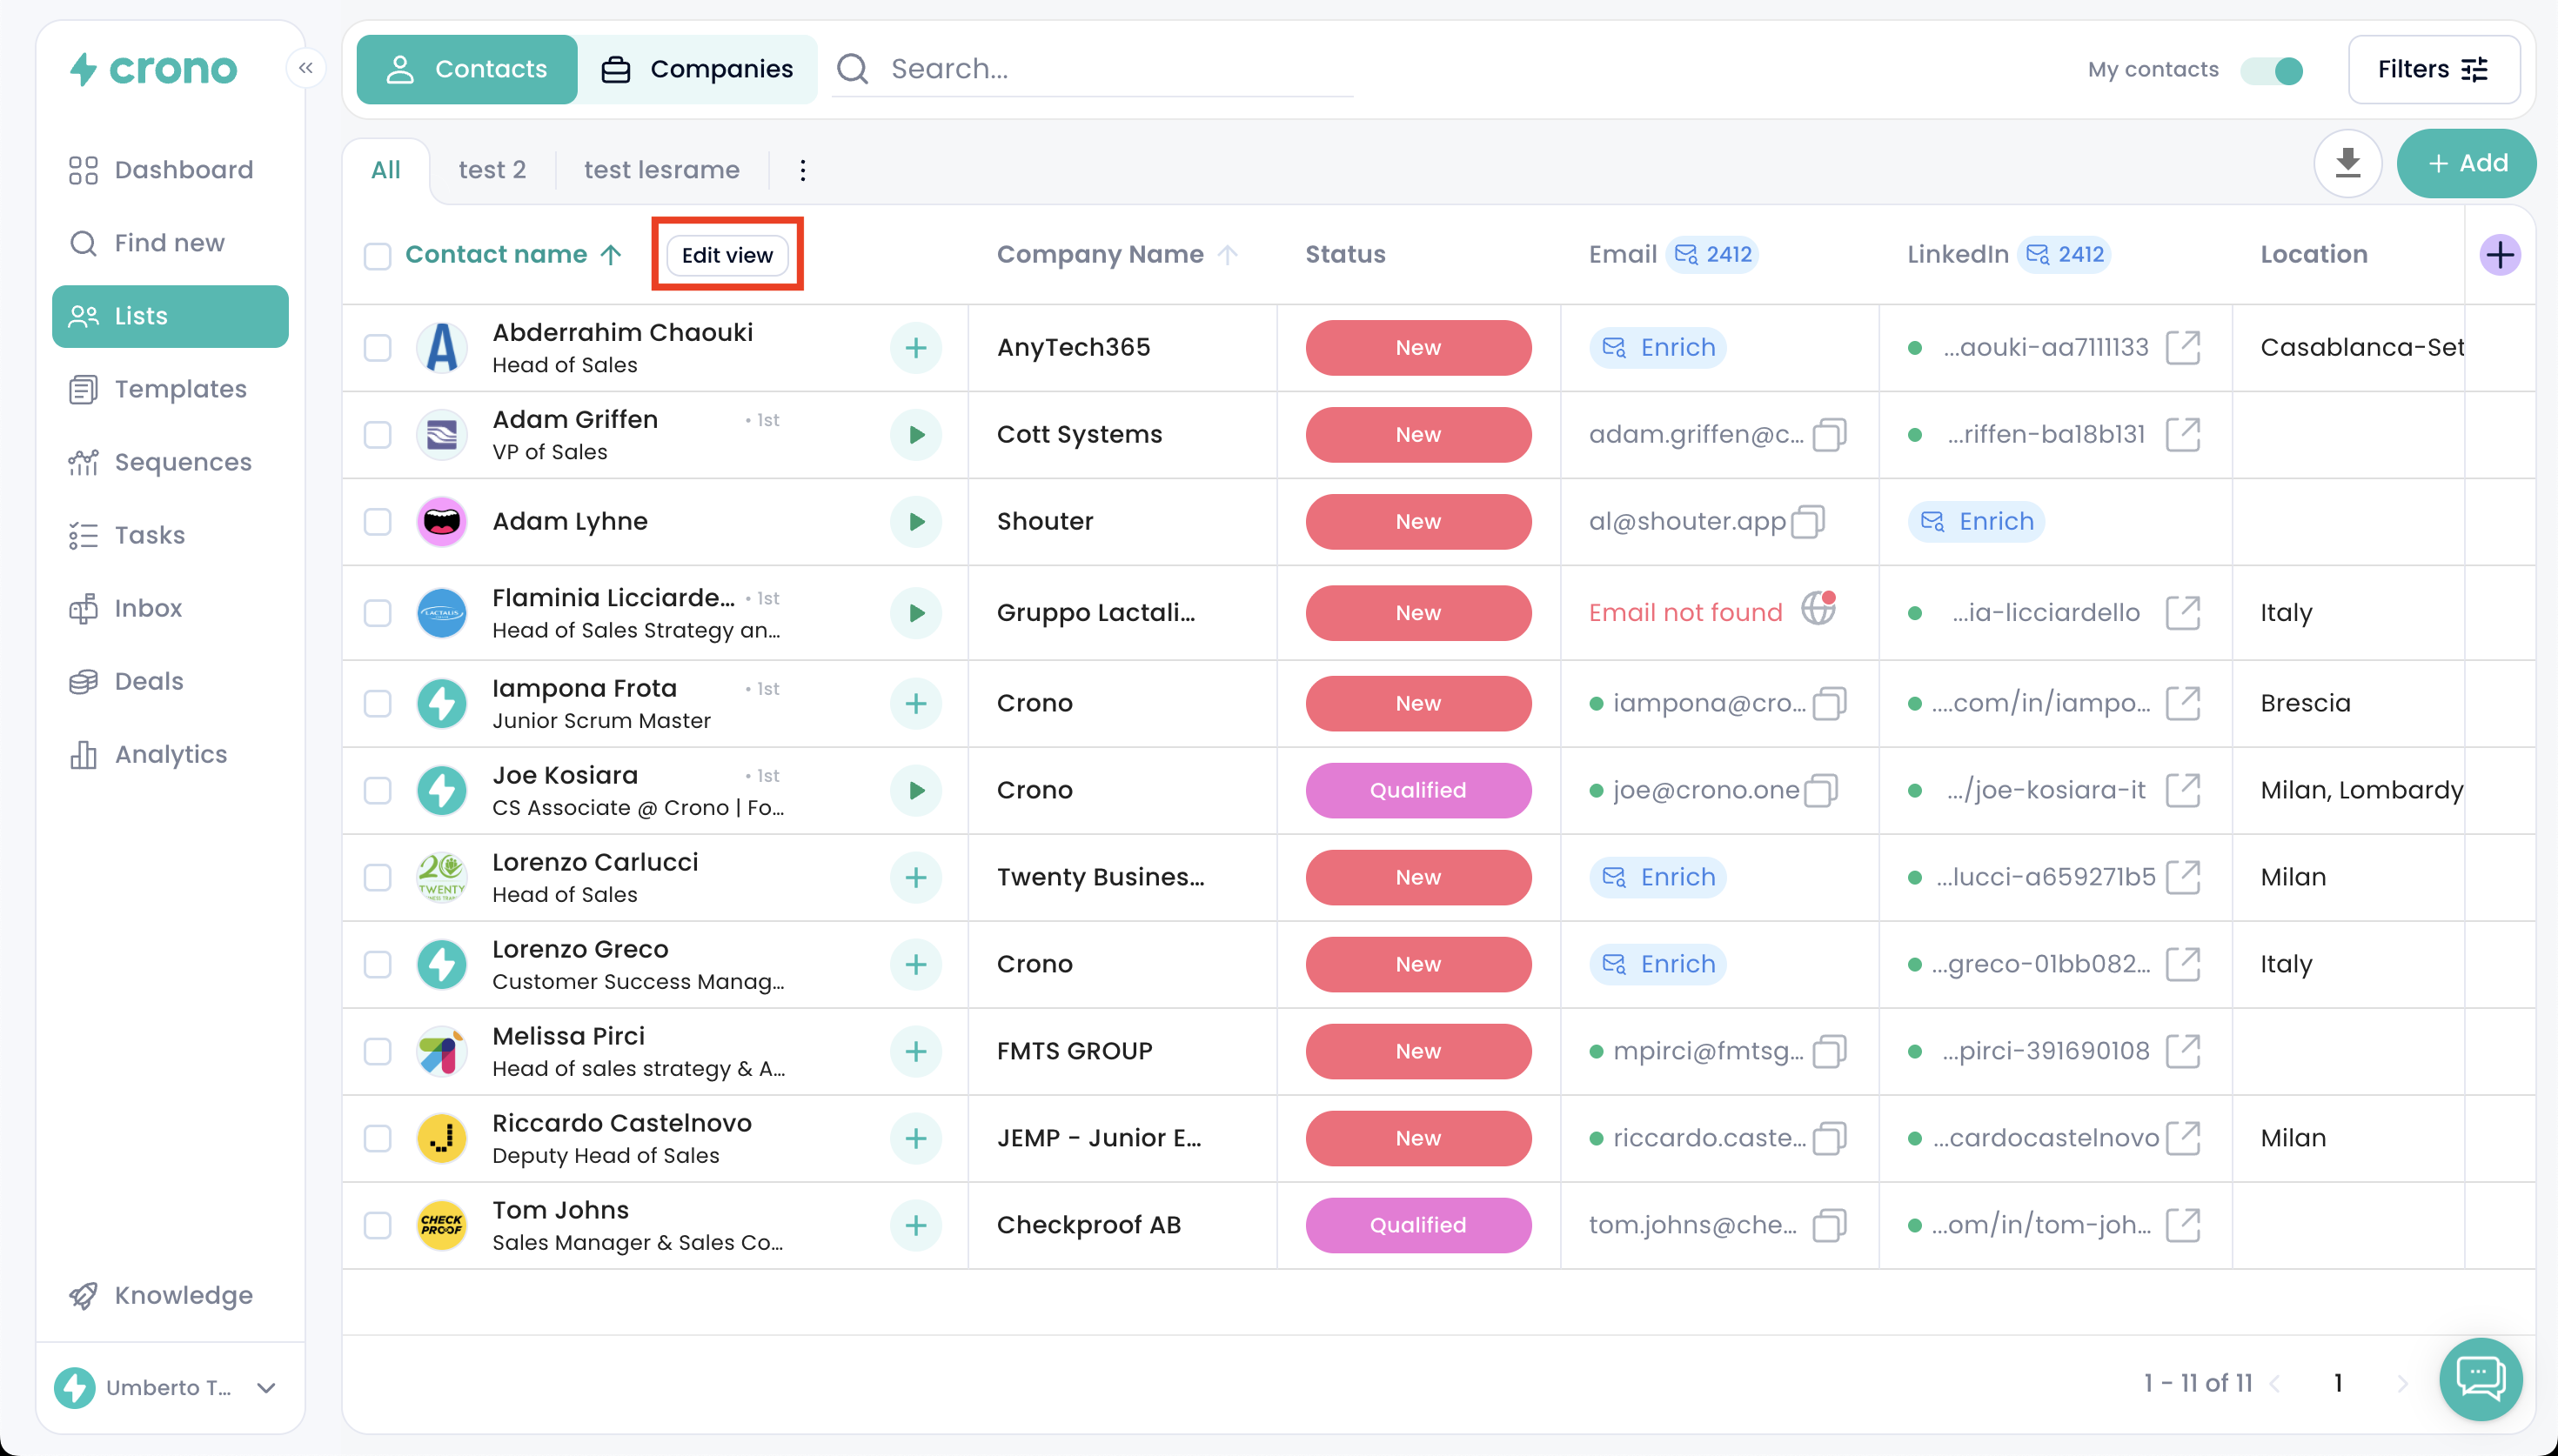
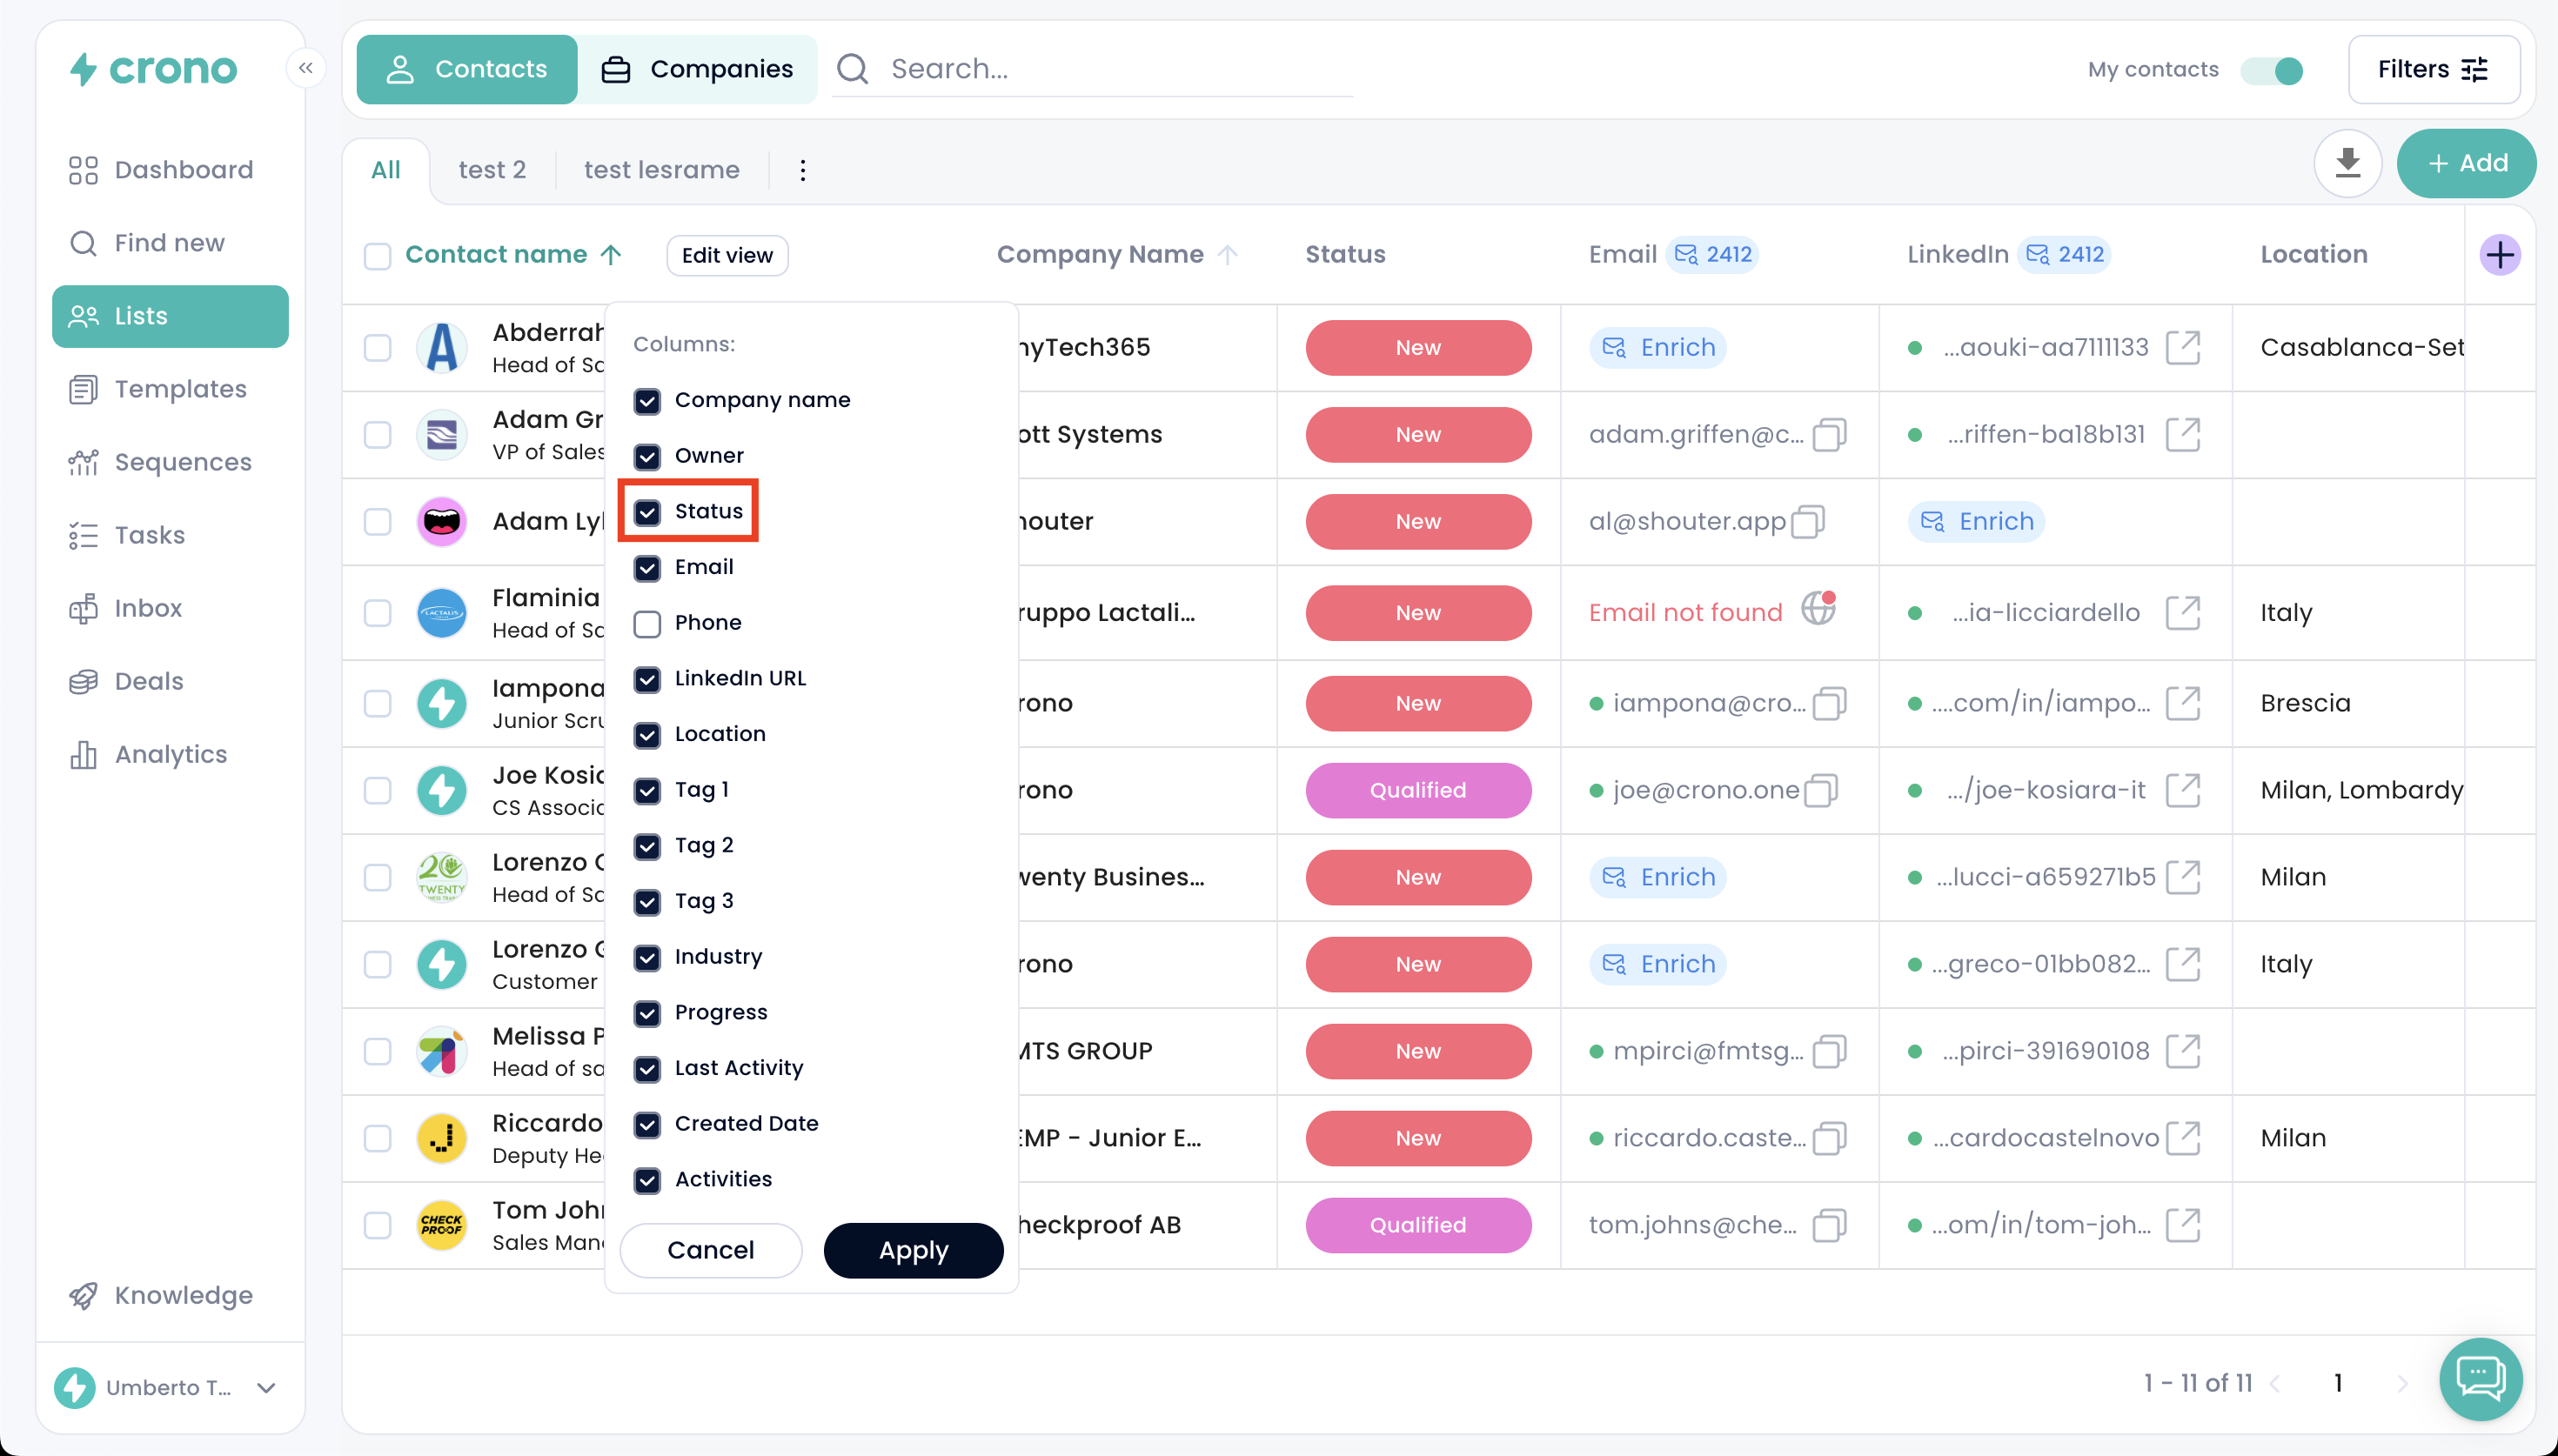
If you do not see the Status column in the list view, you can enable it by clicking the button Edit view at the top of the table. From there, you can show or hide any column, including Status.
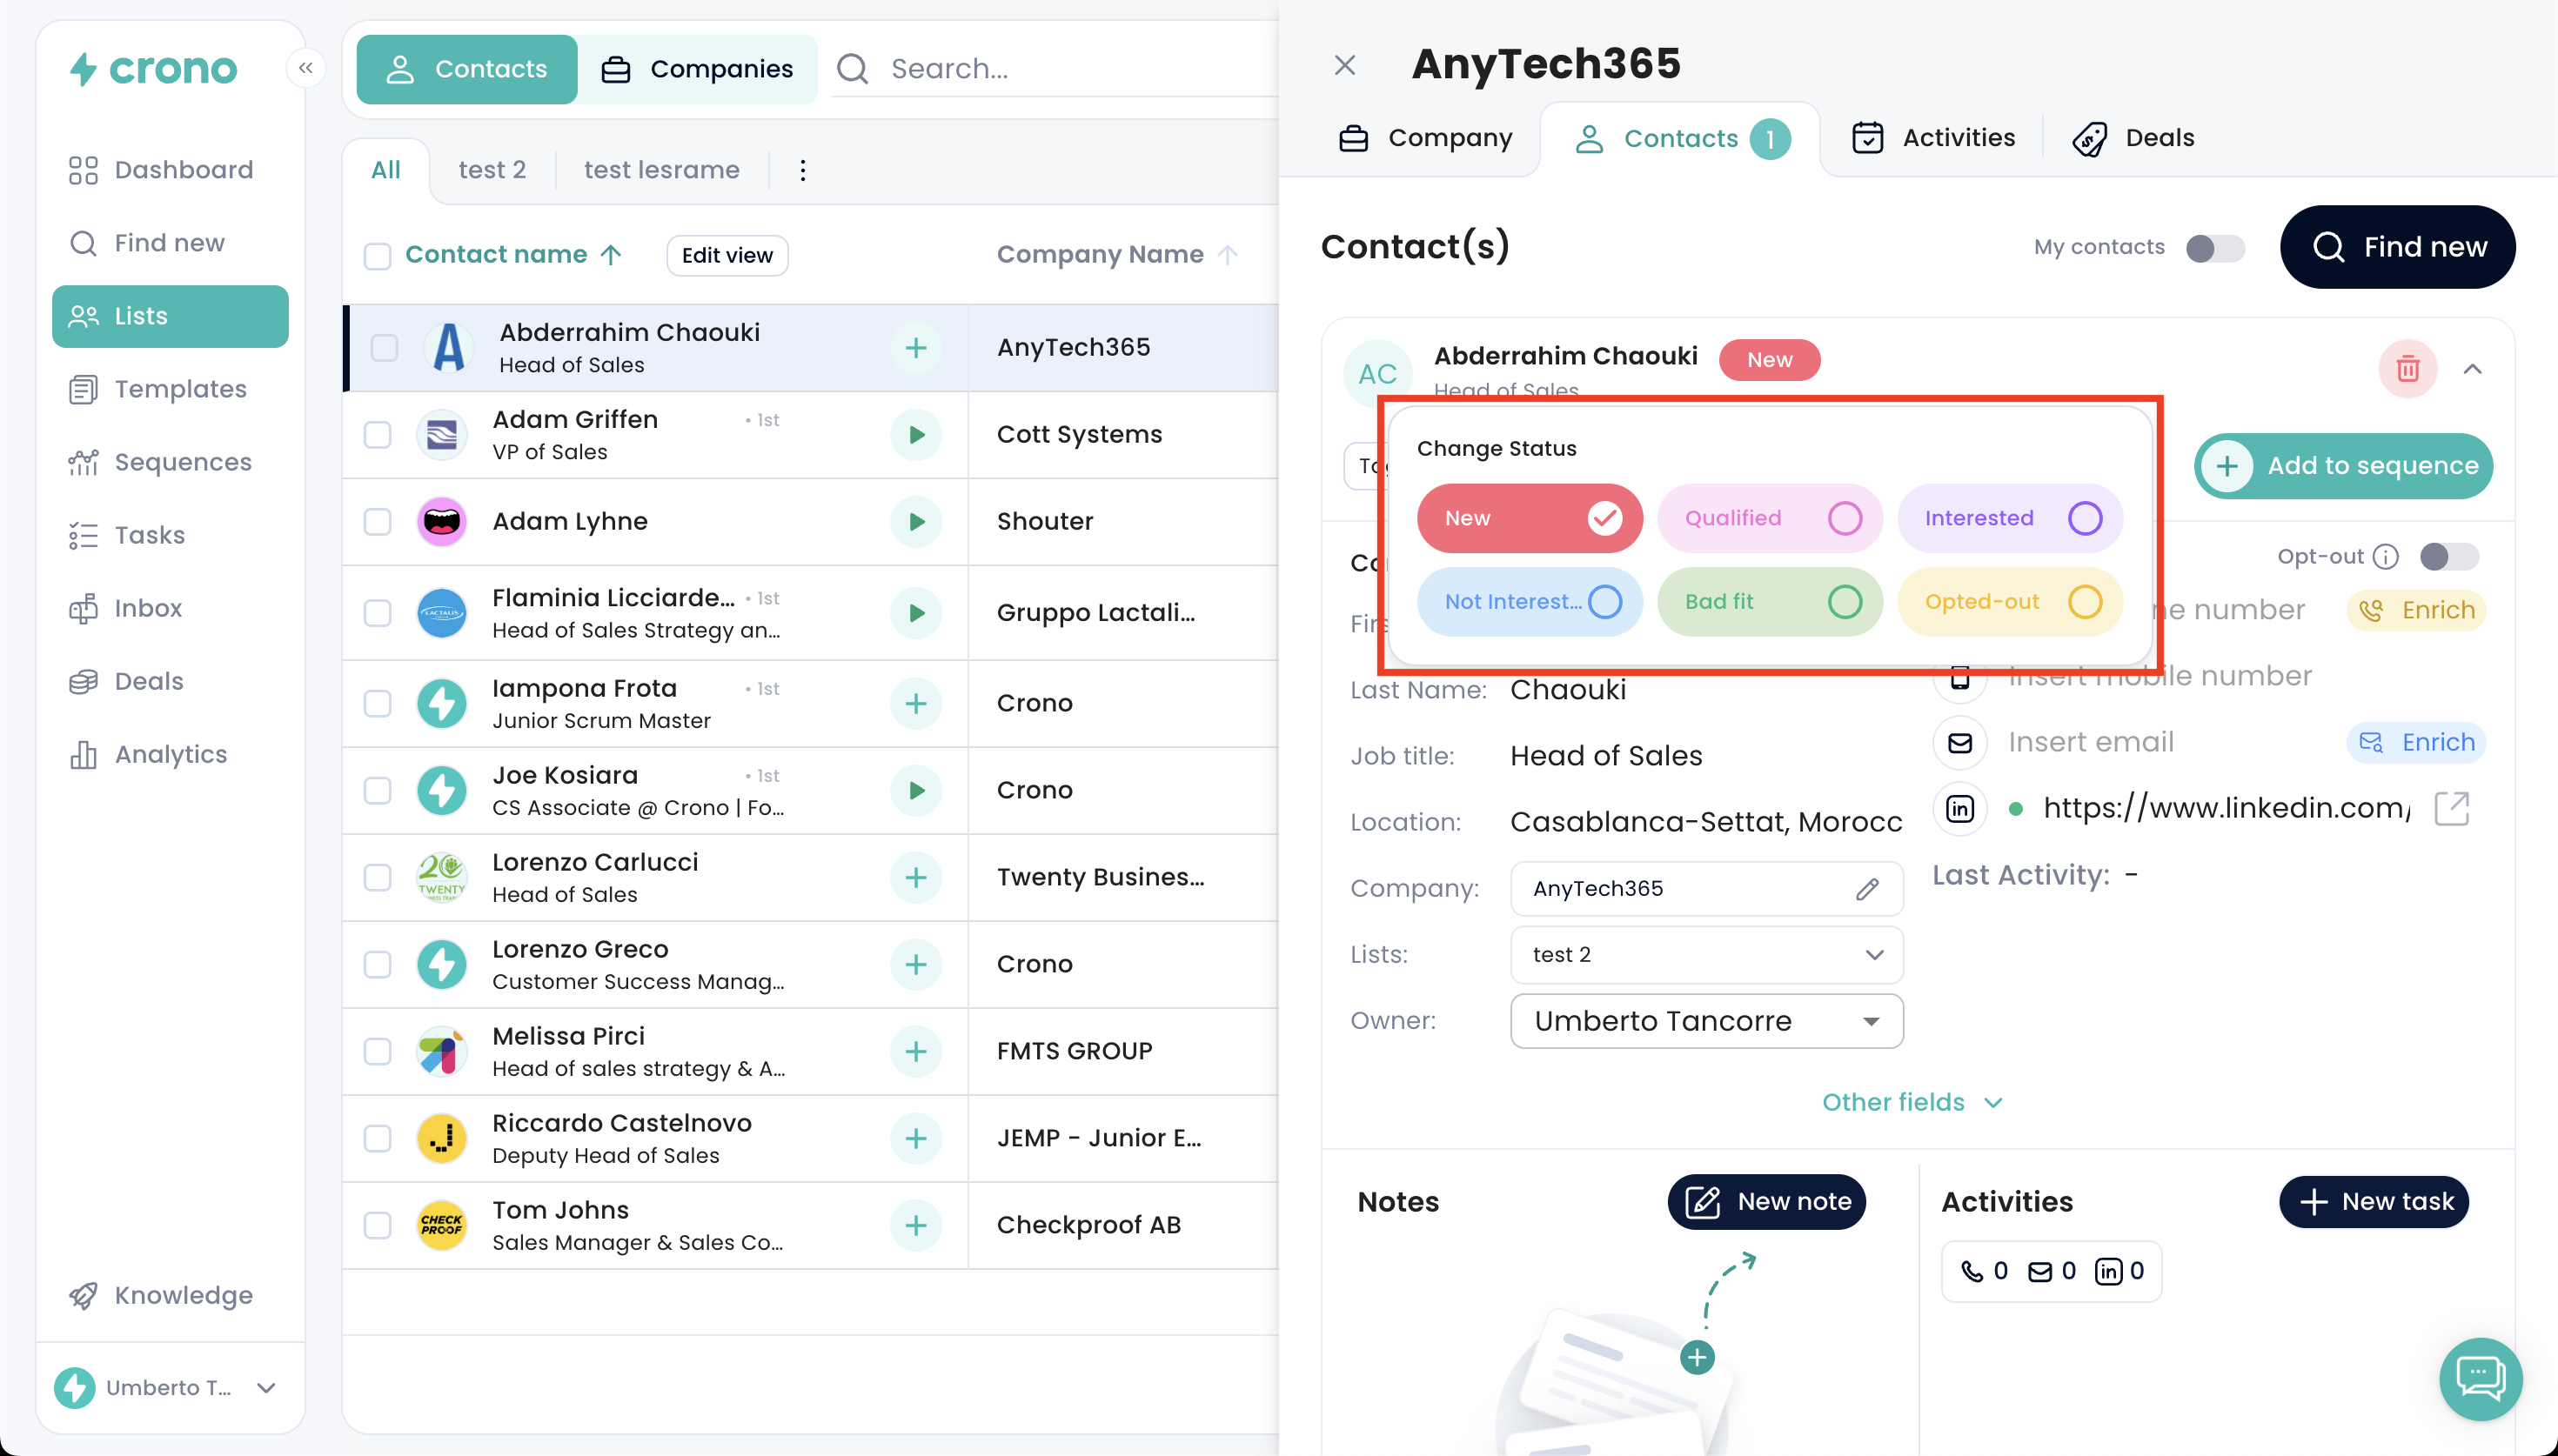
Open the contact or company record.
Find the Status field at the top.
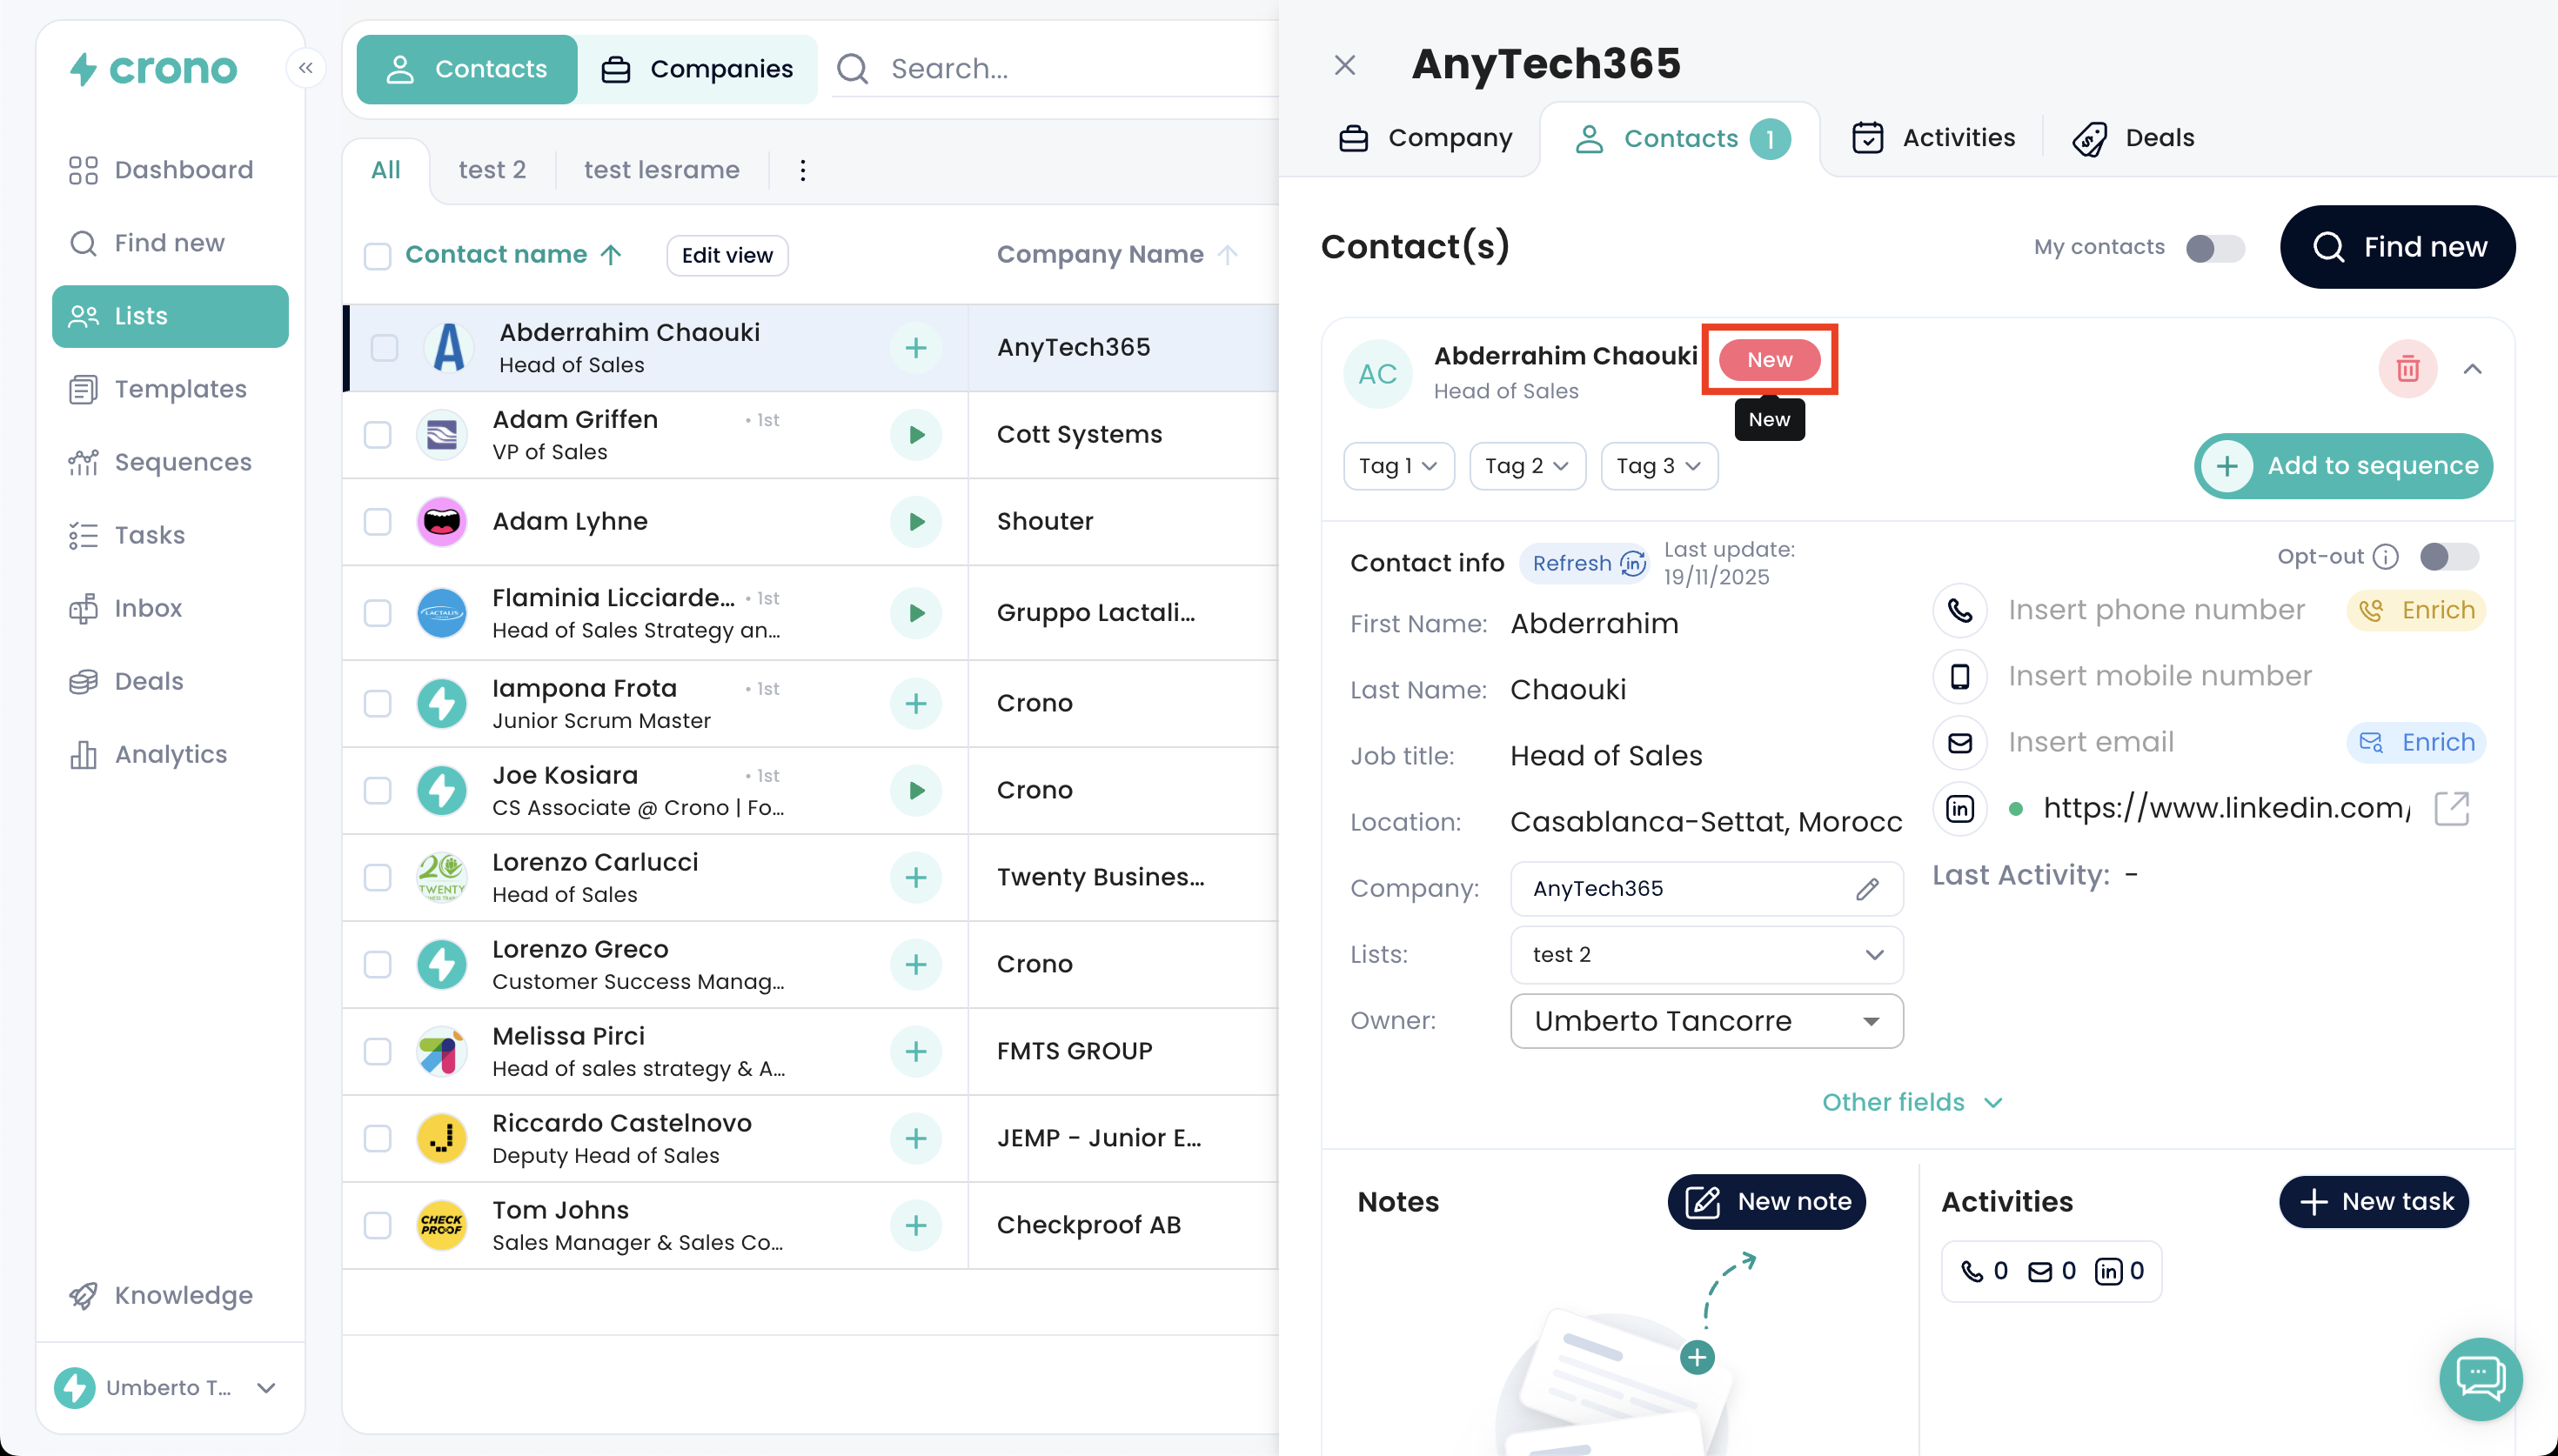
Select a new status.
Statuses for contacts and companies are configured separately.
Go to Account Settings.
Select Status Management.
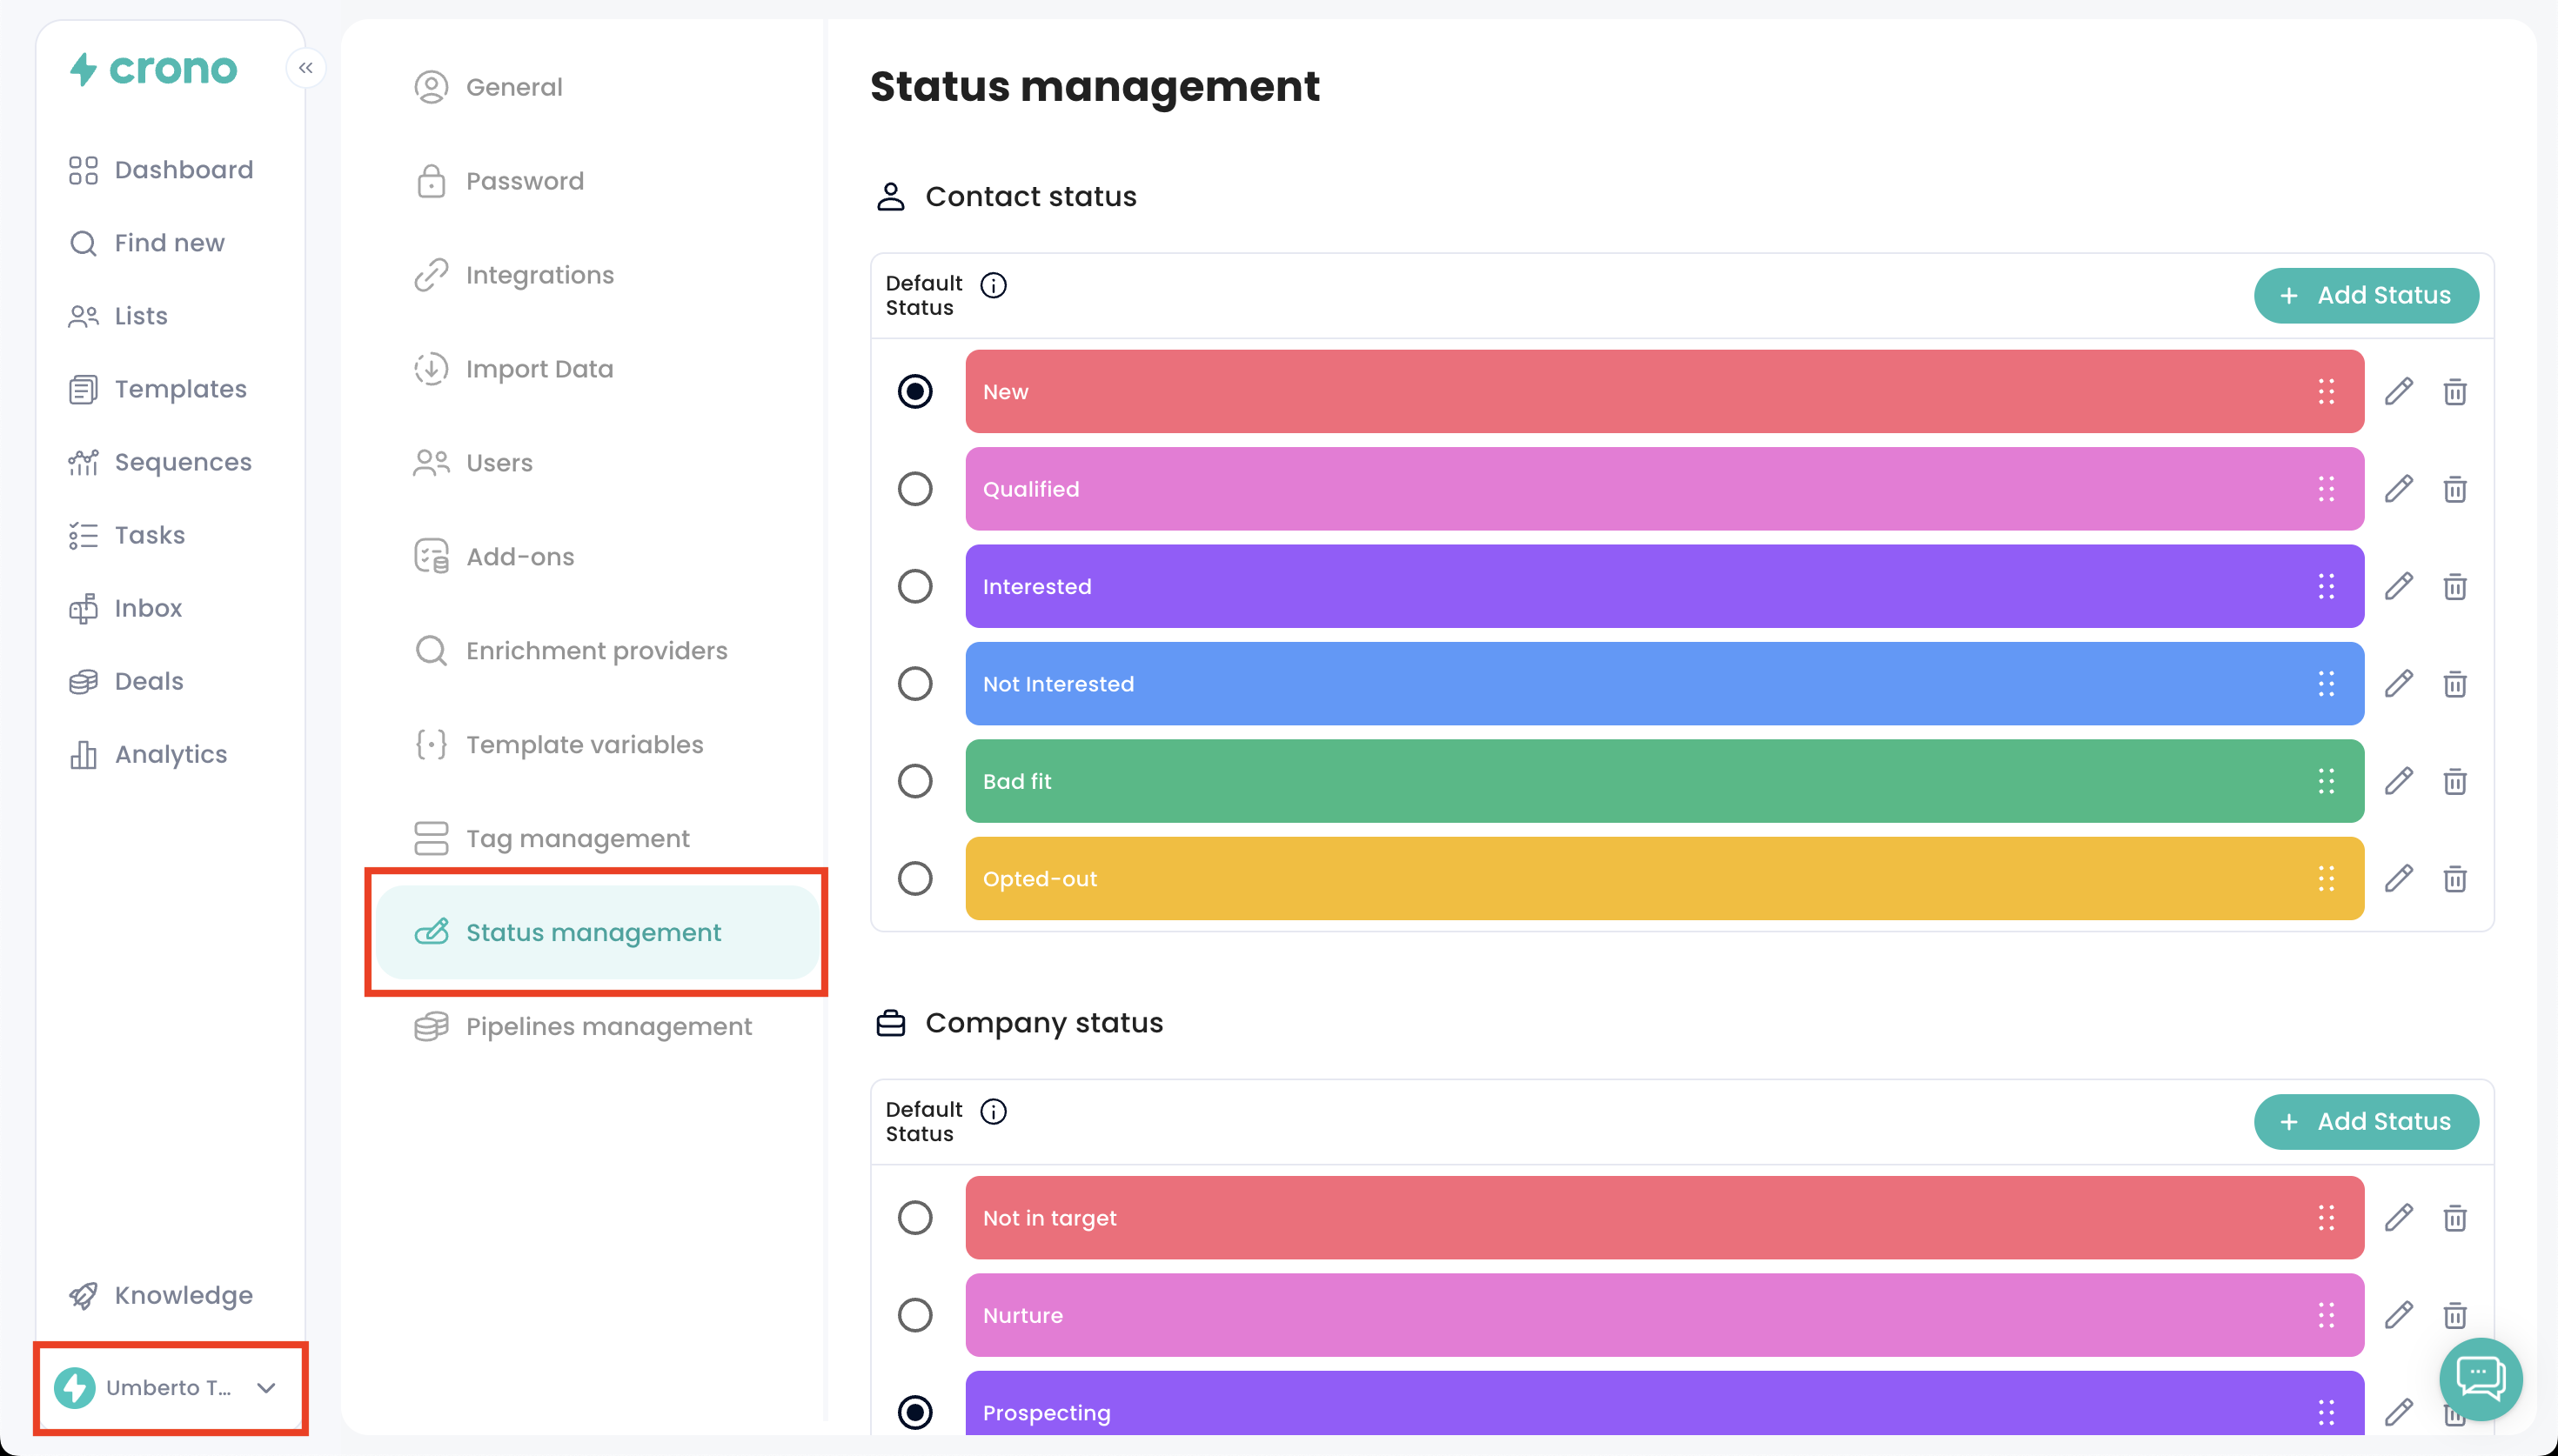
Under each section (Contact statuses, Company statuses), you can:
Create new statuses
Rename statuses
Reorder statuses
Set the default status
Save changes.
Any modification affects the entire workspace.
Crono allows you to sync contact or company statuses directly with a CRM field. When enabled, statuses in Crono are automatically updated based on a CRM property you select.
Go to Account Settings.
Open Status Management.
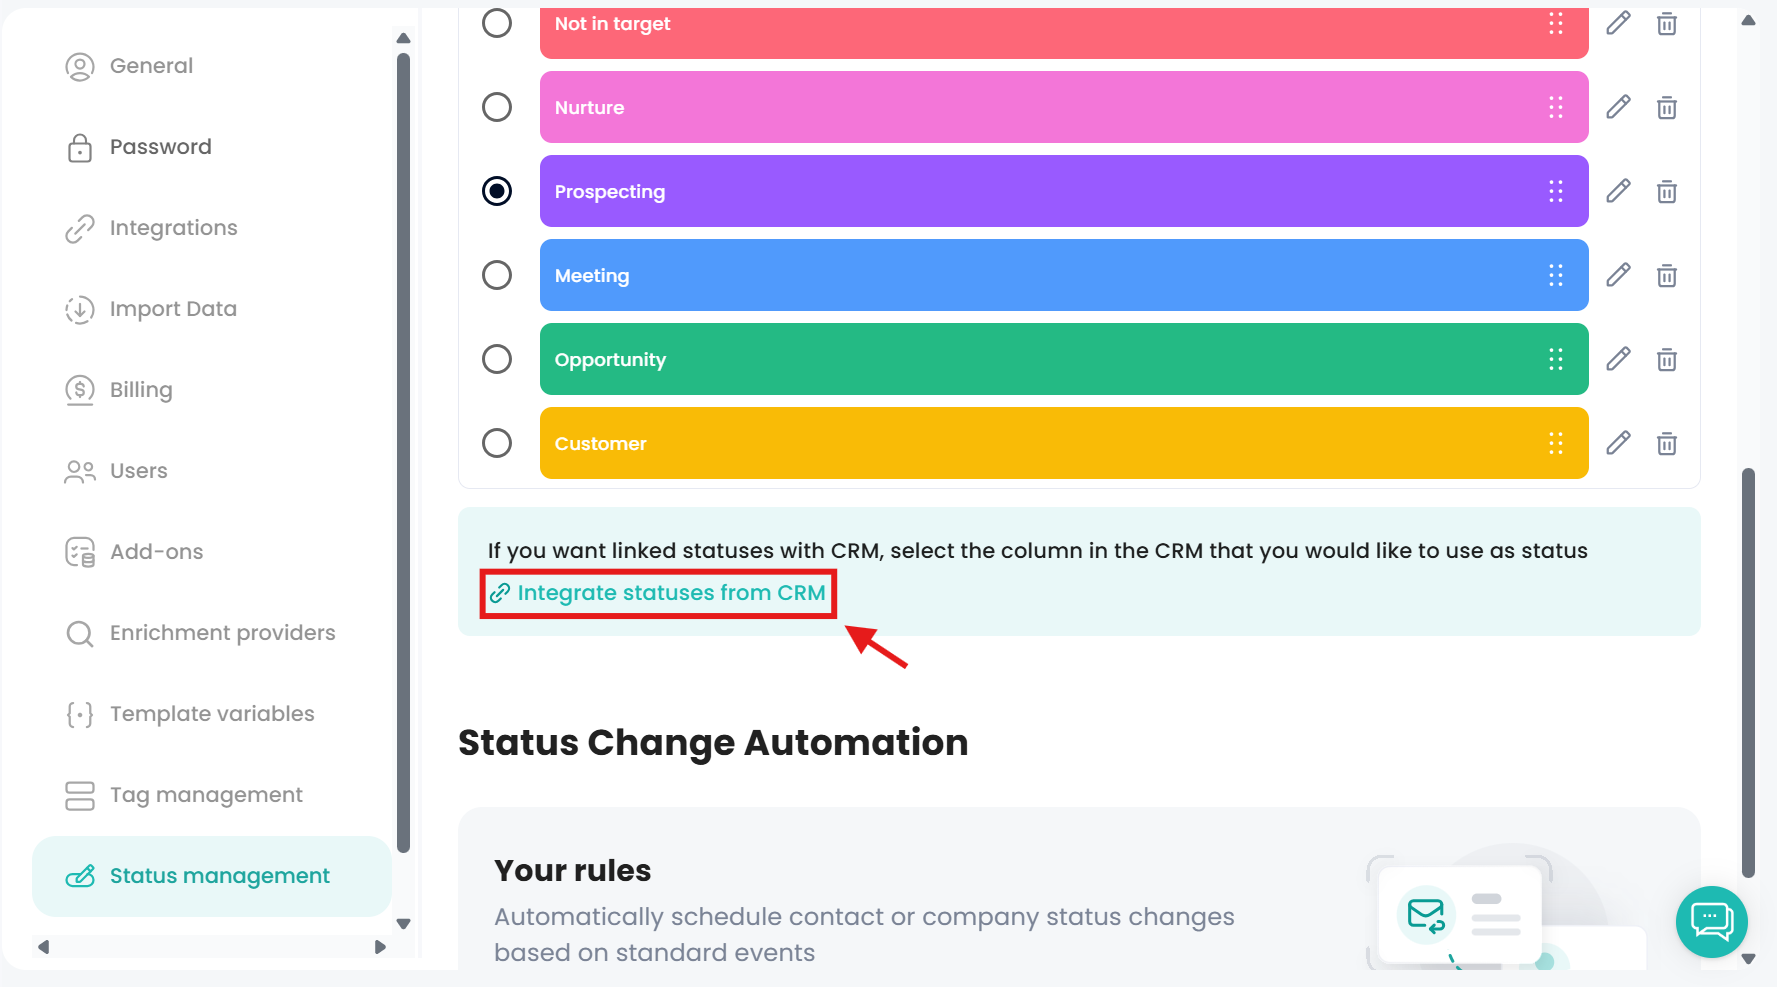
In the status section, click Integrate statuses from CRM.
Choose the CRM property you want to use as the status source.
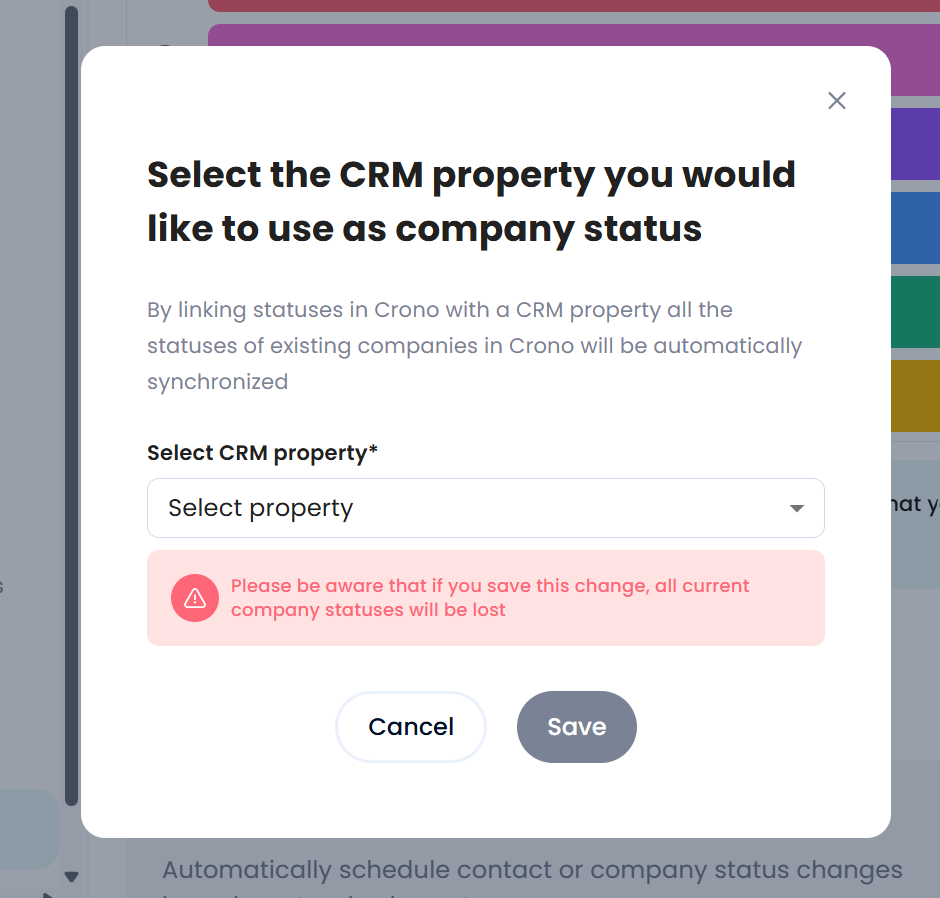
Confirm the change and save.
When CRM status sync is activated:
All current statuses in Crono for that category (contact or company) will be replaced by the values from the CRM property.
Ongoing synchronization keeps both systems aligned.
This is recommended for teams already managing statuses centrally inside their CRM.
