One of the ways to generate leads in Crono is through the 🔍Find New page.
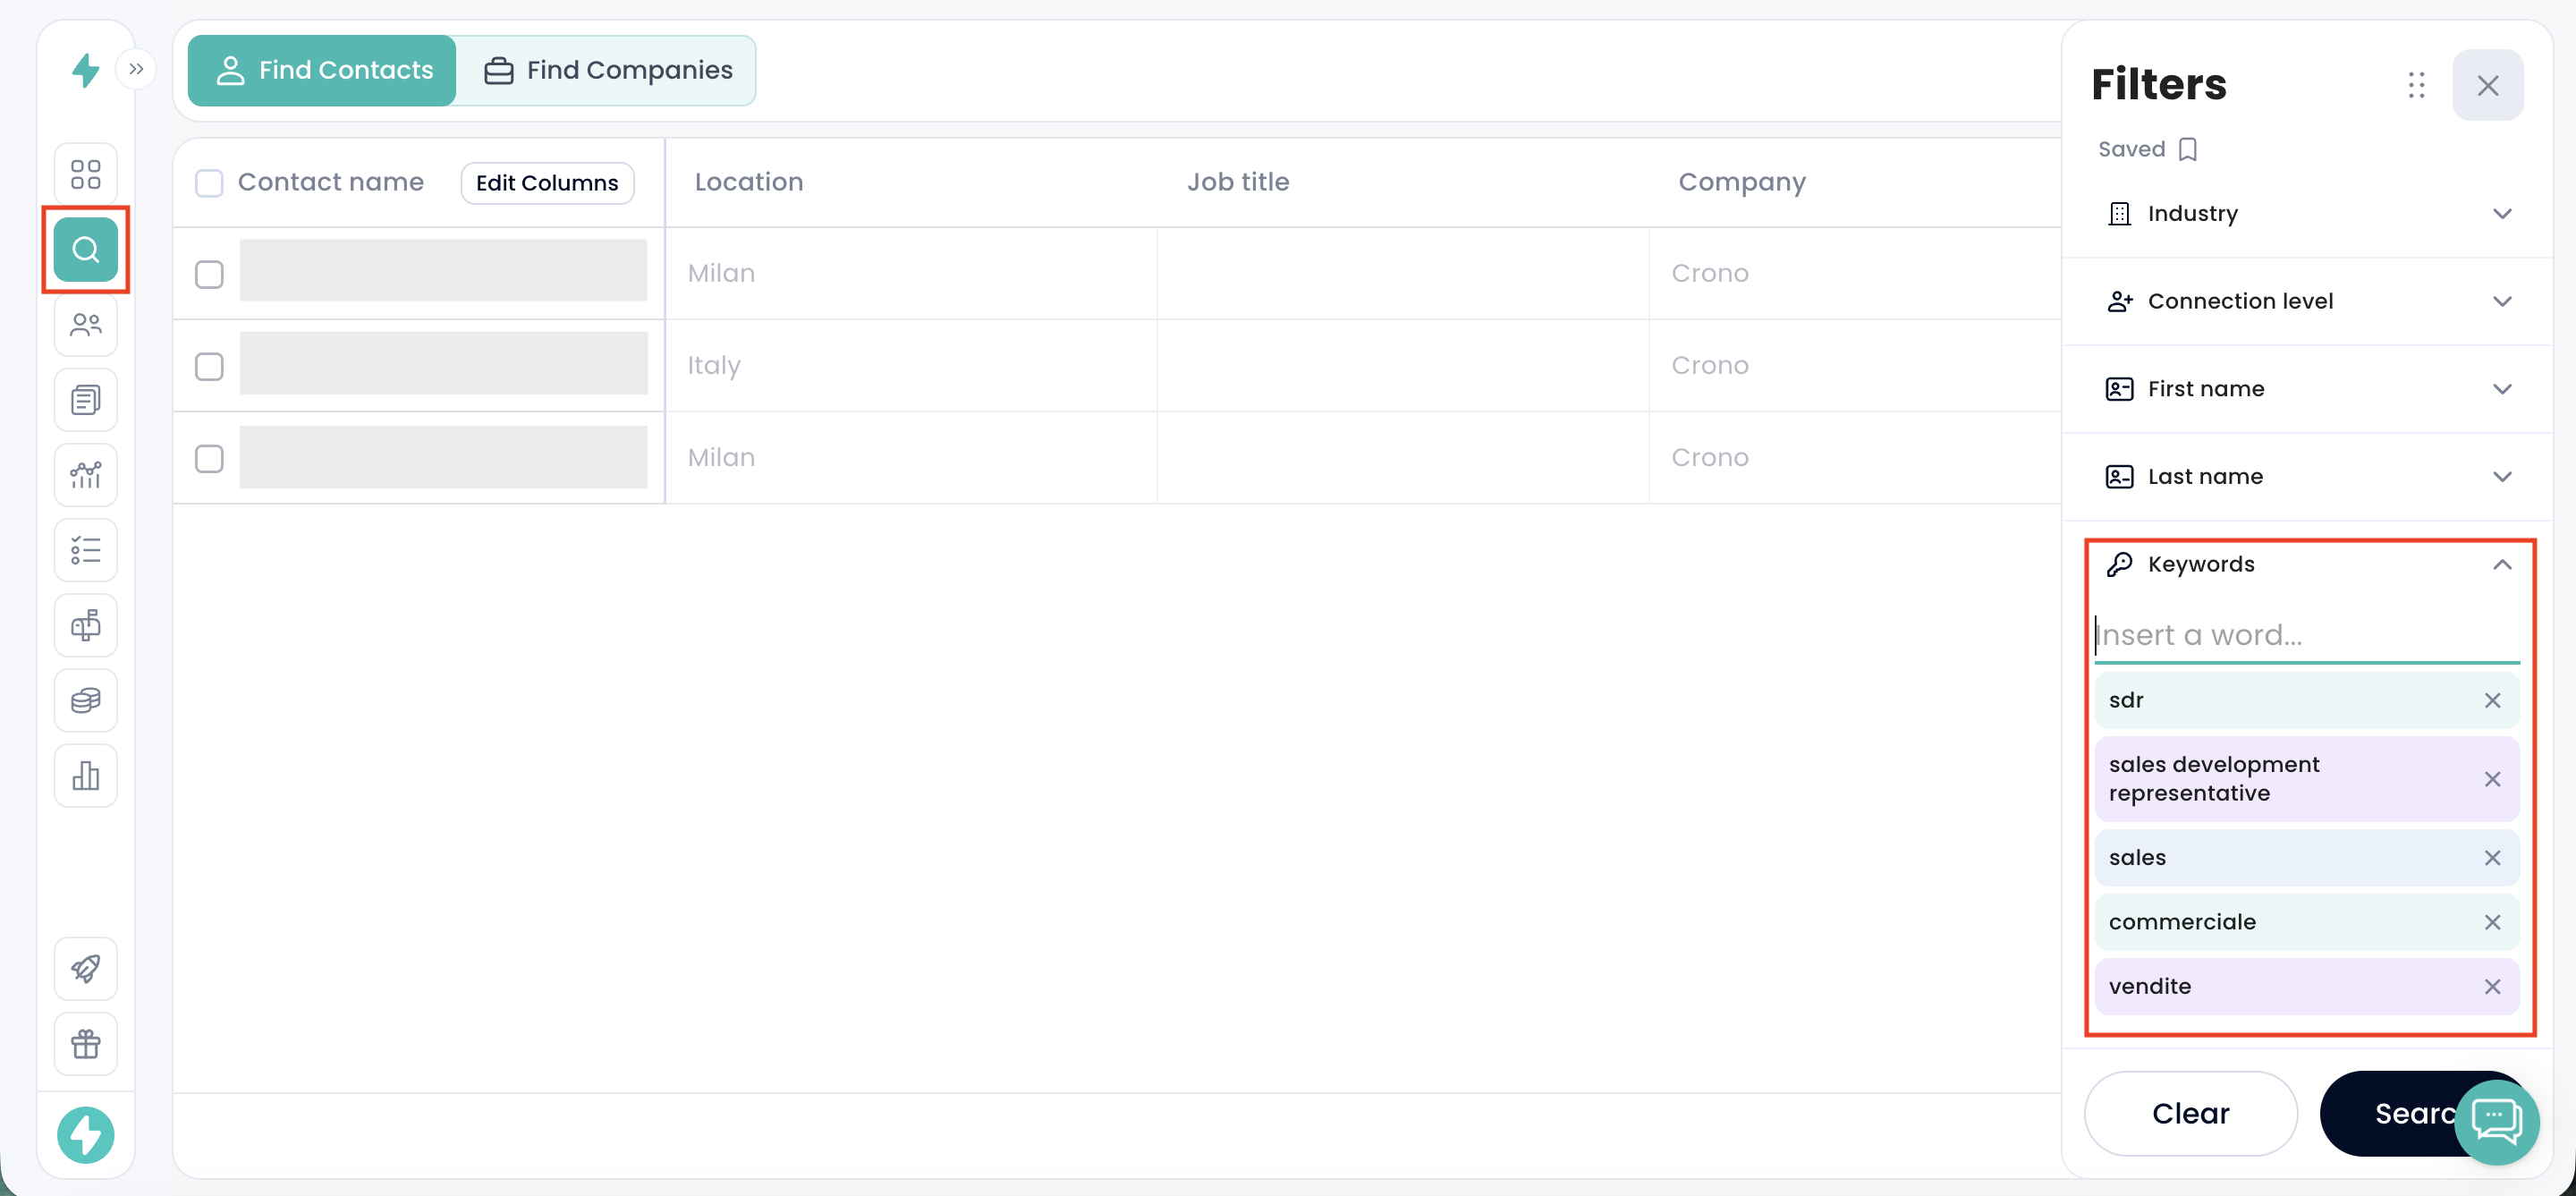
Crono uses LinkedIn as its database. This means that the filters you see on the right side of the page correspond to the same filters available on LinkedIn.
To start finding new leads, apply the filters that match your Ideal Customer Profile (ICP). One of the most important filters is Keywords. Here you can enter the job titles of the people you want to target. You can include multiple variations, such as:
different titles (e.g., Sales Development Representative, Account Executive)
acronyms (e.g., SDR)
titles in multiple languages
If you have access to LinkedIn Sales Navigator, the process is the same as described above, but you will have access to additional filters, allowing you to refine your search even further.
The results displayed will match the same profiles you would see if you performed the same search directly on LinkedIn using the same filters.
Once you apply your filters, you will see a list of profiles that match your criteria.
By scrolling horizontally, you can view additional columns with more contact information. You can also click Edit Columns to choose which fields you want to display or hide.
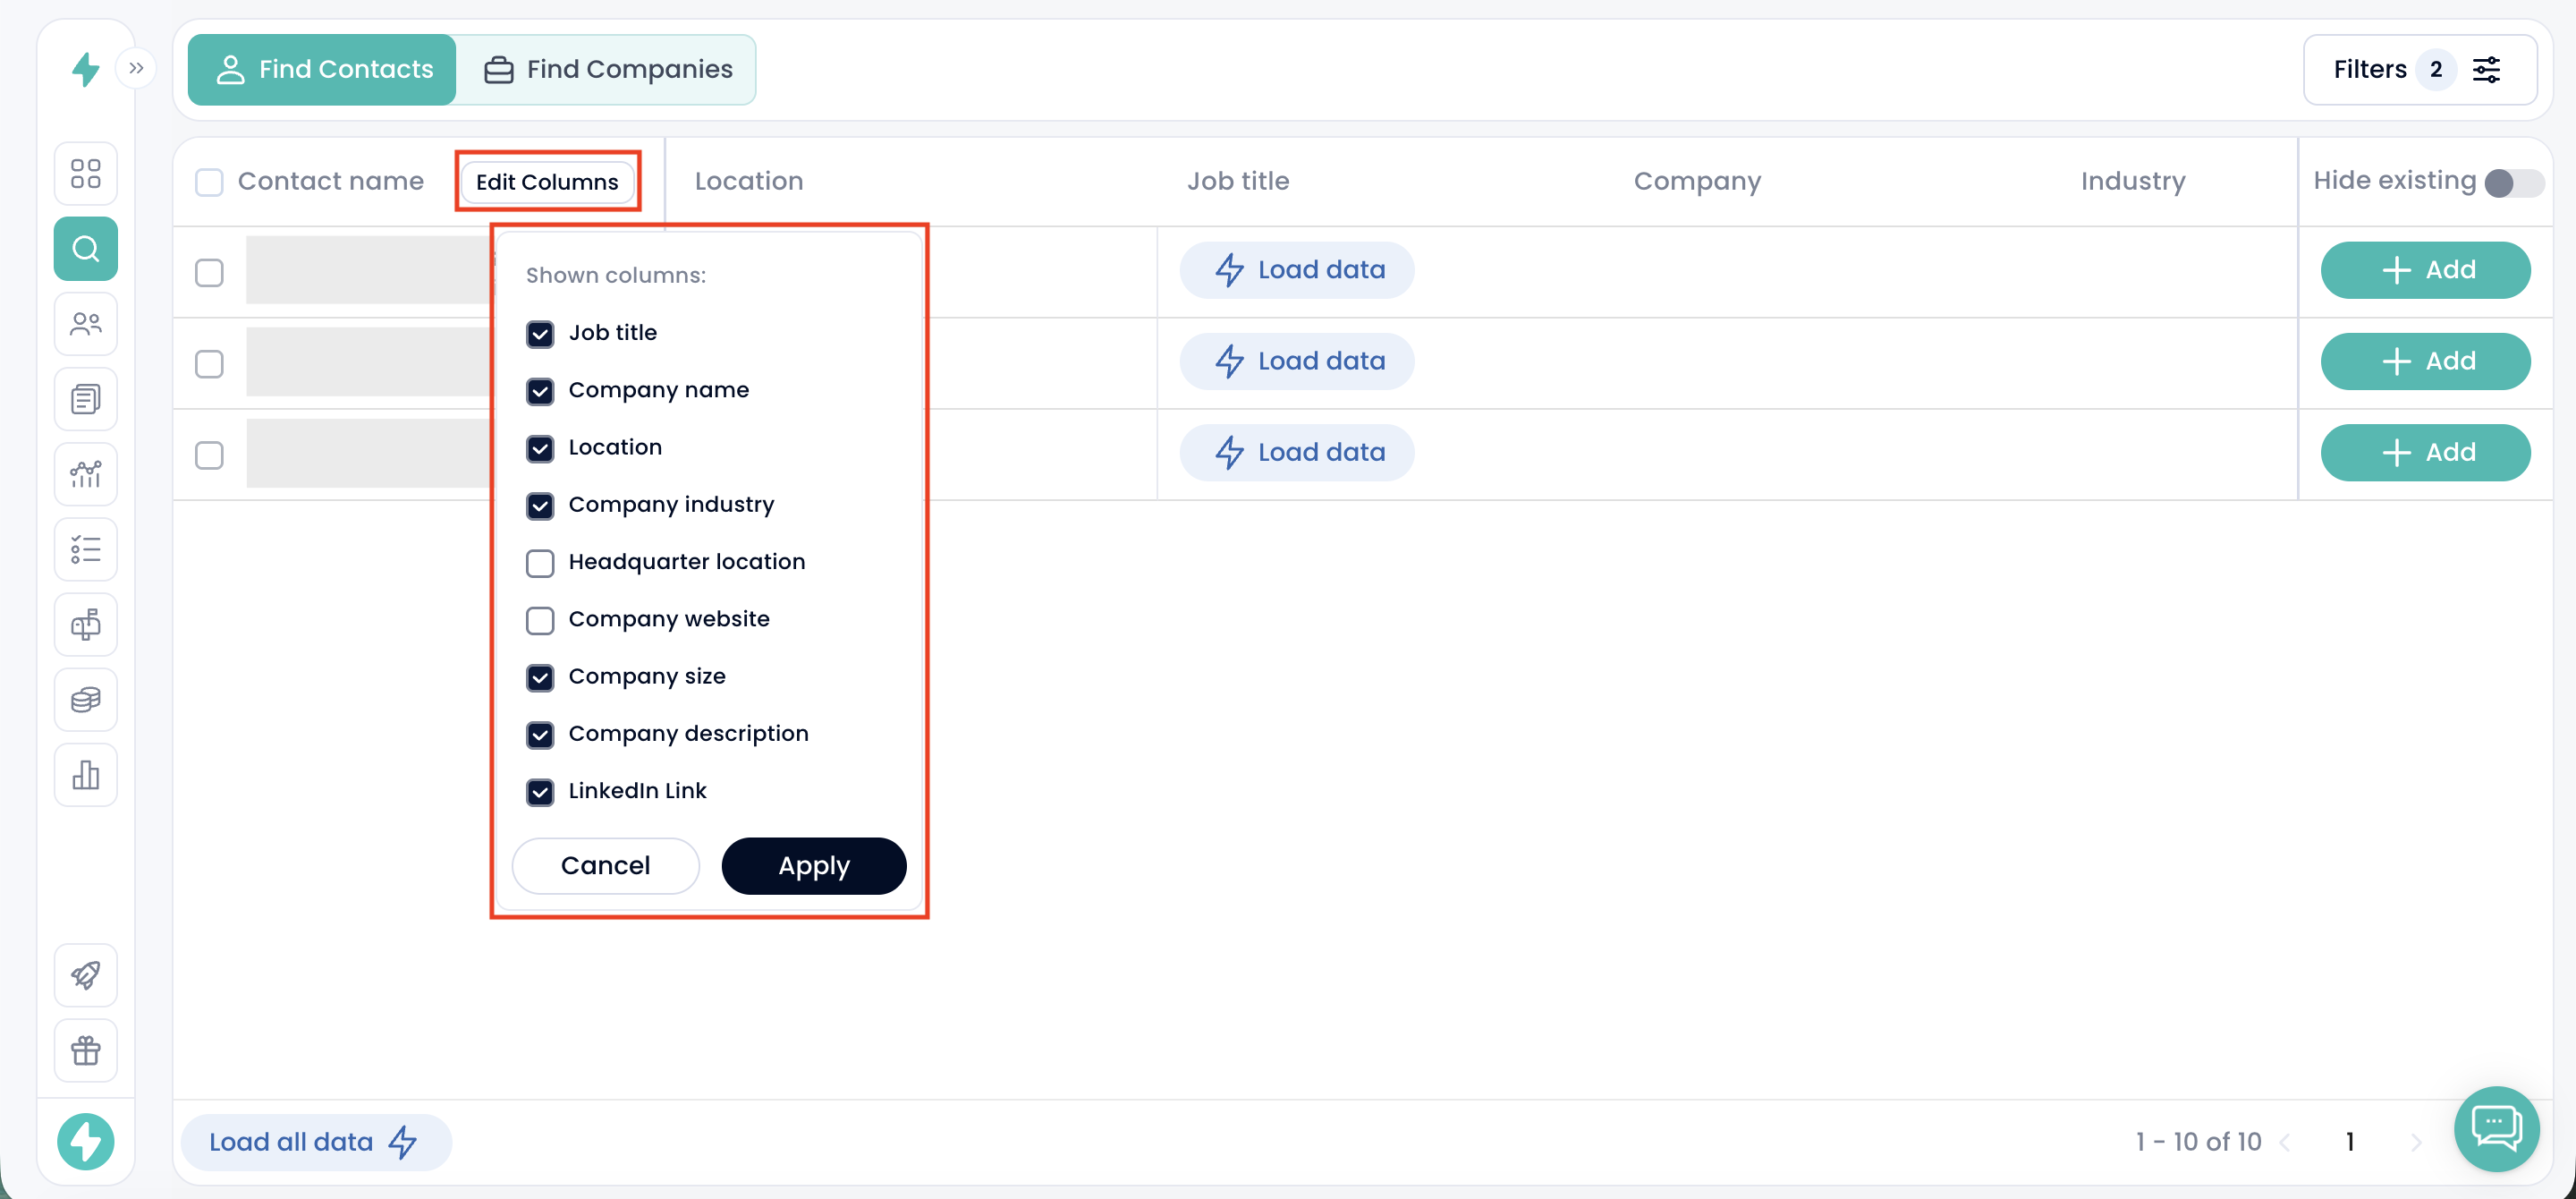
Next to each contact’s name, you may notice the Load data option. This is because Crono does not load all profile data by default, allowing search results to load faster and more smoothly.
You can:
Click Load data for individual contacts
Click Load all data at the bottom left to load data for all results in bulk
Loading this information does not consume any credits, as it only retrieves publicly available profile data.
Once you identify the contacts you want to contact, select them using the checkbox to the left of their name.
After selecting one or more contacts, click Add new at the bottom. A window will open where you can perform several actions:
Enrich email and phone number for the prospect (each enrichment costs 1 credit)
Add tags to organize and categorize your contacts (tags can be created by the admin in the Tag Management section of Settings)
Add the contacts to an existing list or create a new one
Enroll the contacts into a sequence
Change the ownership of the selected contacts if needed
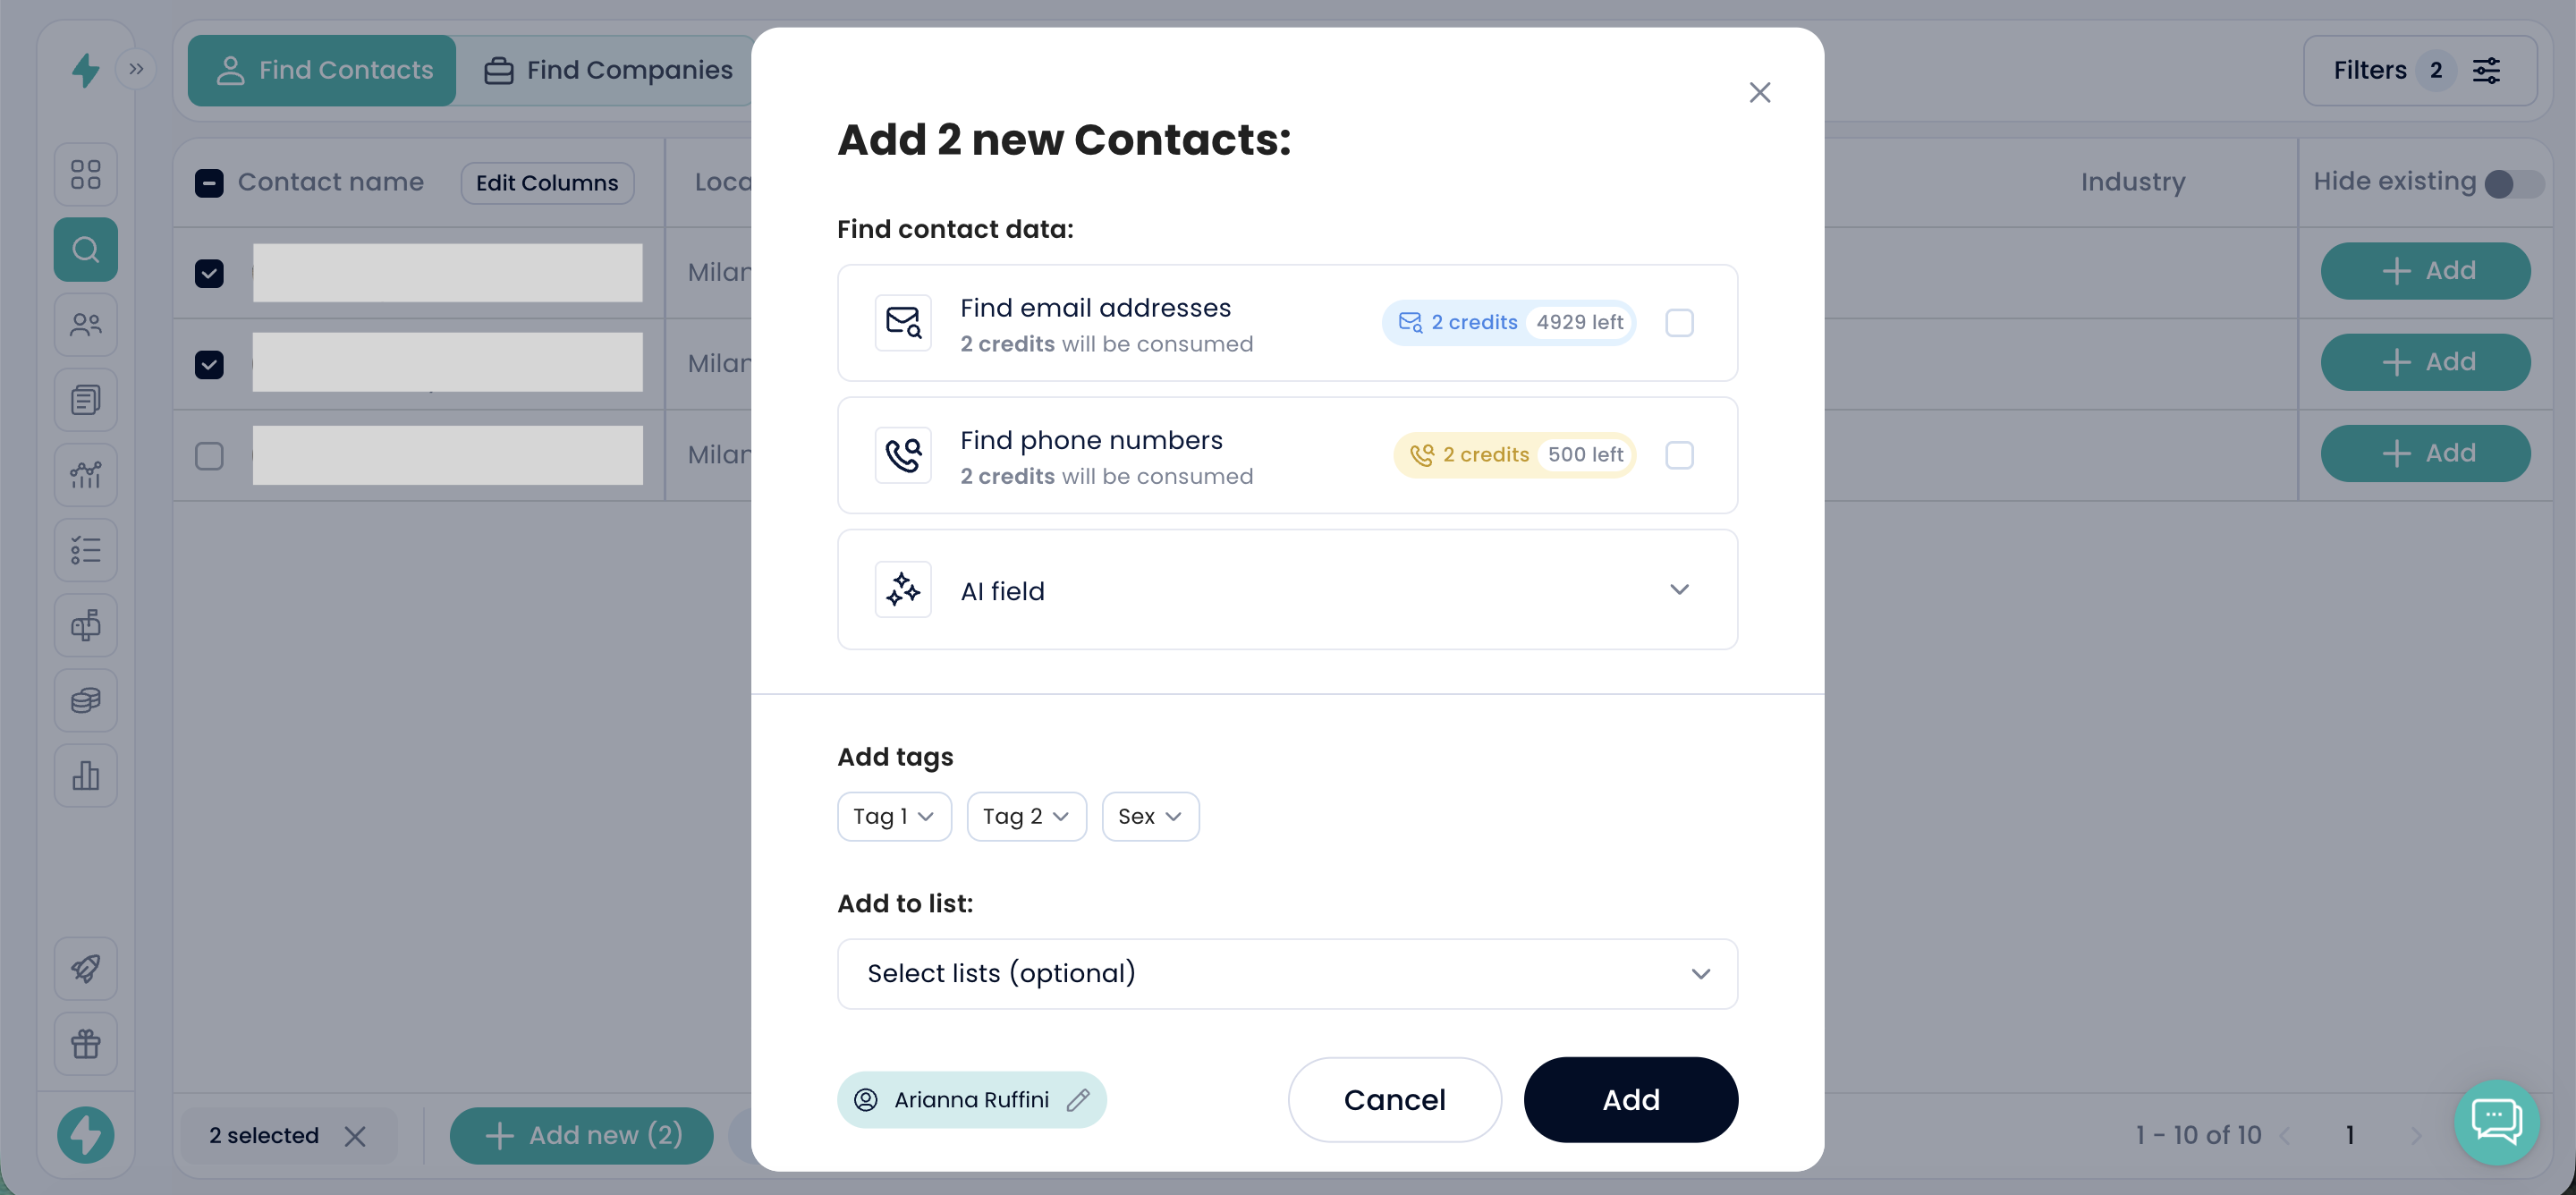
After completing the desired actions, click Add.
The selected contacts will automatically be added to the Crono Lists page, where you can manage and organize them further.
