Crono allows you to integrate natively with your Hubspot account.
When you log in to Crono for the first time, you’ll be asked whether you want to integrate with your CRM. Select HubSpot and proceed with the connection.
If you prefer to do it later, you can integrate it by going to your Account Settings (click on your name), then navigating to the Integrations section and selecting CRM:
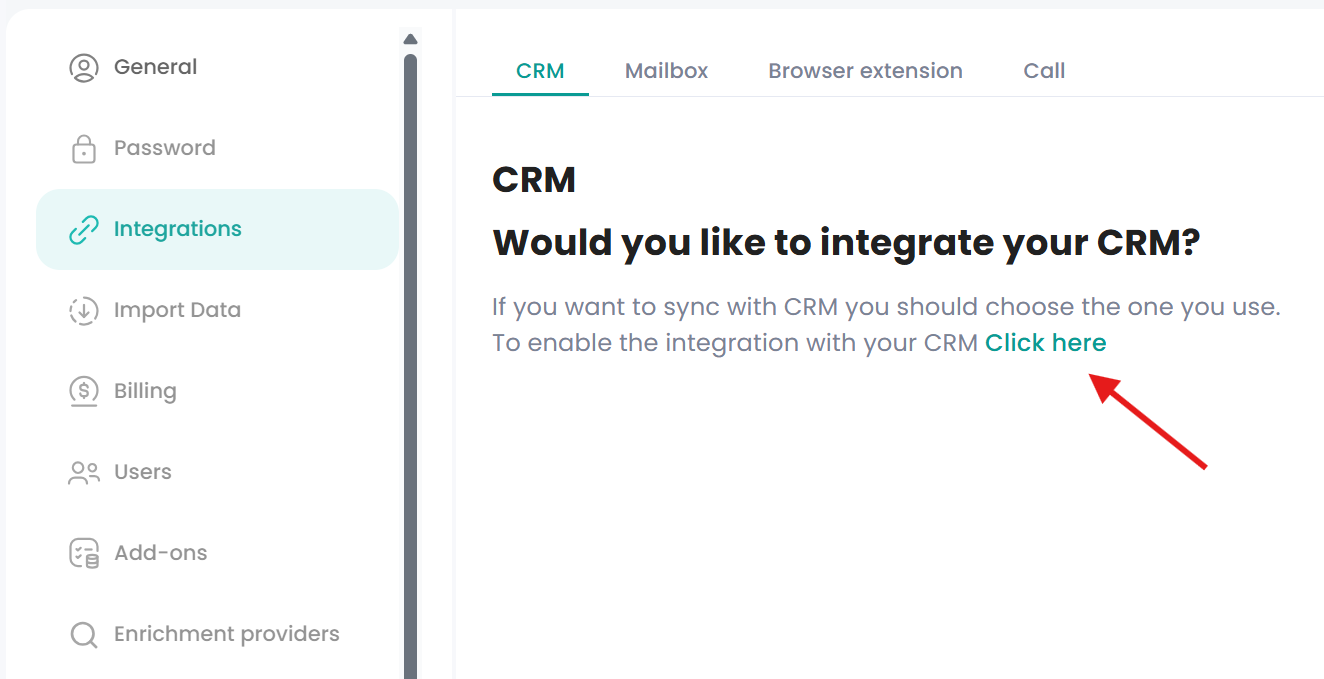
Once this window appears, select HubSpot and click Integrate.

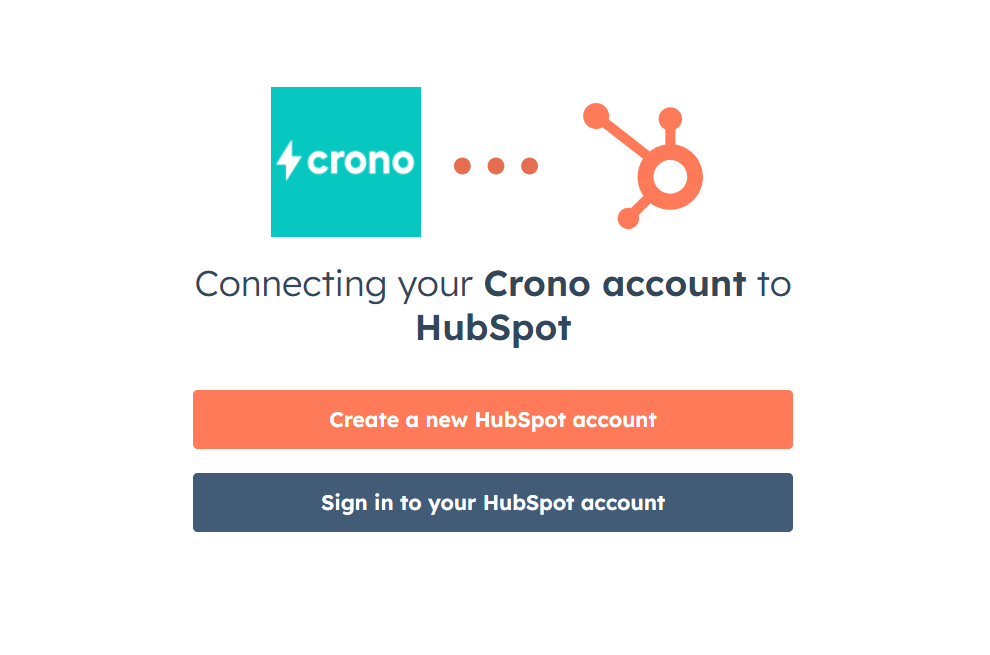
Proceed by signing in to your Hubspot Account:
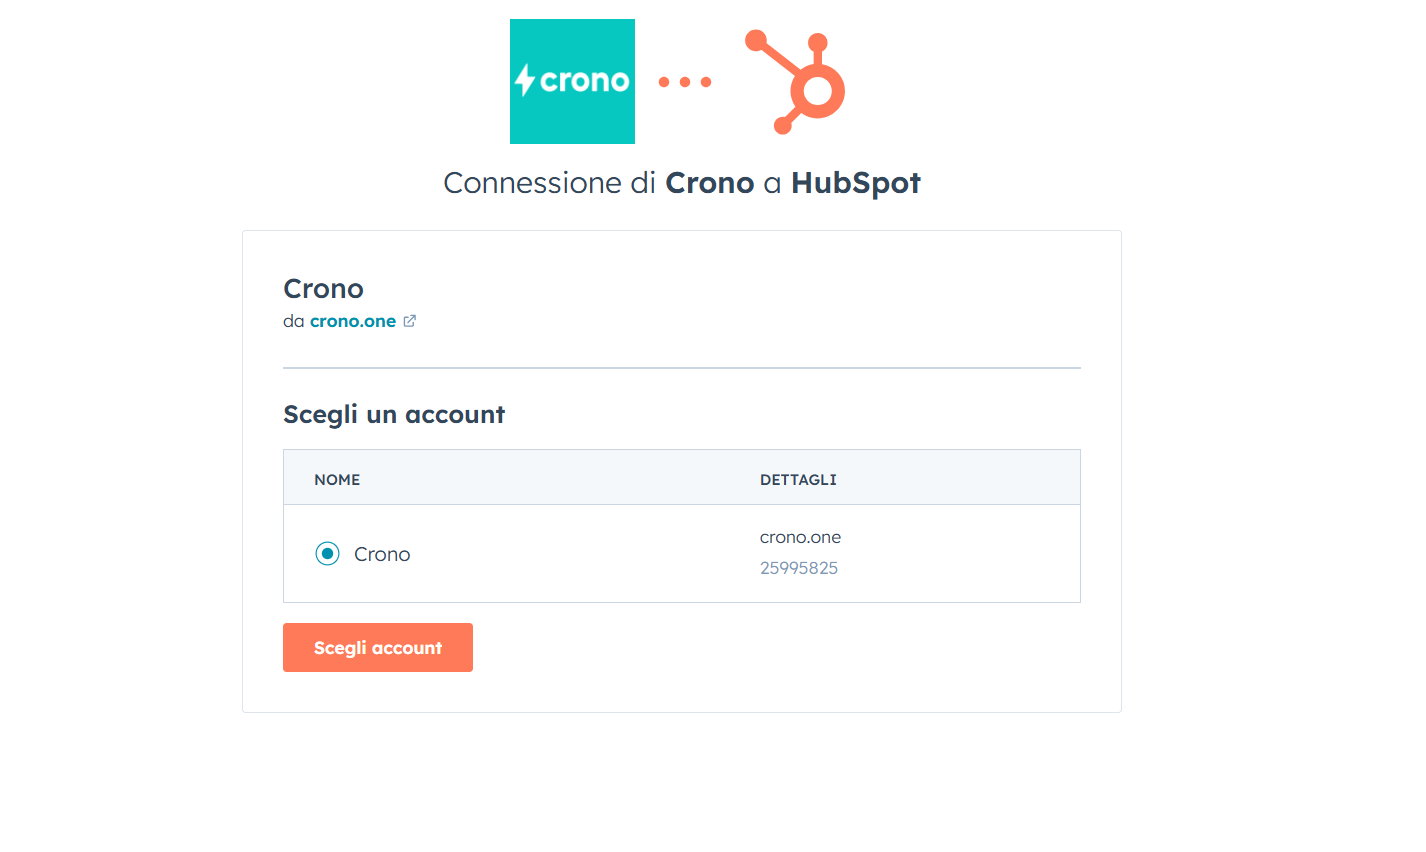
Select your preferred account and click on Choose Account to move to the next page.
Click on Connect App to complete the integration.
Once everything is completed you can start working with Crono and build your pipeline!
→ By default, synchronization between Crono and your CRM will be automatic and in real time. Everything you create in Crono — such as contacts or companies — will also be created in HubSpot, and all activities performed on a contact will be logged in the CRM as well.
However, you can set the integration to Manual or Triggered mode — click here to learn more.
Please note that if you are a team that works on Crono, if one of you requests the integration, all the others will need to do the same in order to proceed working on Crono.
Hubspot Permissions:
Make sure to have the right "Account Access" permissions in Hubspot to proceed smoothly with the integration. If you receive a permission error please ask your Hubspot administrator to verify your permissions.
The administrator can set the right permissions under:
Settings → Users & Teams → Selected User → Edit Permissions → Account → Settings access
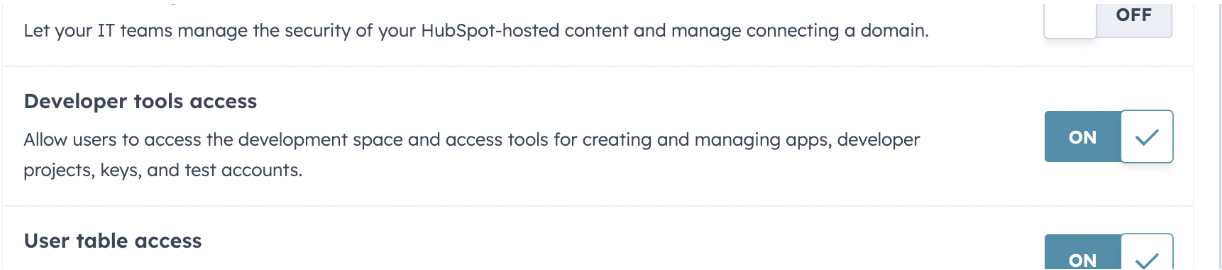
App Marketplace access - ON
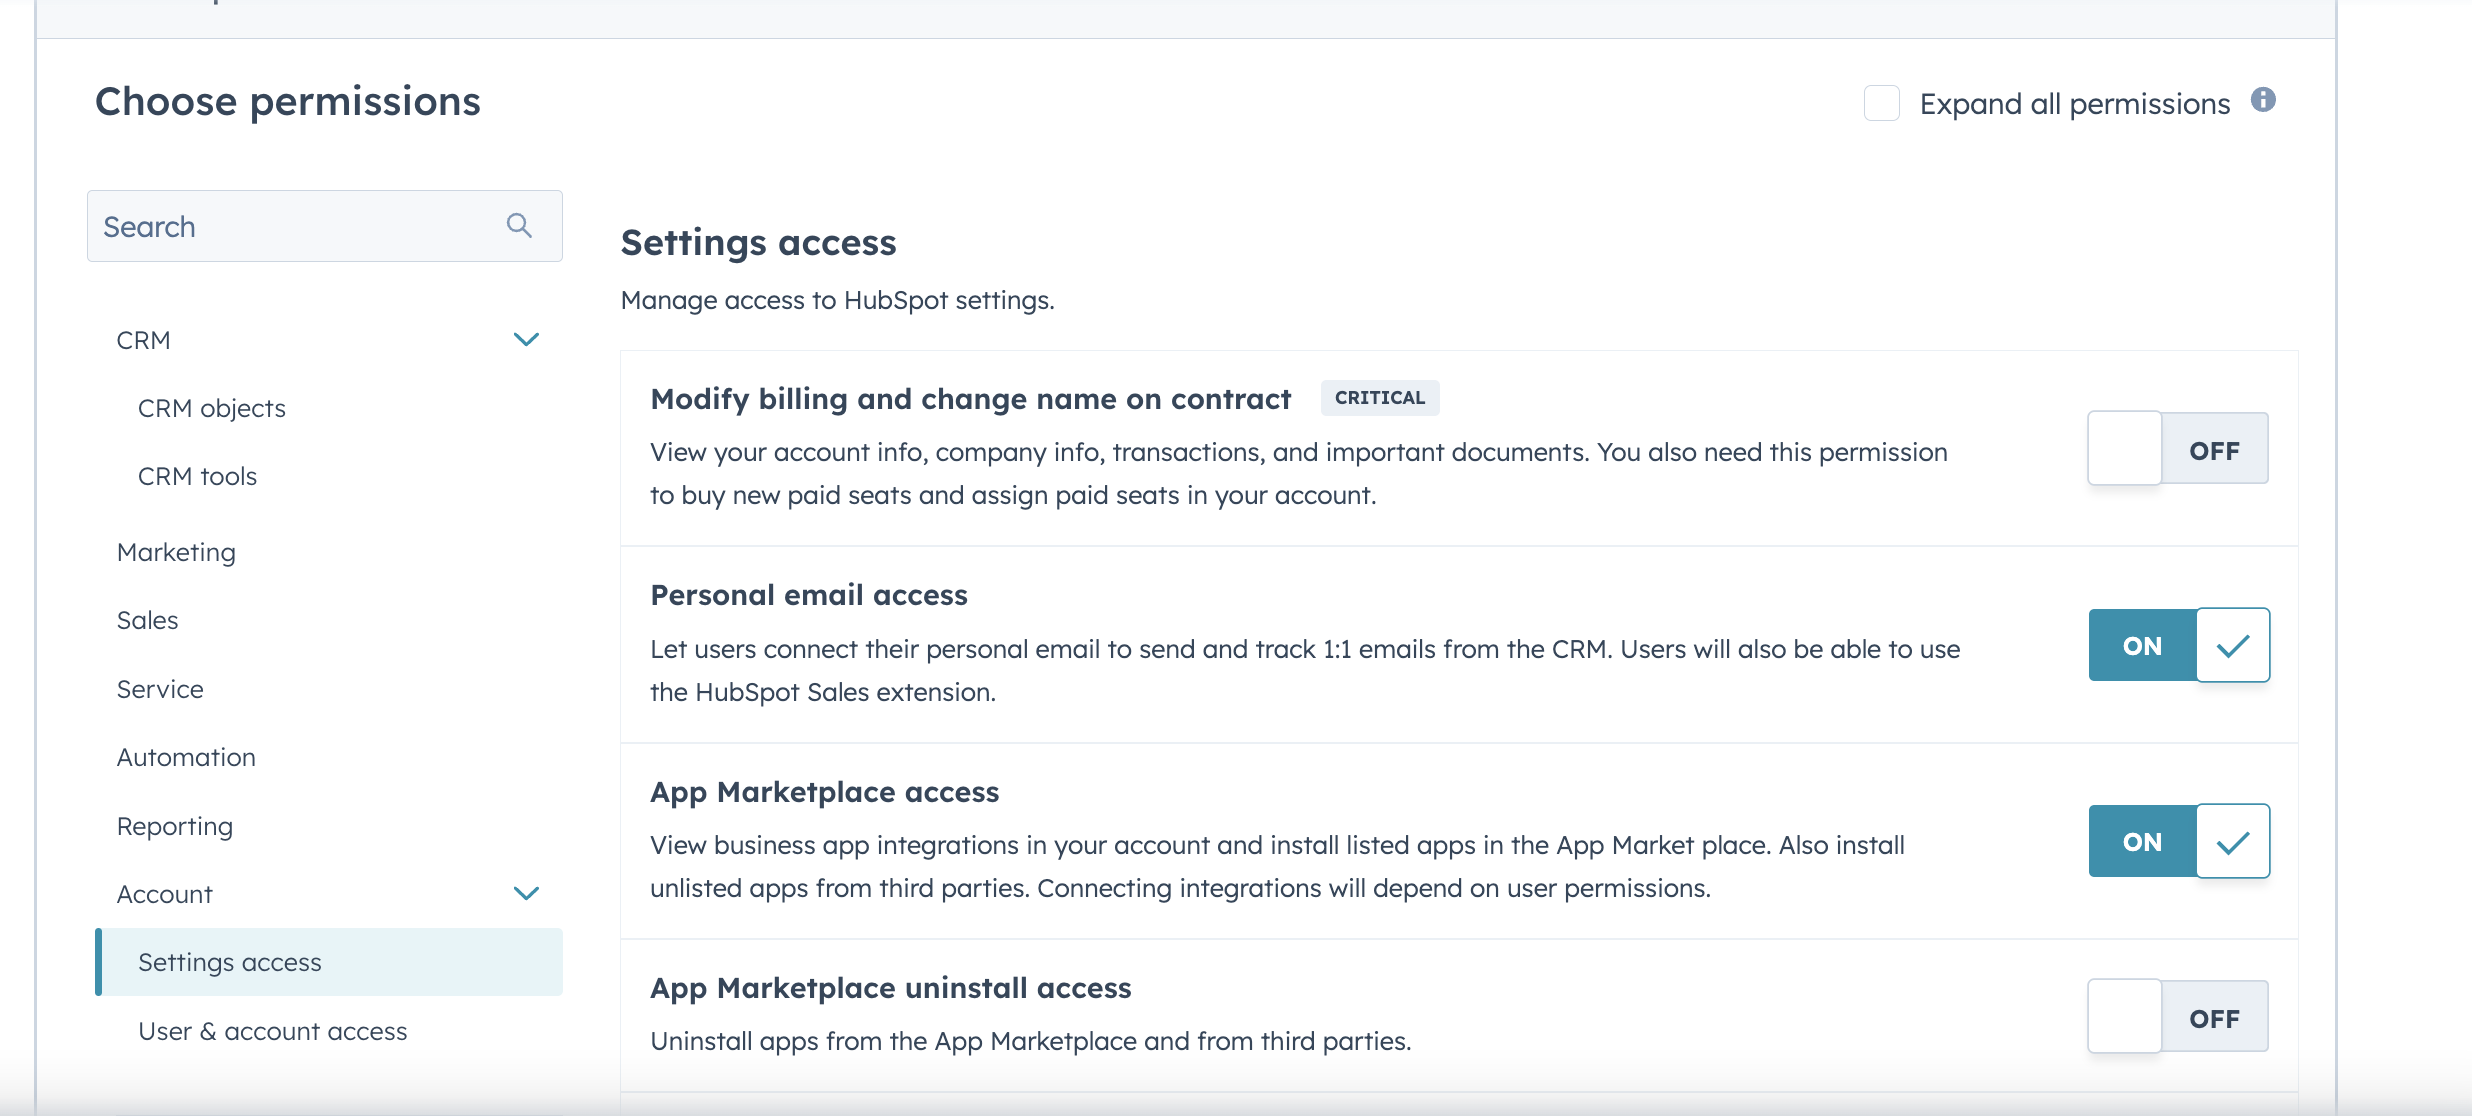
2. Developer tool access - ON
Then:
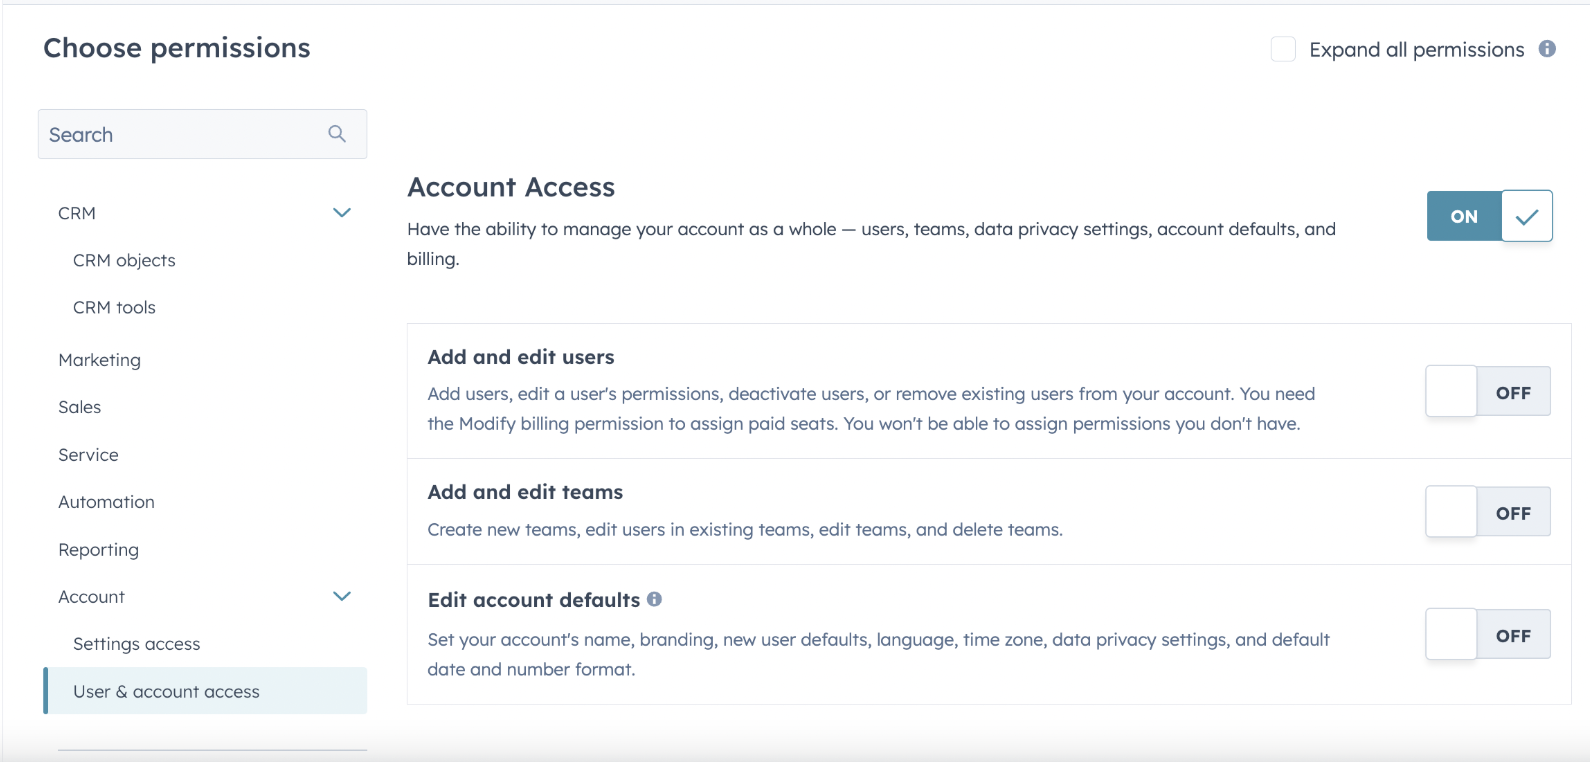
Settings -> Users & Teams -> Selected User -> Edit Permissions -> Account -> User & account access
→ Account Access: ON
General Setup
To minimize potential conflicts/overlaps between HubSpot and Crono and avoid ending up with dirty data, we strongly recommend performing these two additional actions in your HubSpot environment:
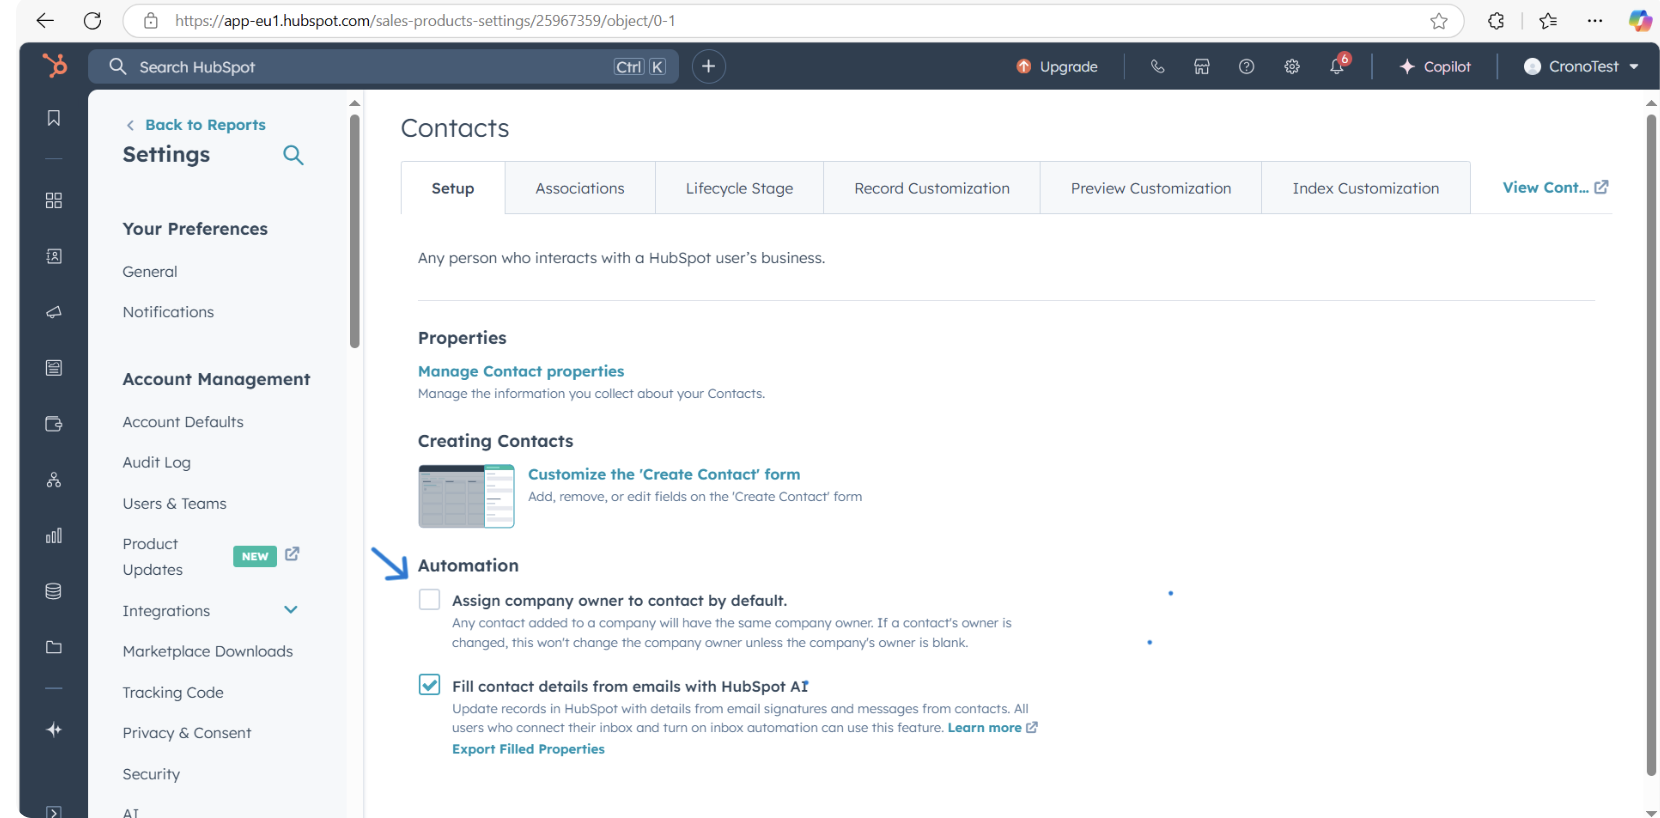
Go to Settings -> Data Management -> Contacts, and disable the option "Assign company owner to contact by default"
Go to Settings -> Data Management -> Companies, and disable the option "Create and associate companies with contacts"
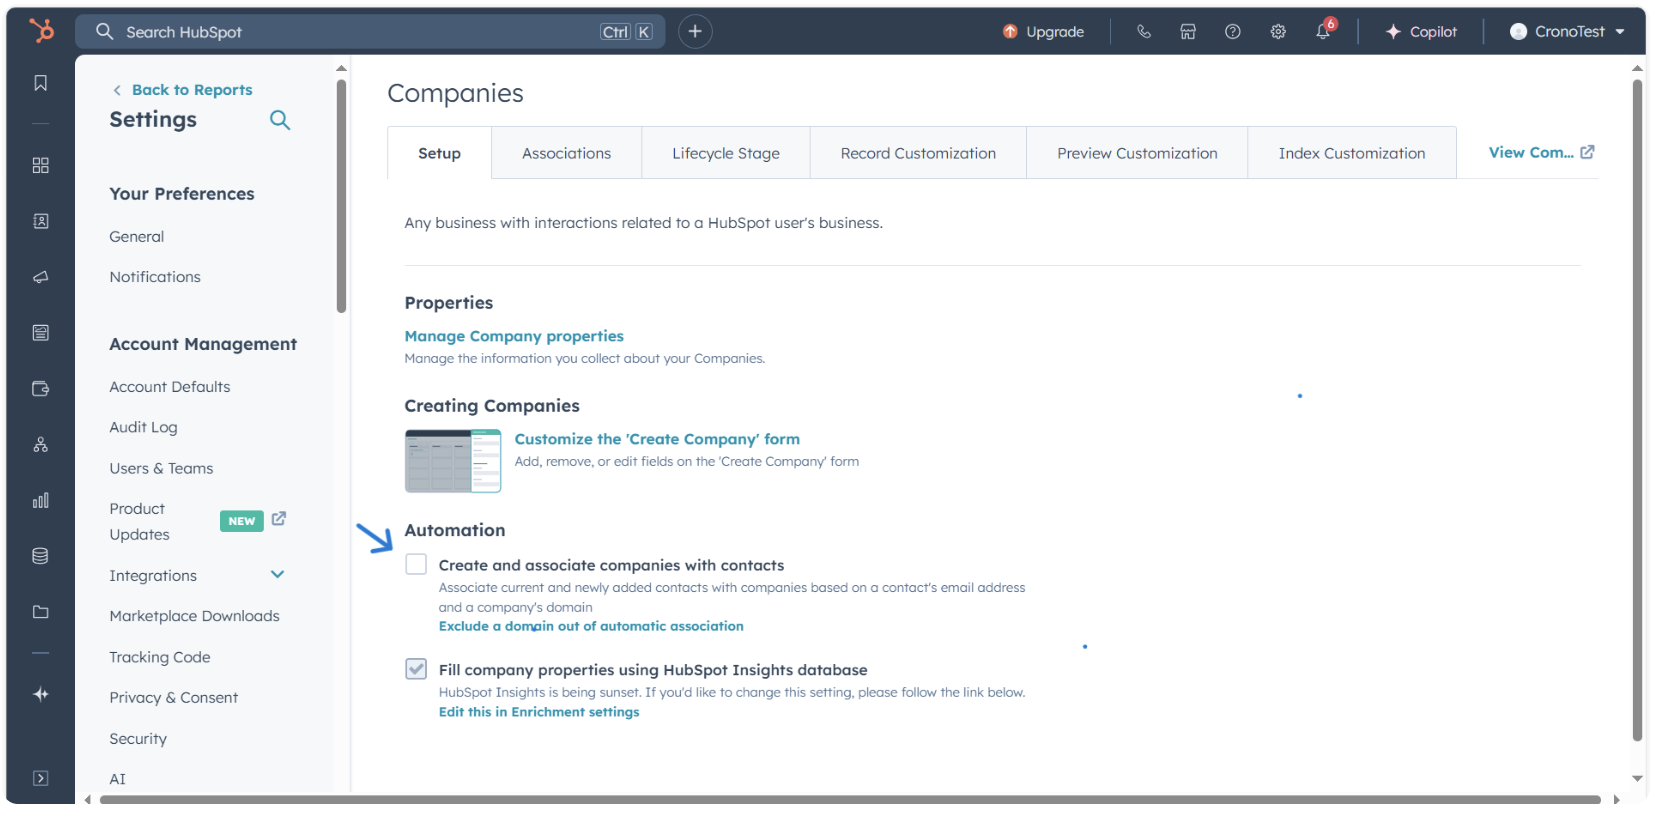
Crono will automatically create the association when a contact is created with their corresponding company.
If you notice that LinkedIn profile URLs containing special characters (such as ñ, é, or other non-ASCII letters) are not being accepted or synced correctly between Crono and HubSpot, this may be caused by the field type configuration of your LinkedIn properties inside HubSpot.
This fix is only necessary if your company created custom fields for LinkedIn inside HubSpot.
HubSpot does not include a default “LinkedIn Profile” field for contacts, so if you see one, it means it was custom-created.
On the other hand, the Company LinkedIn URL field is a default HubSpot property, and it normally supports URLs without issues.
Go to Settings → Data Management → Properties in HubSpot.
Use the search bar to find the custom property named LinkedIn Profile.
Open the property, then in the left sidebar under Manage, click Field type.
Change the field type to Single-line text and save your changes.
Repeat the same steps for the Company LinkedIn URL property if needed.
By default, HubSpot URL fields apply strict URL validation and may reject characters outside the base ASCII set.
Switching the field type to Single-line text removes this limitation and ensures full compatibility with Crono, allowing LinkedIn URLs with accented or special characters to sync correctly.
