This guide explains how to configure Okta Single Sign-On (SSO) for your organization to access Crono.
At the end of the process, you will provide the generated configuration values to the Crono team.
Log in to your Okta Admin Console.
Navigate to:
Applications
→ Applications
→ Create App Integration
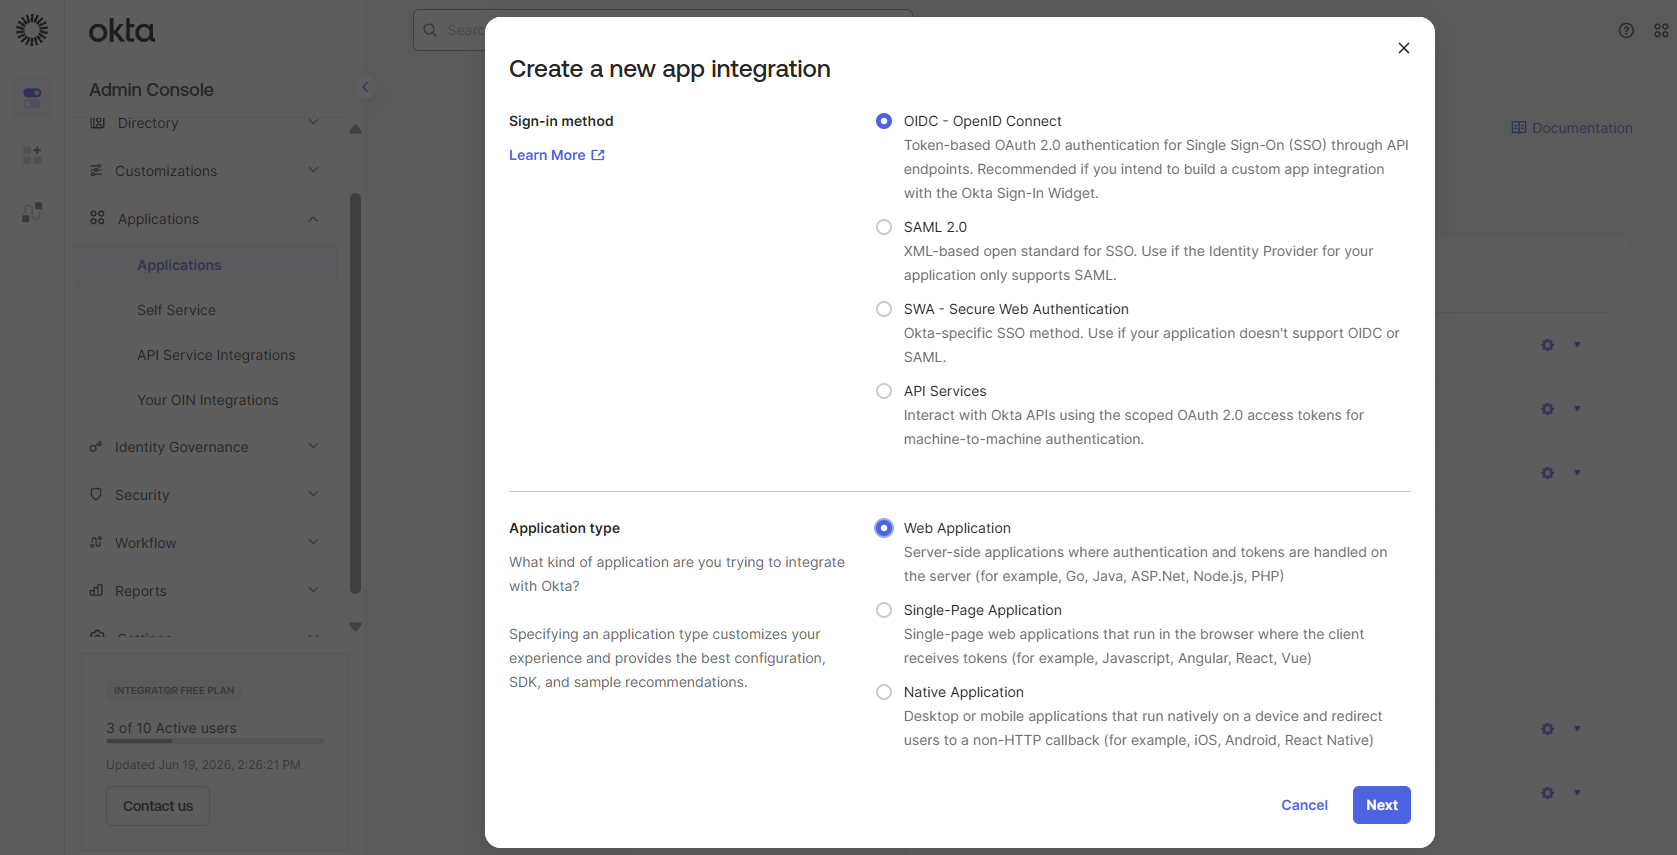
Select:
Sign-in method: OIDC - OpenID Connect
Application type: Web Application
Click Next
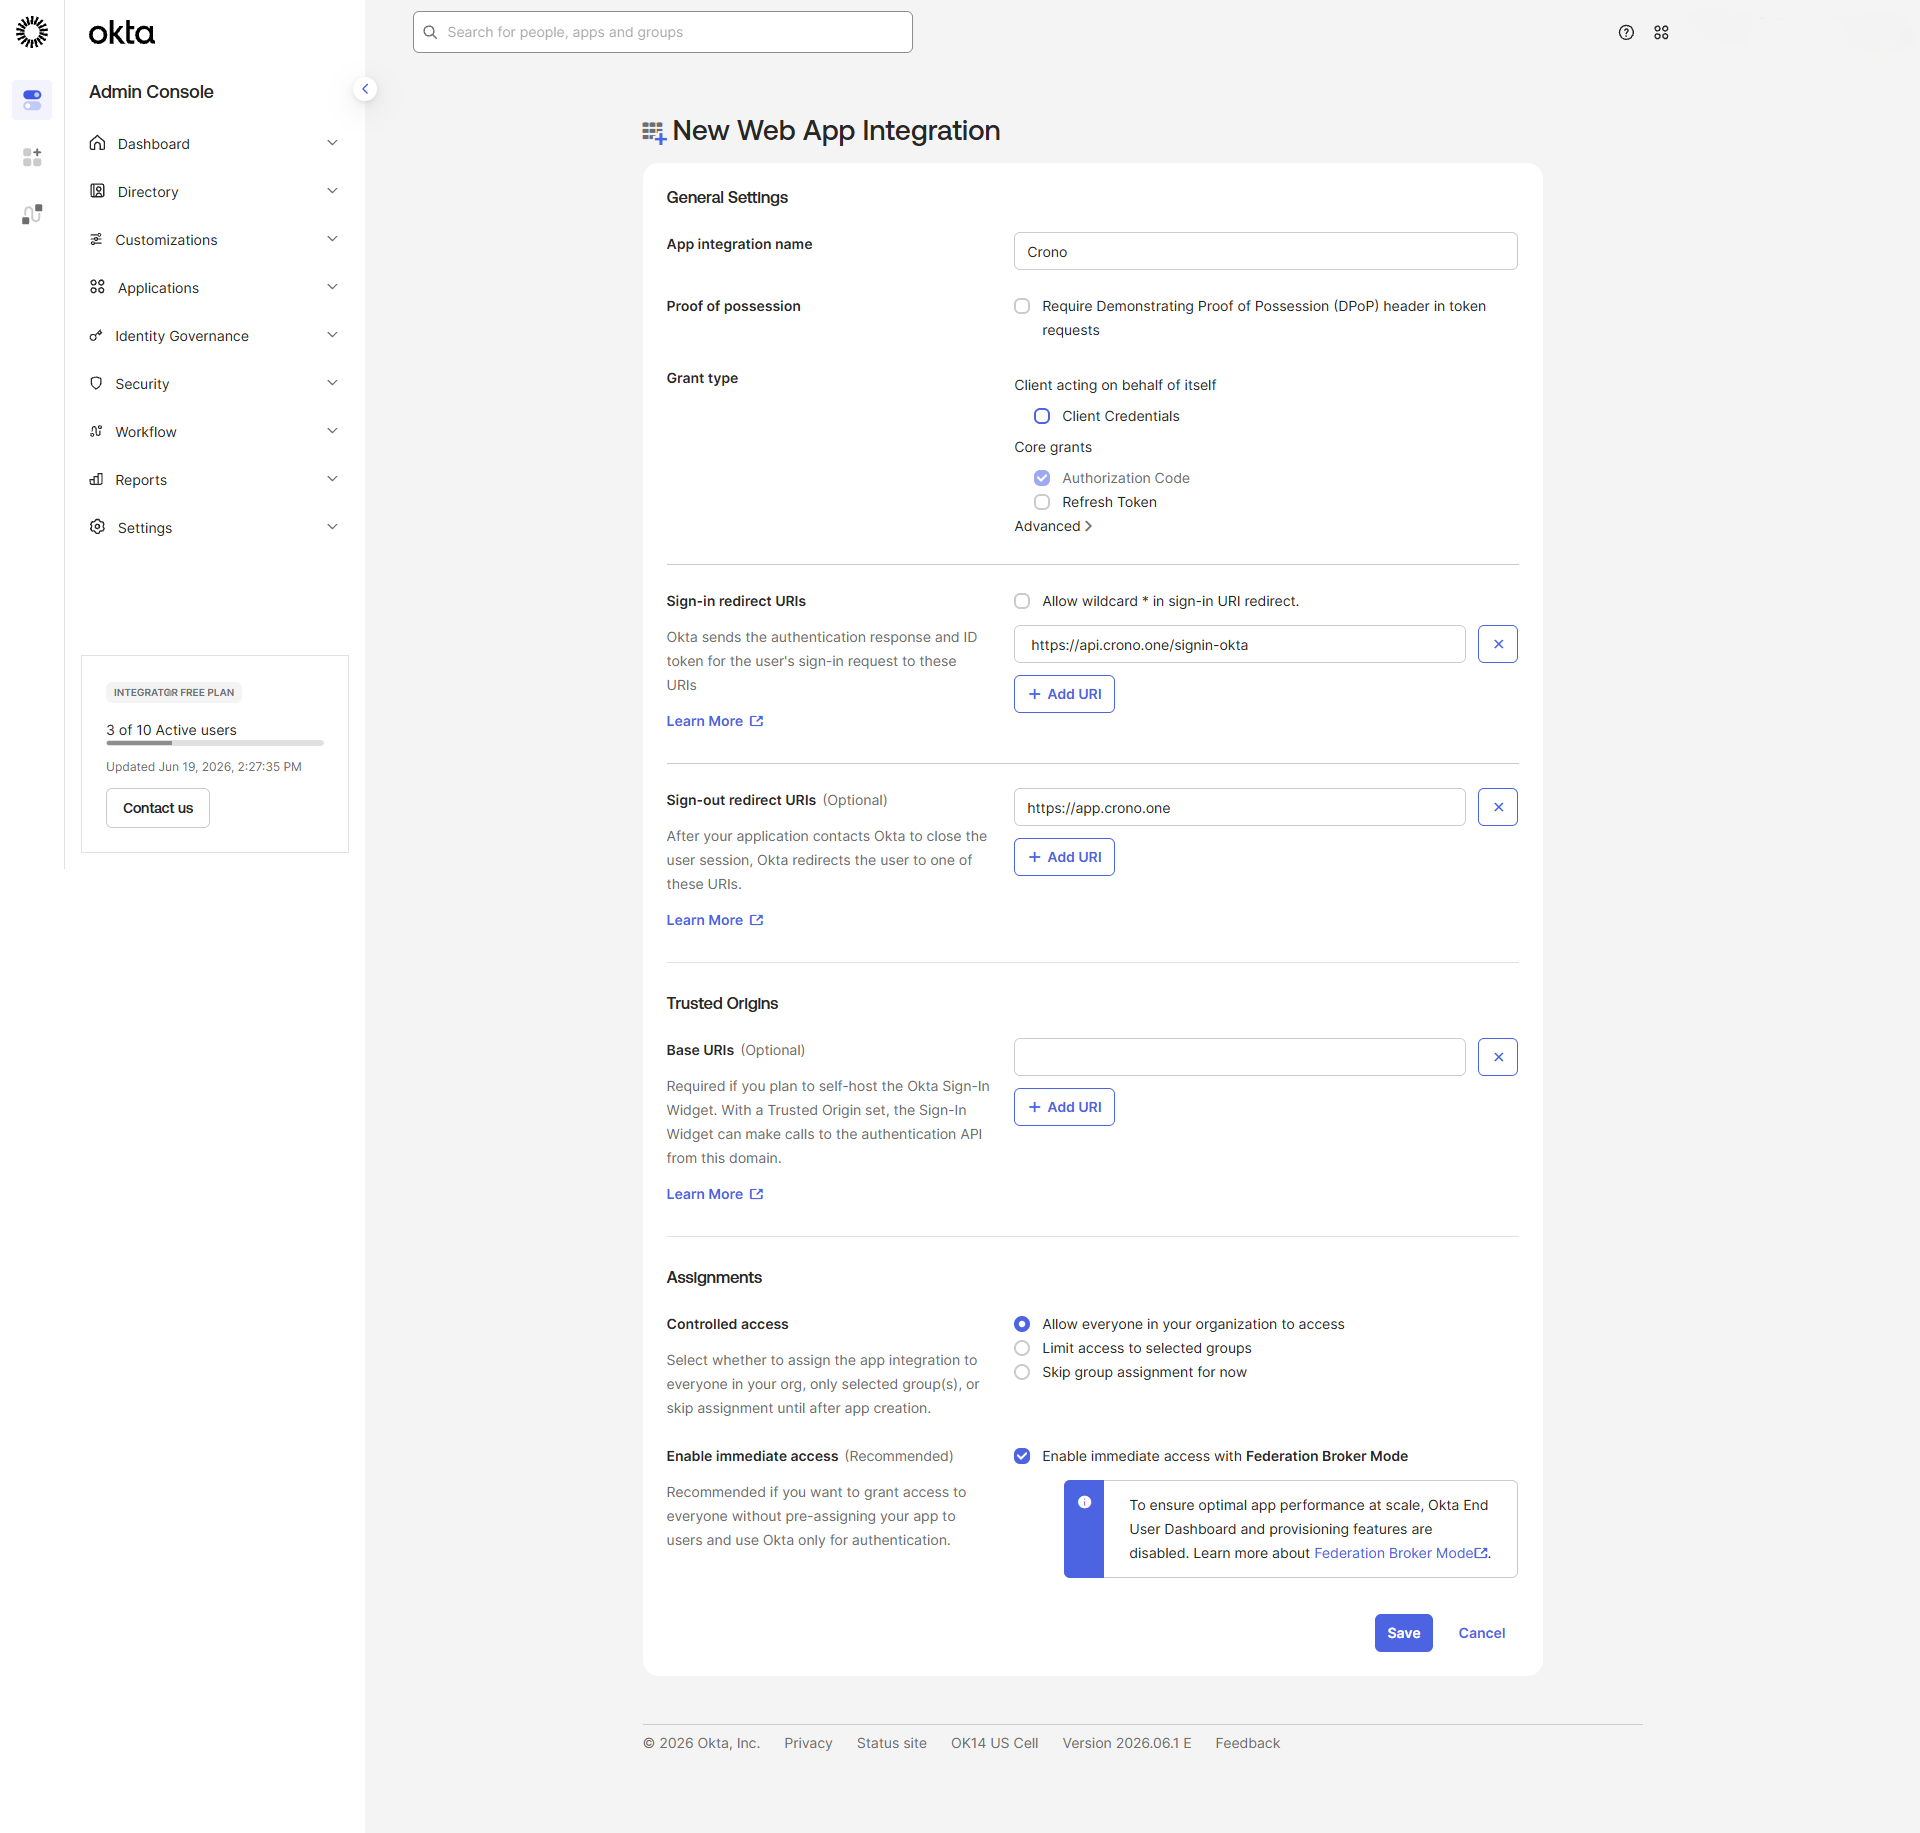
Enter:
Crono
or any name your organization prefers.
Add the following URL:
https://api.crono.one/signin-okta
This value must be entered exactly as shown.
You may enter:
https://app.crono.one
You may initially allow access to everyone, or restrict access to selected groups and users according to your organization's policies.

Open the application you just created.
Navigate to:
Applications
→ Applications
→ Crono
→ General
Locate the Client Credentials section.
Copy the following values:
Example:
0oa123abc456XYZ789
Generate or reveal the Client Secret and copy its value.
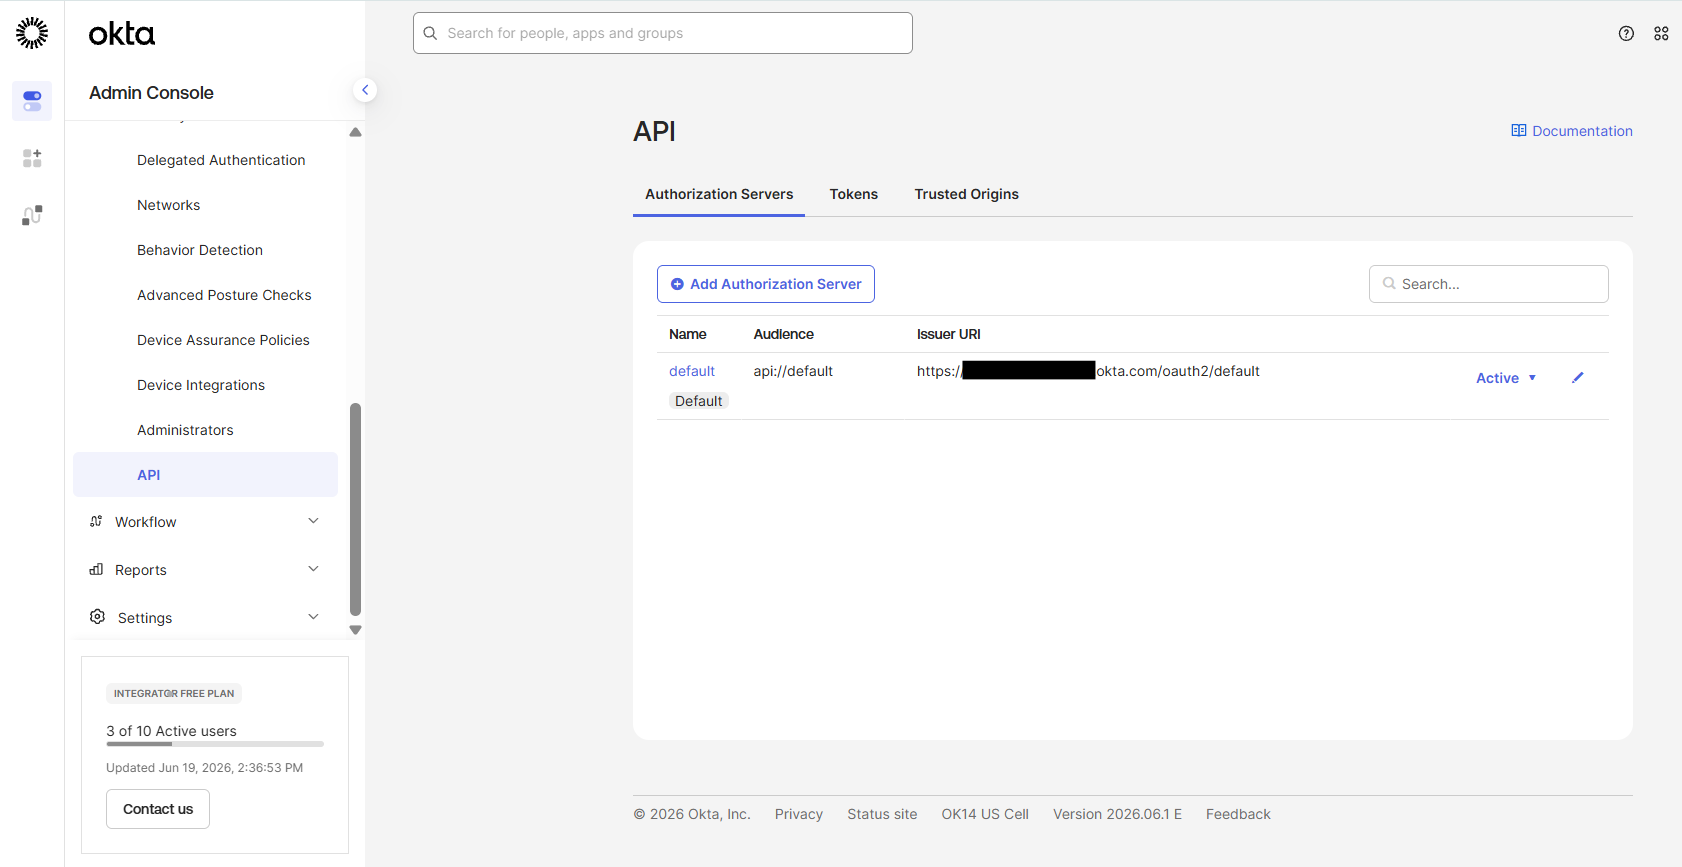
Navigate to:
Security
→ API
→ Authorization Servers
Open the authorization server you intend to use.
In most Okta tenants this is:
default
Copy the Issuer URI value.
Example:
https://your-company.okta.com/oauth2/default
This value will be used as the Authority.
Use:
https://your-company.okta.com/oauth2/default
Do NOT use:
https://your-company.okta.com
The /oauth2/default portion is required.
Creating the application does not automatically grant access.
Users must be assigned to the application.
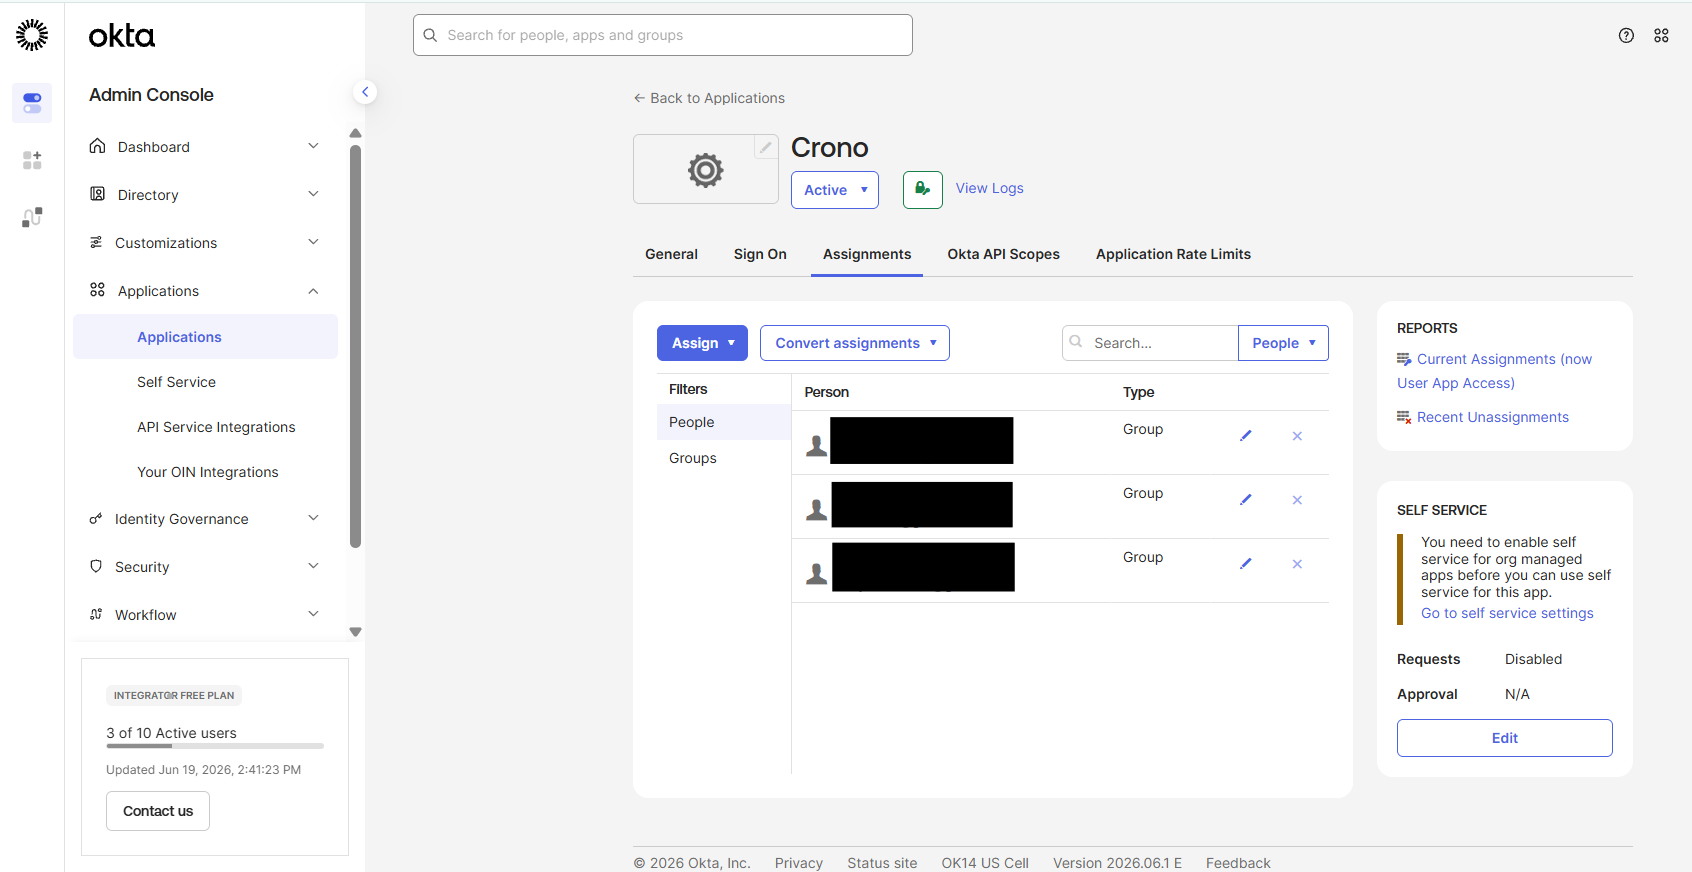
Navigate to:
Applications
→ Applications
→ Crono
→ Assignments
Assign:
Individual users, or
Groups that should be allowed to access Crono
Once the configuration is complete, send the following information to the Crono team:
Configuration | Example |
Authority |
|
Client ID |
|
Client Secret |
|
The Crono team will complete the final activation of SSO for your organization.
Verify that the following URI exists in the application's Sign-in Redirect URIs:
https://api.crono.one/signin-okta
The value must match exactly.
Assign the user or the user's group to the Crono application through the Assignments section.
Verify that:
The user has been assigned to the Crono application in Okta.
The user has an active Crono account.
The Authority, Client ID, and Client Secret provided to Crono are correct.
Crono does not automatically create users during the SSO login process.
Users who authenticate through Okta must already exist in Crono, and the email address used in Okta must match the email address registered in Crono.
For example:
Okta Email | Crono Email | Result |
Login succeeds | ||
Login denied | ||
User does not exist in Crono | Login denied |
Before enabling SSO for your users, ensure that all users who need access to Crono:
Have an active Crono account.
Use the same email address in both Okta and Crono.
In most organizations, users authenticate to Okta using their corporate email address (for example, [email protected]). The same email address should also be registered for the user in Crono.
